prep x assembly 03 b proximity sensor right fan
play

#prep X Assembly 03-B: Proximity Sensor + Right Fan You got the Dual - PDF document

#prep X Assembly 03-B: Proximity Sensor + Right Fan You got the Dual Fan Upgrade? This is what the proximity sensor for Good. Stay here. This is the right guide. Single Fan edition looks like. For that, see the regular Proximity sensor Guide.


  1. #prep X Assembly 03-B: Proximity Sensor + Right Fan You got the Dual Fan Upgrade? This is what the proximity sensor for Good. Stay here. This is the right guide. Single Fan edition looks like. For that, see the regular Proximity sensor Guide. _________________________________________________________________ JellyBox Build: 07_X-Assembly Part 2 - Right Fan In this guide, we attach the right fans and the proximity sensor to the X carriage.
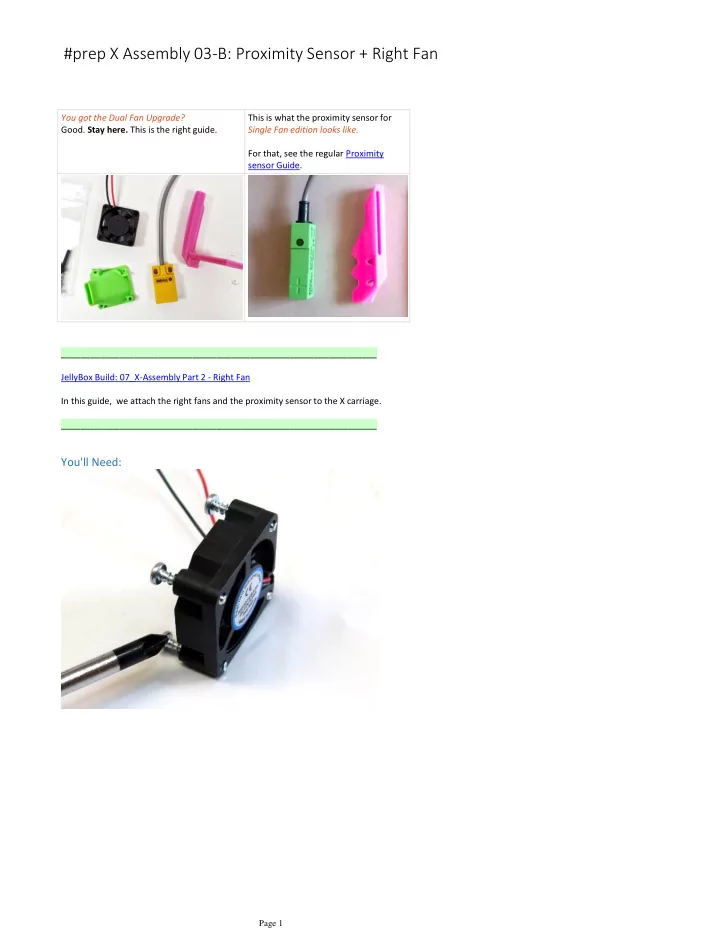
 _________________________________________________________________ You'll Need: Page 1

  2. 30mm fan with a short wire (1) Right fan shroud (1) Larger fan mount (1) Plastite screws (5) Proximity Sensor (1) M3x16 bolts (2) M3 regular washers (2) M3 nylon locknuts (2) Title: Attach the Mount to the Shroud Attach the large mount onto the side of the shroud with one plastite screw. Page 2

  3. Attach the fan onto the shroud As before, tighten the plastite screws in a cross pattern. The fan wire should be exiting at the top right when you're looking directly at the shroud; running parallel to the mount. (Consult video if needed) Title: Attach the Proximity Sensor Page 3

  4. Attach the sensor to the bottom of the mount with two M3x16 screws. Tighten with two M3 regular washers and M3 nylon locknuts. The bolt heads should be on the sensor side. Title: Attach the Right Fan You'll Need: X Assembly (1) Right Fan Assembly (1) M3x16 bolt (1) M3 regular washer (1) M3 regular bolt (1) Page 4

  5. Title: Attach the Right Fan onto the Carriage We repeat the procedure we used for the left fan, but with a longer bolt. Place a washer onto the M3x16 bolt and insert it into the slot on the fan mount. Place a regular M3 nut into the slot on the right side of the carriage. Insert the bolt and tighten with an M3 hex key. Title: For Attaching the Wire Spacers You'll Need: Short Spacer (1) Long Spacer (1) Page 5

  6. Long Spacer (1) M3x45 bolt (1) M3x60 bolt (1) M3 regular washer (4) M3 nylon lock nut (2) Title: Attaching the Long Spacer to the X Assembly Put an M3 washer onto the M3x60 bolt. Insert the M3x60 into the hole at the top left of the X assembly acrylic. Slide the long spacer onto the bolt with the grooved end pointing away from the assembly. Place another washer and an M3 nylon lock nut onto the bolt. Tighten it up with a wrench and an M3 hex key. The image may look confusing because you can see through the acrylic. Consult the video walkthrough if necessary. Page 6

  7. Title: Attaching the Short Spacer to the X Carriage As before with the longer spacer, place an M3 washer onto the M3x45 bolt. Insert the bolt through the hole on top of the X carriage. Add the short spacer, grooved end pointing away. Add the M3 washer and M3 nylon lock nut, and tighten with a wrench and M3 hex key. Page 7

Download Presentation
Download Policy: The content available on the website is offered to you 'AS IS' for your personal information and use only. It cannot be commercialized, licensed, or distributed on other websites without prior consent from the author. To download a presentation, simply click this link. If you encounter any difficulties during the download process, it's possible that the publisher has removed the file from their server.

Recommend


More recommend