ORIENTATION AND MOBILITY traveling in the world of the person with - - PowerPoint PPT Presentation

orientation and mobility
SMART_READER_LITE
LIVE PREVIEW

ORIENTATION AND MOBILITY traveling in the world of the person with - - PowerPoint PPT Presentation

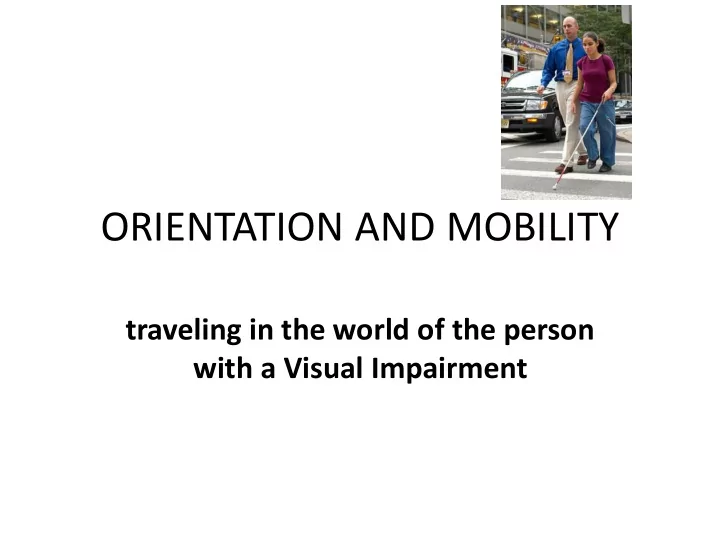
ORIENTATION AND MOBILITY traveling in the world of the person with a Visual Impairment Objectives By the end of this seminar the participant will be able to: Identify the role an orientation and mobility specialist plays in vision


slide-1
SLIDE 1

ORIENTATION AND MOBILITY

traveling in the world of the person with a Visual Impairment

slide-2
SLIDE 2

Objectives

By the end of this seminar the participant will be able to:

  • Identify the role an orientation and mobility

specialist plays in vision rehabilitation

  • Describe the importance of direct teaching

with individuals with a visual impairment

  • Describe at least two guidance strategies
  • Relate the concept of the five points of travel
slide-3
SLIDE 3

Orientation and Mobility (O&M)

Orientation and Mobility Specialist

  • Orientation- Where am I?
  • Mobility- How do I travel to my destination?
  • O&M specialists address:

– Skills for independent travel and community access for people with vision loss – Negotiating environment and maintaining

  • rientation

– Offer support to family and staff

3

slide-4
SLIDE 4

How can someone with a visual impairment travel safely?

  • Wheelchair
  • White cane
  • Sighted/human guide
  • Walker
slide-5
SLIDE 5

The vision team

  • Optometrists
  • Ophthalmologists
  • Low vision specialists
  • Teachers of the visually impaired (TVI)
  • Orientation and Mobility Specialists
  • Occupational Therapists
  • Vision Rehabilitation Therapists/Teachers
  • Rehabilitation counselors
slide-6
SLIDE 6

Direct instruction versus incidental learning

  • Incidental:

(3) distance senses learning about the environment through scanning and comparing

  • Direct:

(2) distance senses Learning about the environment through auditory scanning, movement, smell, and capitalizing on any remaining vision PLUS direct instruction

slide-7
SLIDE 7

COGNITIVE MAP

Through incidental learning heavily supported by direct instruction, individuals build a cognitive map of the environment Individuals with visual impairment need to be taught earlier in some skills because repetition and overlearning is key to map building

slide-8
SLIDE 8

Guidance

  • Trailing and voice guide
  • Human guide
  • White (long) cane
  • Dog guide
  • Electronic travel aids (ETA)

– Sunu band (wrist band/blue tooth) – Laser cane (emits laser beams for obstacles) – Sonicguide spectacles (ultrasounds in the environment) – use with long cane/dog

slide-9
SLIDE 9

HUMAN GUIDE

HOW TO GUIDE A PERSON WITH A VISUAL IMPAIRMENT

slide-10
SLIDE 10

Etiquette

  • Announce name
  • Speak directly to the

individual at a normal volume

  • Ask if assistance is

needed

  • Do not push or pull
  • Give left/right

directions

  • Describe surroundings
  • Verbally indicate

surface changes

  • Inform when

destination is reached, describe the route

  • Do not leave the

individual in open space

10

slide-11
SLIDE 11

Basic Human Guide

  • Offer arm by tapping back of hand

against client’s hand.

  • Individual grasps arm just above

elbow

  • Firm grip
  • Stay 1/2 step ahead of client
  • Individual’s arm at 90 degrees
  • Relaxed and comfortable pace

11

slide-12
SLIDE 12

Supported Basic Sighted Guide

  • If someone needs

extra support, appears off balance,

  • r uncomfortable,

bend your supporting arm to 90 degrees so the individual can apply weight to your arm.

12

slide-13
SLIDE 13

Changing Sides

  • Individual places the back of free hand just

above grip on the guide's arm

  • Individual moves the original grip hand

across guide's back to guide's other arm

  • Individual sidesteps into new position on

guide's other side, resuming grip with the appropriate hand.

13

slide-14
SLIDE 14

Doorways

  • Give narrow

passageways signal

  • Indicate if door is push or

pull and if it opens to left

  • r right
  • Individual puts arm up to

hold door

  • Walk through door and

return to basic hold

14

slide-15
SLIDE 15

Seating

  • Place individual’s

hand on back of seat

  • OR guide individual to

chair so shins lightly touch front of seat

  • Inform if individual is

in front/back of seat

  • Allow individual to sit

15

slide-16
SLIDE 16

Stairs

  • Approach edge of

steps

  • Pause at edge of the

first step.

  • Individual brings toes to

edge of step

  • Take the first step
  • Individual follows guide's

pace, one step behind.

  • Pause after completing

the stairs, announce stairs are complete

16

slide-17
SLIDE 17

video of human guide

  • https://www.youtube.com/watch?v=tl62s2Ml

KEw&list=PLpAOW00xNyybYZ7EmTk3nSvSNoP GK3r7E&index=1

slide-18
SLIDE 18

White (Long) Cane

A few notes about the white cane:

A white cane is used in a sweeping arc to anticipate ground obstacles or drops ahead. It does not identify objects at head height. That is where upper body protective techniques or even electronic travel aids can help. Various types of canes (folding or rigid, NFB canes) and types of cane tips are used depending on the individual’s needs. An individual may choose to use the cane or not when using human guide. A white cane is NOT to be used as a support cane. Support canes can be marked with the white and red universally known markings for identification purposes but support canes are not suitable to be functionally used as a white cane.

slide-19
SLIDE 19

The 5 Point Travel System

For Orientation and Mobility Specialists teaching the 5 point travel system is a systematic approach that enables the individual with a visual impairment to make use of additional information when traveling in order to maintain orientation 1. The shape of the route (according to the braille cell: I shaped, L shaped, U route, Z route) 2. Compass (cardinal) direction 3. Names of streets/hallways 4. Landmarks 5. All of the above in reverse order

slide-20
SLIDE 20

Other Orientation and Mobility Skills

  • Body alignment – body planes
  • Self protection techniques
  • Echolocation
  • Cane techniques
  • All of the above are incorporated into practical

application such as

– Street crossings/intersections – Walking through open space – Using public transportation – Familiarization strategies in new environments – Self advocacy

slide-21
SLIDE 21

References/sources

  • https://www.cnib.ca/en/sight-loss-info/when-

someone-you-know-blind?region=gta

slide-22
SLIDE 22

references/sources

  • Jacobson, W.H.: 1993 The Art and Science of Teaching Orientation and Mobility to Persons

with Visual Impairments, AFB Press

  • Weiner, W., Welsh, R., Blasch, B: 2010 Foundations of Orientation and Mobility Instructional

Strategies and Practical Applications, third ed. AFB Press

  • Great source of video information for training and other sources: Canadian National Institute

for the Blind: https://www.cnib.ca/en/sight-loss-info/when-someone-you-know- blind?region=gta

  • National Federation of the Blind: https://www.nfb.org
  • American Foundation for the Blind: https://www.afb.org
  • Pediatric information from the Perkins School for the Blind: https://www.perkins.org/school
  • Massachusetts Association for the Blind: https://www.mabcommunity.org