
SLIDE 1
NOTES
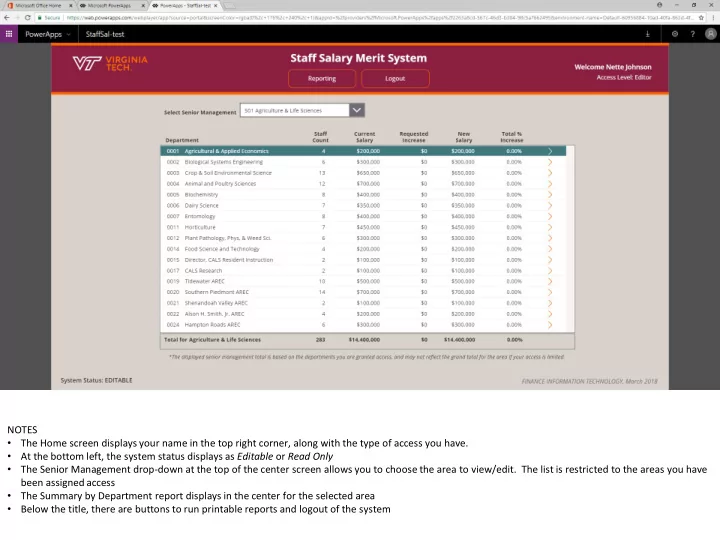
- The Home screen displays your name in the top right corner, along with the type of access you have.
- At the bottom left, the system status displays as Editable or Read Only
- The Senior Management drop-down at the top of the center screen allows you to choose the area to view/edit. The list is restricted to the areas you have
been assigned access
- The Summary by Department report displays in the center for the selected area
- Below the title, there are buttons to run printable reports and logout of the system