Links: Slide 2 - Slide 2 Users Guide - - PowerPoint PPT Presentation

links
SMART_READER_LITE
LIVE PREVIEW

Links: Slide 2 - Slide 2 Users Guide - - PowerPoint PPT Presentation

backend-script-w-slides Friday, February 02, 2007 backend-script-w-slides Friday, February 02, 2007 Links: Slide 2 - Slide 2 Users Guide http://na.know.hp.com/teams/CIC/Training/ROSA/backend-script-w-slides.pdf Distribution Website


slide-1
SLIDE 1

backend-script-w-slides Friday, February 02, 2007 Page 1 of 98

Links:

  • User’s Guide

http://na.know.hp.com/teams/CIC/Training/ROSA/backend-script-w-slides.pdf

  • Distribution Website - http://wps.corp.hp.com/programs/distribution
  • Training – Loading the SAP GUI

http://wps.corp.hp.com/development/gdg/rosa/sap-install_skin.htm

  • Training – Creating a Shipment in ROSA

http://wps.corp.hp.com/development/gdg/rosa/rosa-creator_skin.swf

  • Transaction Codes

http://na2.know.hp.com/teams/office_services_team-Brigitte/WebFlagship/ROSA_tcodes.xls

  • SCAC Codes and Routes

http://na2.know.hp.com/teams/office_services_team-Brigitte/WebFlagship/ROSA-routes.xls

  • Tax IDs for Brazil

http://na2.know.hp.com/teams/office_services_team-Brigitte/WebFlagship/ROSA_BraziltaxID.xls

  • IncoTerms

http://na2.know.hp.com/teams/office_services_team-Brigitte/WebFlagship/ROSA-Incoterms.xls

Slide 1 - Copy of Opening Screen Slide notes

Welcome to the Distribution Services Training Series. You can use the buttons in the bottom left hand corner of the presentation to control your training

  • experience. Please be sure to turn your Popup blockers off.

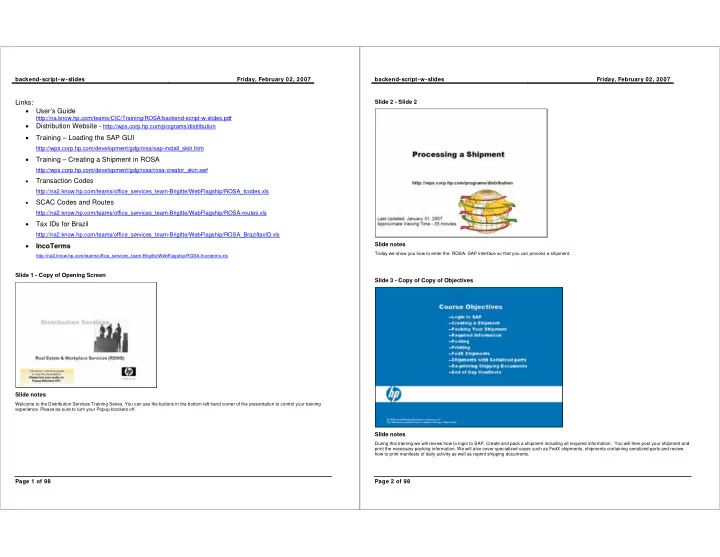
backend-script-w-slides Friday, February 02, 2007 Page 2 of 98 Slide 2 - Slide 2 Slide notes

Today we show you how to enter the ROSA- SAP interface so that you can process a shipment.

Slide 3 - Copy of Copy of Objectives Slide notes

During this training we will review how to login to SAP, Create and pack a shipment including all required information. You will then post your shipment and print the necessary packing information. We will also cover specialized cases such as FedX shipments, shipments containing serialized parts and review how to print manifests of daily activity as well as reprint shipping documents.

slide-2
SLIDE 2

backend-script-w-slides Friday, February 02, 2007 Page 3 of 98 Slide 4 - Slide 4 Slide notes

To get the most value from this training, you should have already installed the SAP GUI. You should also review how a shipment is created in ROSA by taking that self-paced training. If you have not completed these steps - you can access the training now and return to this course at a later time. Note that the installation of the Graphical user interface will take approximately one hour. If you have already installed the GUI, You may want to print out the users guide so you can take notes during this training. If you have you problems with links they are available on the users guide at the distribution site. When ready, then continue with this presentation in the bottom right hand corner http://e-learningstreaming.learn.hp.com/PF51/distribution/sap-install_skin.swf http://e-learningstreaming.learn.hp.com/PF10/distribution/rosa-creator_skin.swf http://na.know.hp.com/teams/CIC/Training/ROSA/backend-script-w-slides.pdf

backend-script-w-slides Friday, February 02, 2007 Page 4 of 98 Slide 5 - Slide 5 Slide notes

To enter ROSA-SAP interface. .double click on the SAP Logon Icon on your desktop

Slide 6 - Slide 6 Slide notes

The launchpad screen will show your server options. Non US users will select D7C, then logon. In the U.S., you should select server ROSA D7C.

slide-3
SLIDE 3

backend-script-w-slides Friday, February 02, 2007 Page 5 of 98 Slide 7 - Slide 7 Slide notes Slide 8 - Slide 8 Slide notes

you will be shown the logon screen. Enter your user name and password.

Slide 9 - Slide 9 Slide notes Slide 10 - Slide 10 Slide notes

Part of the process for installing your GUI interface was to reset your password, so enter that now

backend-script-w-slides Friday, February 02, 2007 Page 6 of 98 Slide 11 - Slide 11 Slide notes

and hit enter. Note you will be required to change your password every 90 days.

slide-4
SLIDE 4

backend-script-w-slides Friday, February 02, 2007 Page 7 of 98 Slide 12 - Slide 12 Slide notes

You are now taken to the SAP graphical user interface. Normally you will use one of 3 methods to initiate a shipment. Your user links accessed by this icon will show you all the transactions you have been configured to make. You can type in a transaction code here or you can set up your most frequently used features in your favorites. The SAP menu

backend-script-w-slides Friday, February 02, 2007 Page 8 of 98 Slide 13 - Slide 13 Slide notes

is not recommended as it displays features and databases you do not have access to. So let's go back to the users menu

Slide 14 - Slide 14 Slide notes

you could double click on create an Outbound delivery with an Order Reference

slide-5
SLIDE 5

backend-script-w-slides Friday, February 02, 2007 Page 9 of 98 Slide 15 - Slide 15 Slide notes

  • r we could enter a transaction code

Slide 16 - Slide 16 Slide notes

which for creating an outbound shipment is forward slash nVL01N

backend-script-w-slides Friday, February 02, 2007 Page 10 of 98 Slide 17 - Slide 17 Slide notes

and for frequently accessed transaction codes you can save these to your favorites by clicking on favorites

Slide 18 - Slide 18 Slide notes

Then Add

slide-6
SLIDE 6

backend-script-w-slides Friday, February 02, 2007 Page 11 of 98 Slide 19 - Slide 19 Slide notes Slide 20 - Slide 20 Slide notes

You can now see this option under Favorites

Slide 21 - Slide 21 Slide notes

You can also right click on favorites

Slide 22 - Slide 22 Slide notes

and select insert transaction

backend-script-w-slides Friday, February 02, 2007 Page 12 of 98 Slide 23 - Slide 23 Slide notes

and type in the transaction code in the box provided

Slide 24 - Slide 24 Slide notes

then click the green check mark to continue.

slide-7
SLIDE 7

backend-script-w-slides Friday, February 02, 2007 Page 13 of 98 Slide 25 - Slide 25 Slide notes

You'll see that we now added Change an Outbound Delivery to our favorites. The list of most frequently used transaction codes is provided here. You can print these out at the link provided for future reference. then continue with the presentation in the bottom right hand corner. http://na2.know.hp.com/teams/office_services_team-Brigitte/WebFlagship/ROSA_tcodes.xls

Slide 26 - Slide 26 Slide notes

So let's create an outbound delivery

backend-script-w-slides Friday, February 02, 2007 Page 14 of 98 Slide 27 - Slide 27 Slide notes

When you look at the shipping request form - you will need to get the order number and the ship from location .. which of course should be your location for

  • processing. Enter that information into the fields . first we'll enter the shipping point.

Slide 28 - Slide 28 Slide notes

Note - if you do not know your shipping point code, you can click on the icon to get a full listing.

slide-8
SLIDE 8

backend-script-w-slides Friday, February 02, 2007 Page 15 of 98 Slide 29 - Slide 29 Slide notes

the code entered must match the shipping request form so that's the easiest place to find it

Slide 30 - Slide 30 Slide notes

and now the order number

backend-script-w-slides Friday, February 02, 2007 Page 16 of 98 Slide 31 - Slide 31 Slide notes

and hit enter

Slide 32 - Slide 32 Slide notes

  • r you can click on the Enter Icon in the top left corner
slide-9
SLIDE 9

backend-script-w-slides Friday, February 02, 2007 Page 17 of 98 Slide 33 - Slide 33 Slide notes

This takes you to the overview screen where you can see the items listed for this shipment

Slide 34 - Slide 34 Slide notes

Click on the PACK icon to prepare your shipment

backend-script-w-slides Friday, February 02, 2007 Page 18 of 98 Slide 35 - Slide 35 Slide notes

Available packing materials can be accessed using the drop down or you can click in the packing material section and backspace and it will show all previously used packing materials, then hit enter or the continue icon in the top left hand corner.

Slide 36 - Slide 36 Slide notes

The handling unit Id will be assigned, click on the box to the left of the handling unit to highlight the box you are going to pack.

slide-10
SLIDE 10

backend-script-w-slides Friday, February 02, 2007 Page 19 of 98 Slide 37 - Slide 37 Slide notes

then select all the items that will be going into the carton

Slide 38 - Slide 38 Slide notes Slide 39 - Slide 39 Slide notes

And using the pack icon on the far left - indicate that they are in the box. If not all items will fit in box, you can edit quantity by clicking on it before you pack and the identified quantity will move into the carton, leaving the remainder to be packed in another box. For now, use the single pack icon – the other pack features will be enabled at a future time and you will be informed when that occurs (show arrow for other options).

backend-script-w-slides Friday, February 02, 2007 Page 20 of 98 Slide 40 - Slide 40 Slide notes

You can see all our material disappears from the lower area and you get a confirmation that it has now been packed. you now need to enter the total weight

  • f the box with its contents. If you select your handling unit (left side) . .you have tools on the right side and you can undo your action(s). such as unpack,

delete (trashcan) . .note you can’t delete a box before you unpack. For instance, if a shipping order is cancelled or there is a problem with the shipping order

  • you must notify the creator, unpack the box using the icon unpack icon on the right side, then delete the delivery using the trashcan icon.

Slide 41 - Slide 41 Slide notes

Now let's enter our weight

slide-11
SLIDE 11

backend-script-w-slides Friday, February 02, 2007 Page 21 of 98 Slide 42 - Slide 42 Slide notes

Note that the default unit of measure in SAP is kilograms. Although it is recommended that you just change your scale to metric - Let's go through what you would need to do to change your unit of measure or to make the unit of measure more easily visible.

backend-script-w-slides Friday, February 02, 2007 Page 22 of 98 Slide 43 - Slide 43 Slide notes

On the packing screen, scroll to the right until you find the Weight unit column. You will probably only see the letter W above the column and it will have a vaule of KG for kilogram. Click on the column header and drag it left next to the total weight column.

slide-12
SLIDE 12

backend-script-w-slides Friday, February 02, 2007 Page 23 of 98 Slide 44 - Slide 44 Slide notes

Again, Scroll to the right and find the next weight column. Once again, click on the column header and drag it next to the other weight column.

backend-script-w-slides Friday, February 02, 2007 Page 24 of 98 Slide 45 - Slide 45 Slide notes

Click on the little configuration icon at the top right corner. In the Variant field type ROSA and make sure the "Use as standard setting" is checked, then click create. Now click Save. Once you have done this you will now see your weight column visible. If you are not using a metric scale - you will have to change the units to lbs with each shipment by entering LB in both weigh columns. Once you enter your weight, hit enter and the loading weight should autocalculate.

Slide 46 - Slide 46 Slide notes

If the contents were serialized you would then go to the Total Contents tab.

slide-13
SLIDE 13

backend-script-w-slides Friday, February 02, 2007 Page 25 of 98 Slide 47 - Slide 47 Slide notes

where you would verify that the serial numbers listed by the user - match what you have packed. We will show examples of this later in this course. Let's continue with our non-serialized shipment by going back to our main screen.

backend-script-w-slides Friday, February 02, 2007 Page 26 of 98 Slide 48 - Slide 48 Slide notes

And click on the header icon which looks like a hat.

slide-14
SLIDE 14

backend-script-w-slides Friday, February 02, 2007 Page 27 of 98 Slide 49 - Slide 49 Slide notes

from here we want to scroll over to the partners tab

backend-script-w-slides Friday, February 02, 2007 Page 28 of 98 Slide 50 - Slide 50 Slide notes Slide 51 - Slide 51 Slide notes

slide-15
SLIDE 15

backend-script-w-slides Friday, February 02, 2007 Page 29 of 98 Slide 52 - Slide 52 Slide notes

In the partners tab, we will assign a carrier to this shipment. Click on the first blank line. The Sold to, HP Internal and Ship to information was imported from the shipping request and should not be modified.

Slide 53 - Slide 53 Slide notes

Click on the drop down icon

backend-script-w-slides Friday, February 02, 2007 Page 30 of 98 Slide 54 - Slide 54 Slide notes

select Forwarding Agent which is the SAP terminology for Carrier.

Slide 55 - Slide 55 Slide notes

then click in the partner box

Slide 56 - Slide 56 Slide notes

You can type the SCAC code directly or use the drop down under partner and search for your carrier. We will demonstrate the search feature later in the course.

slide-16
SLIDE 16

backend-script-w-slides Friday, February 02, 2007 Page 31 of 98 Slide 57 - Slide 57 Slide notes

and the partner or carrier id will be populated . .now lets continue by going to the shipment tab.

Slide 58 - Slide 58 Slide notes

You now need to enter a route appropriate to this carrier

backend-script-w-slides Friday, February 02, 2007 Page 32 of 98 Slide 59 - Slide 59 Slide notes

Each route or MODE as it was known in Flagship is associated with a specific carrier. The route tells the carrier what service we expect - but must be appropriate for the SCAC code. Unless you are sure of matching routes/mode – you must check the spreadsheet to ensure that this will be a match – the drop down provides all routes – NOT just those associated with the carrier or partner you entered. Take a minute to print out the routes/modes associated with carriers you frequently use and click continue when ready. It's recommended that you create a version of this list that just contains the carriers and routes commonly used at your location. http://na2.know.hp.com/teams/office_services_team-Brigitte/WebFlagship/ROSA-routes.xls

slide-17
SLIDE 17

backend-script-w-slides Friday, February 02, 2007 Page 33 of 98 Slide 60 - Slide 60 Slide notes

Note that Incoterms defaults to DDU or Delivery Duty Unpaid and is required for international shipments. You should enter the shipment destination in the field where Delivery Duty Unpaid is currently. You can click on the link provided for additional INCOTERMS depending upon your ship to and ship from

  • location. When ready continue with the presentation. http://na2.know.hp.com/teams/office_services_team-Brigitte/WebFlagship/ROSA-Incoterms.xls

backend-script-w-slides Friday, February 02, 2007 Page 34 of 98 Slide 61 - Slide 61 Slide notes

Now enter your Bill of Lading. Note that if this was a FedX shipment in the US, population of the Bill of Lading is done during the sub process which we will cover later.

Slide 62 - Slide 62 Slide notes

You can now check to make sure you have completed all the processing steps.

slide-18
SLIDE 18

backend-script-w-slides Friday, February 02, 2007 Page 35 of 98 Slide 63 - Slide 63 Slide notes

Congratulations you are good to go. If there were any problems, they would be listed by item and area .

backend-script-w-slides Friday, February 02, 2007 Page 36 of 98 Slide 64 - Slide 64 Slide notes

You can now click on Post Goods Issue to complete the process. Note that once you have PGI'd your shipment, you should not attempt to edit the

  • shipment. We will cover this in more detail after we process another shipment.
slide-19
SLIDE 19

backend-script-w-slides Friday, February 02, 2007 Page 37 of 98 Slide 65 - Slide 65 Slide notes

So let's do that now. Note that there is a request that we send this package by FedX overnight.

backend-script-w-slides Friday, February 02, 2007 Page 38 of 98 Slide 66 - Slide 66 Slide notes

We'll enter our shipping point

Slide 67 - Slide 67 Slide notes

and order number

Slide 68 - Slide 68 Slide notes

slide-20
SLIDE 20

backend-script-w-slides Friday, February 02, 2007 Page 39 of 98 Slide 69 - Slide 69 Slide notes

Now let's pack our shipment by clicking on the pack icon.

backend-script-w-slides Friday, February 02, 2007 Page 40 of 98 Slide 70 - Slide 70 Slide notes

Our packaging material will be a carton, so we'll enter that

Slide 71 - Slide 71 Slide notes

Our packaging material will be a carton, so we'll enter that

Slide 72 - Slide 72 Slide notes

and change the partial quantity to 1 and enter

Slide 73 - Slide 73 Slide notes

slide-21
SLIDE 21

backend-script-w-slides Friday, February 02, 2007 Page 41 of 98 Slide 74 - Slide 74 Slide notes

then pack our box

Slide 75 - Slide 75 Slide notes

let's add another carton

Slide 76 - Slide 76 Slide notes Slide 77 - Slide 77 Slide notes backend-script-w-slides Friday, February 02, 2007 Page 42 of 98 Slide 78 - Slide 78 Slide notes

and select the material for that carton

Slide 79 - Slide 79 Slideenotes Slide 80 - Slide 80 Slide notes

Don't forget - your handling unit must be selected before you can click on the pack icon

Slide 81 - Slide 81 Slide notes

slide-22
SLIDE 22

backend-script-w-slides Friday, February 02, 2007 Page 43 of 98 Slide 82 - Slide 82 Slide notes

Now both boxes are packed and we can add their weight

backend-script-w-slides Friday, February 02, 2007 Page 44 of 98 Slide 83 - Slide 83 Slide notes Slide 84 - Slide 84 Slide notes Slide 85 - Slide 85 Slide notes Slide 86 - Slide 86 Slide notes Slide 87 - Slide 87 Slide notes

and enter

slide-23
SLIDE 23

backend-script-w-slides Friday, February 02, 2007 Page 45 of 98 Slide 88 - Slide 88 Slide notes

this shipment contains serialized parts, so we'll enter those on the total content tab

Slide 89 - Slide 89 Slide notes

by selecting the serialized part

backend-script-w-slides Friday, February 02, 2007 Page 46 of 98 Slide 90 - Slide 90 Slide notes

and clicking on the serial number button

slide-24
SLIDE 24

backend-script-w-slides Friday, February 02, 2007 Page 47 of 98 Slide 91 - Slide 91 Slide notes

Verify that the serial numbers of the items you pack, match what was on the shipping request form and enter it here. If there is any discrepancy, you will have to go back to the creator and have them edit their request and resubmit.

backend-script-w-slides Friday, February 02, 2007 Page 48 of 98 Slide 92 - Slide 92 Slide notes

You can type in the serial number and enter

Slide 93 - Slide 93 Slide notes

slide-25
SLIDE 25

backend-script-w-slides Friday, February 02, 2007 Page 49 of 98 Slide 94 - Slide 94 Slide notes backend-script-w-slides Friday, February 02, 2007 Page 50 of 98 Slide 95 - Slide 95 Slide notes

Or if you have a lot of serialized parts in a carton, you may find it more convenient to list all available serial numbers by part number or by shipping request. Even though it is not a recommended option, Let's look at the search by part number first.

slide-26
SLIDE 26

backend-script-w-slides Friday, February 02, 2007 Page 51 of 98 Slide 96 - Slide 96 Slide notes

You can search for all containers that have the same part number or by a variety of other options

backend-script-w-slides Friday, February 02, 2007 Page 52 of 98 Slide 97 - Slide 97 Slide notes

and then select the correct serial numbers - but note that this list contains all the serial numbers input by the all creators at all location for this part number - it would be very easy to make a mistake and select the incorrect serial number since the order number is not displayed

slide-27
SLIDE 27

backend-script-w-slides Friday, February 02, 2007 Page 53 of 98 Slide 98 - Slide 98 Slide notes

It is recommended that you use this icon and search by order number

backend-script-w-slides Friday, February 02, 2007 Page 54 of 98 Slide 99 - Slide 99 Slide notes

You can enter the order number or a range of order numbers, then search

Slide 100 - Slide 100 Slide notes

which will show all the serial numbers the user input for this order. You can then select or deselect the serial numbers in this specific carton without having to type them in

Slide 101 - Slide 101 Slide notes

slide-28
SLIDE 28

backend-script-w-slides Friday, February 02, 2007 Page 55 of 98 Slide 102 - Slide 102 Slide notes

and click ok

Slide 103 - Slide 103 Slide notes

It is a good habit to periodically save your work.

Slide 104 - Slide 104 Slide notes

now let's go into our header details by clicking on the hat icon

backend-script-w-slides Friday, February 02, 2007 Page 56 of 98 Slide 105 - Slide 105 Slide notes

Scroll to the partners tab

Slide 106 - Slide 106 Slide notes Slide 107 - Slide 107 Slide notes

and add forwarding agent to our first blank line under partner function.

slide-29
SLIDE 29

backend-script-w-slides Friday, February 02, 2007 Page 57 of 98 Slide 108 - Slide 108 Slide notes

click in the partner box

Slide 109 - Slide 109 Slide notes

Let's use the drop down box to search for a carrier, if you know their id number you can directly type it in.

Slide 110 - Slide 110 Slide notes

Our creator requested Federal Express, so we'll use FED asterisk which acts as a search wild card.

backend-script-w-slides Friday, February 02, 2007 Page 58 of 98 Slide 111 - Slide 111 Slide notes

We'll narrow our partner search to only carriers by typing in 700asterisk in the vendor area and initiate the search.

Slide 112 - Slide 112 Slide notes

We can now double click on the appropriate carrier or highlight it and hit enter

slide-30
SLIDE 30

backend-script-w-slides Friday, February 02, 2007 Page 59 of 98 Slide 113 - Slide 113 Slide notes

Once the partner id populates, hit return

Slide 114 - Slide 114 Slide notes

which completes the forwarding agent information. Since we are using Federal Express, we need to go into that sub-process. Note the sub process for FedX is only used in the US. If you are not in the US and want to skip this portion of the training, do so at the link provided, Before we go into the FedX subprocess we must save our work. Please click on the Continue button to review the training for the FedX subprocess.

backend-script-w-slides Friday, February 02, 2007 Page 60 of 98 Slide 115 - Slide 115 Slide notes

we'll use a transaction code to enter the sub-process

slide-31
SLIDE 31

backend-script-w-slides Friday, February 02, 2007 Page 61 of 98 Slide 116 - Slide 116 Slide notes

which is nzfdxs - remember this sub-process is only used in the US

backend-script-w-slides Friday, February 02, 2007 Page 62 of 98 Slide 117 - Slide 117 Slide notes

enter the transaction code

Slide 118 - Slide 118 Slide notes

Select the service using the drop down options

slide-32
SLIDE 32

backend-script-w-slides Friday, February 02, 2007 Page 63 of 98 Slide 119 - Slide 119 Slide notes Slide 120 - Slide 120 Slide notes backend-script-w-slides Friday, February 02, 2007 Page 64 of 98 Slide 121 - Slide 121 Slide notes

If you aren't going to use a regular pickup, you can change that here

slide-33
SLIDE 33

backend-script-w-slides Friday, February 02, 2007 Page 65 of 98 Slide 122 - Slide 122 Slide notes

For international shipments, you will have to call FedX to obtain a Booking no to enter here. the international fedX subprocess will not work without a booking number. For international shipments, you may find it more convenient to use another carrier. Note - for shipments to brazil, you MUST add the Tax Id . these are listed at the link provided. When ready, continue with the presentation in the bottom right hand corner. http://na2.know.hp.com/teams/office_services_team-Brigitte/WebFlagship/ROSA_BraziltaxID.xls

backend-script-w-slides Friday, February 02, 2007 Page 66 of 98 Slide 123 - Slide 123 Slide notes

You would the special processing tab for Saturday deliveries . . be sure the delivery date actually falls on a Saturday. A validation will be done to compare dates.

slide-34
SLIDE 34

backend-script-w-slides Friday, February 02, 2007 Page 67 of 98 Slide 124 - Slide 124 Slide notes

the file info tab is a temporary storage area used to print labels . .you can go back to this area to reprint labels if need be. Be sure to check this at least quarterly and delete old temp files that are no longer needed.

backend-script-w-slides Friday, February 02, 2007 Page 68 of 98 Slide 125 - Slide 125 Slide notes

So let's review our delivery information tab

Slide 126 - Slide 126 Slide notes

Everything looks good so we are ready to Click on the execute button - this will make a connection to the FedX server. Box numbers will be generated and label information which will pop up in a separate screen. When the popup window appears, hit File Print to print your labels. . . so once your labels are printed, you have completed our FedX subprocess and you now need to return to your original order.

slide-35
SLIDE 35

backend-script-w-slides Friday, February 02, 2007 Page 69 of 98 Slide 127 - Slide 127 Slide notes

by entering the transaction code for editing a shipment which is VL02N

Slide 128 - Slide 128 Slide notes

and hitting enter or the check mark. Note 2 other transaction codes associated with the fedX subprocess are shown here. nzfdxd will allow you to delete a fedx shipping request and if you have requested fedX ground service, you must close the requests using nzfdxc at the end of the day for a pickup to occur.

backend-script-w-slides Friday, February 02, 2007 Page 70 of 98 Slide 129 - Slide 129 Slide notes

we can now return to our header details. By saving our shipment it is easy to return to this screen.

Slide 130 - Slide 130 Slide notes

where we need to enter our route on the shipment tab

slide-36
SLIDE 36

backend-script-w-slides Friday, February 02, 2007 Page 71 of 98 Slide 131 - Slide 131 Slide notes Slide 132 - Slide 132 Slide notes

Now scroll down to see the Bill of Lading

backend-script-w-slides Friday, February 02, 2007 Page 72 of 98 Slide 133 - Slide 133 Slide notes

If you used the FedX sub-process . . the bill of lading is automatically populated. A carrier master screen is being developed. When that is completed the Bill of Lading for other carriers will be automatically populated. You will be notified when this becomes active. Until then, you must manually enter the Bill

  • f Lading for all other carriers. Remember to check the Incoterms spreadsheet for international shipments to be sure you are using the correct code and

enter the destination description. When ready continue with the presentation. http://na2.know.hp.com/teams/office_services_team-Brigitte/WebFlagship/ROSA-Incoterms.xls

Slide 134 - Slide 134 Slide notes

Means of Transportation must be populated for International shipments, but is a good habit to enter for all shipments.

slide-37
SLIDE 37

backend-script-w-slides Friday, February 02, 2007 Page 73 of 98 Slide 135 - Slide 135 Slide notes Slide 136 - Slide 136 Slide notes Slide 137 - Slide 137 Slide notes

Make sure that your weight has populated then check your order for completeness.

backend-script-w-slides Friday, February 02, 2007 Page 74 of 98 Slide 138 - Slide 138 Slide notes

And now you are ready to Post. Note, If your site has an already established process where the shipping department forwards the Assist form and No Charge invoice to a contact in the Logistics Operations organization, you will need to reprint or copy the no charge invoice and Assist form in order to complete that activity. Or you might need to reprint a document for another reason - let's cover how you would do that.

slide-38
SLIDE 38

backend-script-w-slides Friday, February 02, 2007 Page 75 of 98 Slide 139 - Slide 139 Slide notes

Once you PGI you are taken to the Change Outbound delivery screen. You should never make any changes to a shipment after a PGI as it will lock the shipment and prevent the printing of invoice. You can click on the pencil to view the delivery, just be sure the screen header says Display, not Change. You can use the icon to toggle between display and change. but let's use our transaction code nVl03n to continue with our print exercise.

backend-script-w-slides Friday, February 02, 2007 Page 76 of 98 Slide 140 - Slide 140 Slide notes Slide 141 - Slide 141 Slide notes

Now click on the document flow icon

slide-39
SLIDE 39

backend-script-w-slides Friday, February 02, 2007 Page 77 of 98 Slide 142 - Slide 142 Slide notes

This screen will show you your status. Your order number is also available here as well as your delivery number. Note, it takes at least 15 minutes for the proforma invoice to show completed status. Let's go back to our Display outbound delivery screen

Slide 143 - Slide 143 Slide notes

And we'll go to Outbound delivery

Slide 144 - Slide 144 Slide notes

and issue Delivery Output

backend-script-w-slides Friday, February 02, 2007 Page 78 of 98 Slide 145 - Slide 145 Slide notes

slide-40
SLIDE 40

backend-script-w-slides Friday, February 02, 2007 Page 79 of 98 Slide 146 - Slide 146 Slide notes

this displays the documents that are available for printing. International shipments will have 5 documents, domestic will have 3.

backend-script-w-slides Friday, February 02, 2007 Page 80 of 98 Slide 147 - Slide 147 Slide notes

Select the document you wish to print. NOte that you can only print one document at a time. If you want the document to go to your default printer, just click on the print icon. If you want to change your printer or need to verify print option, click on that button.

slide-41
SLIDE 41

backend-script-w-slides Friday, February 02, 2007 Page 81 of 98 Slide 148 - Slide 148 Slide notes

Your local printer is default. If you want to change this - you must know the short ROSA name for the printer. Contact your administrator if you do not know the SAP short name. Be sure the Print immediately and Release after output boxes are checked. When ready, hit execute.

Slide 149 - Slide 149 Slide notes

Then your printer icon. You will see a confirmation message that the print request has been sent.

backend-script-w-slides Friday, February 02, 2007 Page 82 of 98 Slide 150 - Slide 150 Slide notes

Now let's look at how to print an invoice. Go to your document flow button.

slide-42
SLIDE 42

backend-script-w-slides Friday, February 02, 2007 Page 83 of 98 Slide 151 - Slide 151 Slide notes

Click on the invoice row, then the F8 key

backend-script-w-slides Friday, February 02, 2007 Page 84 of 98 Slide 152 - Slide 152 Slide notes

Verify that this is the correct invoice, then go back to your Display screen.

slide-43
SLIDE 43

backend-script-w-slides Friday, February 02, 2007 Page 85 of 98 Slide 153 - Slide 153 Slide notes

and we'll enter the transaction code

Slide 154 - Slide 154 Slide notes

nvF03 will load the the last invoice opened - - this will be the invoice we just verified to be correct.

backend-script-w-slides Friday, February 02, 2007 Page 86 of 98 Slide 155 - Slide 155 Slide notes

Now go to billing document

slide-44
SLIDE 44

backend-script-w-slides Friday, February 02, 2007 Page 87 of 98 Slide 156 - Slide 156 Slide notes

and issue

Slide 157 - Slide 157 Slide notes Slide 158 - Slide 158 Slide notes

Highlight the invoice just as we did in the other print screen

backend-script-w-slides Friday, February 02, 2007 Page 88 of 98 Slide 159 - Slide 159 Slide notes

and select the print icon

slide-45
SLIDE 45

backend-script-w-slides Friday, February 02, 2007 Page 89 of 98 Slide 160 - Slide 160 Slide notes

You will get confirmation that your print was successful.

backend-script-w-slides Friday, February 02, 2007 Page 90 of 98 Slide 161 - Slide 161 Slide notes

You may see an SAP dialogue box during the print spooling sequnce, this is normal. You can just close it using the x in the top right hand corner

slide-46
SLIDE 46

backend-script-w-slides Friday, February 02, 2007 Page 91 of 98 Slide 162 - Slide 162 Slide notes

Now Let's quickly review some reports you will routinely run. On a daily basis, you will probably want to print out a manifest . . This is only used for shipments where we store tracking information at the box level - specifically UPS and FedX.

backend-script-w-slides Friday, February 02, 2007 Page 92 of 98 Slide 163 - Slide 163 Slide notes

You can run this for a specific shipping point or a range of shipping points. You can also filter by PGI date or your carrier.

slide-47
SLIDE 47

backend-script-w-slides Friday, February 02, 2007 Page 93 of 98 Slide 164 - Slide 164 Slide notes backend-script-w-slides Friday, February 02, 2007 Page 94 of 98 Slide 165 - Slide 165 Slide notes Slide 166 - Slide 166 Slide notes

The forwarding agent drop down is the same search vehicle we are used to.

slide-48
SLIDE 48

backend-script-w-slides Friday, February 02, 2007 Page 95 of 98 Slide 167 - Slide 167 Slide notes Slide 168 - Slide 168 Slide notes backend-script-w-slides Friday, February 02, 2007 Page 96 of 98 Slide 169 - Slide 169 Slide notes

  • nce you have entered your parameters, just execute your report

Slide 170 - Slide 170 Slide notes

Now let's look at another commonly used report

slide-49
SLIDE 49

backend-script-w-slides Friday, February 02, 2007 Page 97 of 98 Slide 171 - Slide 171 Slide notes

This is the ship log

Slide 172 - Slide 172 Slide notes

You can also access it from your user menu

Slide 173 - Slide 173 Slide notes

here you can generate a report based on shipping point and post good issue date range

backend-script-w-slides Friday, February 02, 2007 Page 98 of 98 Slide 174 - Slide 174 Slide notes

Be sure to investigate the information on both of these reports.

Slide 175 - Copy of Closing Slide notes

Congratulations You can now Process a shipment. For more information please go to the distribution website. You will be transferred to that location now.