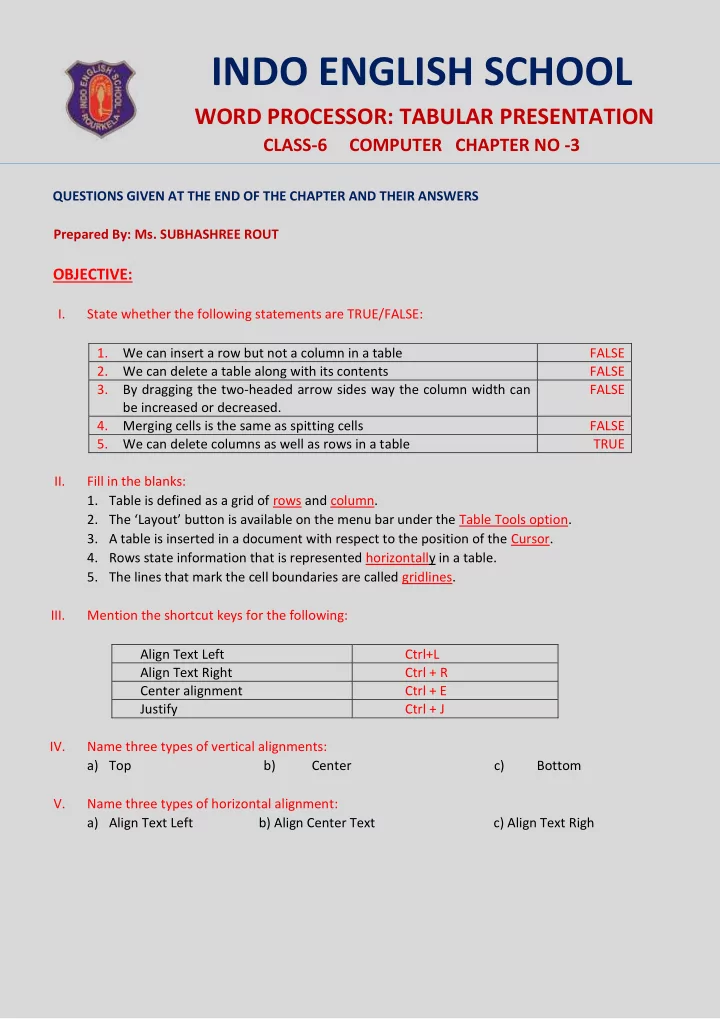

INDO ENGLISH SCHOOL WORD PROCESSOR: TABULAR PRESENTATION CLASS-6 COMPUTER CHAPTER NO -3 QUESTIONS GIVEN AT THE END OF THE CHAPTER AND THEIR ANSWERS Prepared By: Ms. SUBHASHREE ROUT OBJECTIVE: I. State whether the following statements are TRUE/FALSE: 1. We can insert a row but not a column in a table FALSE 2. We can delete a table along with its contents FALSE 3. By dragging the two-headed arrow sides way the column width can FALSE be increased or decreased. 4. Merging cells is the same as spitting cells FALSE 5. We can delete columns as well as rows in a table TRUE II. Fill in the blanks: 1. Table is defined as a grid of rows and column. 2. The ‘Layout’ button is available on the menu bar under the Table Tools option. 3. A table is inserted in a document with respect to the position of the Cursor. 4. Rows state information that is represented horizontally in a table. 5. The lines that mark the cell boundaries are called gridlines. III. Mention the shortcut keys for the following: Align Text Left Ctrl+L Align Text Right Ctrl + R Center alignment Ctrl + E Justify Ctrl + J IV. Name three types of vertical alignments: a) Top b) Center c) Bottom V. Name three types of horizontal alignment: a) Align Text Left b) Align Center Text c) Align Text Righ
SUBJECTIVE: I. Write short notes on the following: 1. Cell: A cell is a grid of rows and column that intersect to form cells. The lines that mark the cell boundaries are called gridlines. 2. Resizing a table: Resizing a table means decreasing or increasing the table size as per our needs. We may change the table size proportionately, length-wise or width-wise depending upon the data items 3. Merging and splitting of cells: Merging cells means to combine cells by converting one or more cells into a single cell. Other hand, splitting cells is the reverse of merging cells where a particular cell is divided into a number of small cells. 4. Cell Alignment: MS WORD aligns text in a table to the top left corner of a cell. Alignment defines the position of data/text placed within the boundary of a cell. The computer system primarily provides two different types of alignment of data/text within a cell i. e vertical alignment and horizontal alignment. II. Write all the steps to perform the following tasks: 1. Creating a table: Step 1 : Place the cursor on the document where you want to create a table. Step 2 : Click the ‘Insert’ button which is available on the menu bar. Step 3 : Select ‘Table’ and then ‘Insert Table’ from the drop -down list. Step 4 : Enter the number of columns and rows in the ‘Insert Table’ window. Step 5 : Finally, click OK. 2. Deleting a column in a table : Step 1 : Select the row that is to be deleted. Step 2 : Click the ‘Layout’ button under the ‘Table Tools’ option which is available on the menu bar. Step 3 : Select ‘Delete’ and then an appropriate option, i. e ., ‘Delete Column’ from the drop down list.
3. Inserting a row in a table: Step 1 : Set the cursor in any cell in the row above or below which we want to insert a row. Step 2 : Click the ‘Layout’ button under the ‘Table Tools’ option which is available on the menu bar. Step 3 : Click an appropriate option, i. e., ‘Insert Below’ or ‘Insert Above’. 4. Merging cells in a table: Step 1 : Click the ‘Insert’ button which is available on the menu bar. Step 2 : Select ‘Table’. Step 3 : Select ‘Insert Table’ from the drop -down list. Step 4 : Enter the number of columns and rows in the ‘Insert Table’ window. Click ‘OK’. Step 5 : Enter the data /text in the table where merging isn’t required. Step 6 : Now, select the cells which are to be merged. Step 7 : Click on the ‘Layout’ button under the ‘Table Tools’ option which is present on the Ribbon area. Step 8 : Select the option ‘Merge Cells’. 5. Changing the row height in a table : Step 1 : Select a cell or cells of the desired table. Step 2: Click the ‘Layout’ button from ‘Table Tools’ option . It will display the default table row height in the ‘Cell Size’ area. Step 3: Click this button ( ) to change the height of the row to a specific measurement of the selected cells. 6. Adding Borders to a Table: Step 1: Select the cell or cells of the desired table where a border is to be added. Step 2: Click the ‘Design’ button from ‘Table Tools’ option followed by the ‘Border’ button. Step 3: Click on the drop-down arrow button ( ) to select the desired border type.
Recommend
More recommend