abomp digital slides quickstart
play

ABOMP Digital Slides Quickstart The slides were scanned into high - PDF document

1 Pathology Digital Imaging Core Facility Aperio ImageScope Quickstart University of Washington ABOMP Digital Slides Quickstart The slides were scanned into high resolution whole slide images using an Aperio ScanScope digital slide scanner,


  1. 1 Pathology Digital Imaging Core Facility Aperio ImageScope Quickstart University of Washington ABOMP Digital Slides Quickstart The slides were scanned into high resolution whole slide images using an Aperio ScanScope digital slide scanner, allowing for viewing the entire slides online. Viewing of virtual slides is possible using specialized viewing software. Accessing the Scanned Slides 1. Open the UW Aperio eSlide Manager server and log in with the account credentials provided: https://slides.pathology.washington.edu 
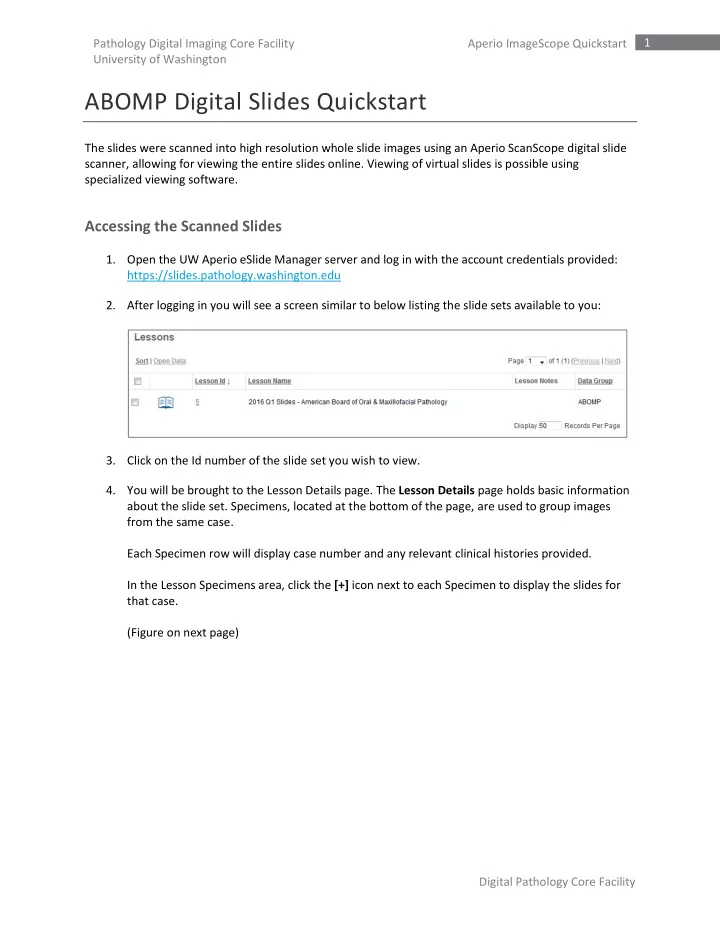
2. After logging in you will see a screen similar to below listing the slide sets available to you: 3. Click on the Id number of the slide set you wish to view. 4. You will be brought to the Lesson Details page. The Lesson Details page holds basic information about the slide set. Specimens, located at the bottom of the page, are used to group images from the same case. Each Specimen row will display case number and any relevant clinical histories provided. In the Lesson Specimens area, click the [+] icon next to each Specimen to display the slides for that case. (Figure on next page) Digital Pathology Core Facility

  2. 2 Pathology Digital Imaging Core Facility Aperio ImageScope Quickstart University of Washington 5. Click the small image thumbnail to open the scanned image in WebScope or ImageScope . Please see the following section on information for image viewing applications. Opening digital slides 1. Click the slide thumbnail to open the slide. 2. The slide will either open in one of two viewers depending on what software and web browser you have installed: a. A new tab in your browser ( WebScope ), or b. Prompt you to open a file called DigitalSlide.sis ( ImageScope ). Aperio WebScope WebScope is the web based version of ImageScope. This is default viewer when no additional software is installed or detected by the eSlide Manager web application. It is also the only viewer available on Macs. Aperio WebScope requires Adobe Flash. WebsScope has a feature set which most users will find satisfactory with a fairly intuitive interface. The major downside to using WebScope is viewing speed. WebScope can often perform slowly while downloading and rendering views of virtual slides if you pan and zoom quickly. If the image is pixelated while viewing, please stop panning to let the viewer catch up. Digital Pathology Core Facility

  3. 3 Pathology Digital Imaging Core Facility Aperio ImageScope Quickstart University of Washington Aperio ImageScope Aperio ImageScope provides much faster image rendering, faster panning, and more advanced features such as image rotation and image capture. If you have ImageScope installed, the eSlide Manager website should detect the software and prompt you to open a file called DigitalSlide.sis after clicking on an image thumbnail. You should open this file in ImageScope, and check the option to always open this file type with this application. Aperio ImageScope is a Microsoft Windows-only application. Install ImageScope by downloading and opening this file: https://slides.pathology.washington.edu/files/Imagescope_Install.exe Note about administrative privileges: If you are installing this on a computer with restricted user accounts, you will need to install it with administrative privileges, reboot, and then (important!) log back in with administrative privileges. Once this process is done, you can log out and back in as a user with restricted privileges. Main Window 1. Open the image file in ImageScope (File/Open Image). After you install ImageScope, your system will recognize the virtual slide file formats and automatically open them with ImageScope by double- clicking on the file name. 2. You will be presented with a window that looks similar to the image below. 3. The main features of ImageScope are: A. Main window. This displays a portion of the slide at its full magnification. Panning - You can easily pan the slide by grabbing the image in the main window (press the left mouse button and hold down - the cursor changes to a fist) and move it in any direction. You can also use the arrow keys on your keyboard to pan the slide. You can click on the toolbar to return to a previous view of the digital slide. Clicking retraces the views. B. Zoom Tools. Click each magnification button to change the magnification. The yellow highlight shows the current zoom level. You can also use the scroll wheel on your mouse to zoom in and out of the slide. C. Slide Label Image D. Thumbnail. This shows a thumbnail of the entire slide. The smaller black rectangle inside the thumbnail shows the size and location of the image that is currently displayed in the main window. Digital Pathology Core Facility

  4. 4 Pathology Digital Imaging Core Facility Aperio ImageScope Quickstart University of Washington You can quickly navigate to any location on the digital slide by clicking the desired location in the thumbnail window or by dragging the black rectangle to the desired position. E. Magnifier. The image displayed in the magnifier is twice the magnification of the image displayed in the main window. The contents of the magnifier correspond to the region under the mouse cursor. F. Filmstrip – Switch between open slides. Adjusting Image Color and Brightness. You can control the image colors by using various options in the image on the toolbar. adjustments box - accessed by clicking Quickly Navigating Virtual Slides in ImageScope 1. Switch to a comfortable scanning magnification such as 4x or 5x. 2. Click and drag the black rectangle in the thumbnail to pan the slide. 3. When you find an area you want to take a closer look at, stop panning and double-click on the feature in the main window. This will switch to the highest magnification available (20x or 40x) centered on where you clicked. 4. Double-click again in the main window to switch back to your 4/5x scanning magnification. Saving Pictures from Scanned Slides 1. Frame the area you want to capture in the viewport. 2. Decide if you want a scale bar in your image or not. You can toggle it on or off using the button on the toolbar (see image below). 3. Save a picture of the current view by clicking the camera button on the toolbar. Choose JPEG in the "Save as type" drop down menu for presentations or TIFF for publications and printing. Toggle scale bar Snapshot Digital Pathology Core Facility

Download Presentation
Download Policy: The content available on the website is offered to you 'AS IS' for your personal information and use only. It cannot be commercialized, licensed, or distributed on other websites without prior consent from the author. To download a presentation, simply click this link. If you encounter any difficulties during the download process, it's possible that the publisher has removed the file from their server.

Recommend


More recommend