
SLIDE 1
Vidyo Tutorials for engineers
- Basics of VidyoDesktop
– How to start VidyoDesktop – Basic setting
- Technical Tips
– How to setup audio – How to share PPT
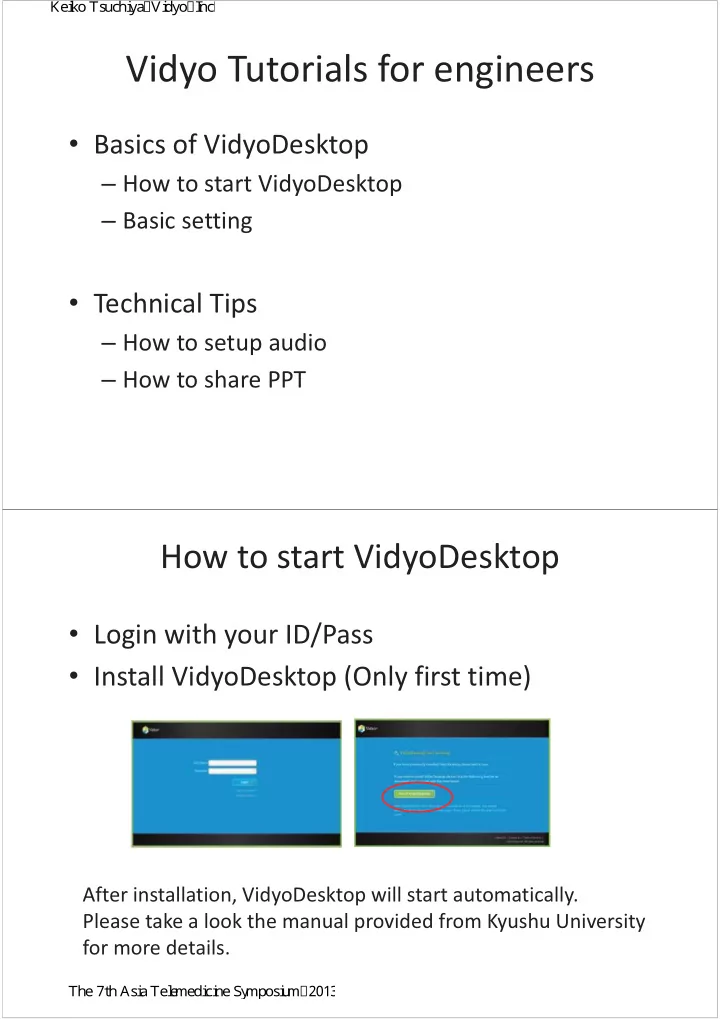
How to start VidyoDesktop
- Login with your ID/Pass
- Install VidyoDesktop (Only first time)
After installation, VidyoDesktop will start automatically. Please take a look the manual provided from Kyushu University for more details.
T h e 7 t h A s i a T e l e m e d i c i n e S y m p
- s
i u m , 2 1 3 K e i k
- T
s u c h i y a , V i d y
- ,
I n c .