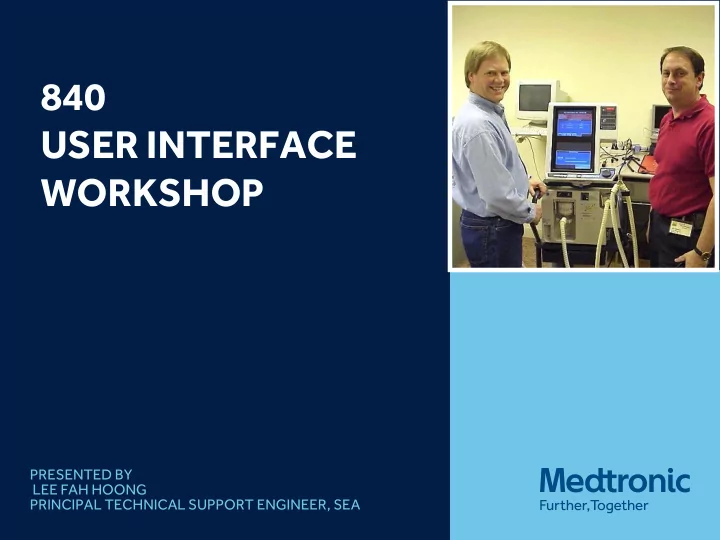
SLIDE 1 PRESENTED BY LEE FAH HOONG PRINCIPAL TECHNICAL SUPPORT ENGINEER, SEA
840 USER INTERFACE WORKSHOP
SLIDE 2 WORKSHOP REQUIREMENTS
PB840 Vent AC BPS Inspiratory and Expiratory Filters Wall Air and Wall Oxygen sources & hoses
SLIDE 3
- Grasp the Oxygen Hose firmly and push the Quick
Connect fitting into the Oxygen Outlet:
CONNECTING THE GAS SOURCES:
SLIDE 4 CONNECT THE PATIENT CIRCUIT, FILTERS & LUNG
NOTE: to eliminate leaks, make sure that the barbs of the patient circuit wye fit snuggly in the patient circuit tubing grooves.
SLIDE 5 THE RIGHT WAY TO POWER UP THE 840:
- The 840 should always be powered on with an open circuit.
By leaving the Expiratory Bacteria Filter Latch open, you’ve created an open circuit condition. You can also leave the test lung disconnected.
SLIDE 6 NORMAL OPERATION STARTUP SCREENS
- On power up the ventilator runs POST.
- Default startup screen is displayed there
are no failure conditions
- Note what is displayed on the upper
screen:
- Vent Startup in progress
- Circuit type?
- Humidification type?
- Time and date?
- SST & EST overall test result?
SLIDE 7 “NORMAL OPERATION”
LOWER SCREEN DISPLAY AT START-UP
wipes out the SAME PATIENT settings from the previous setup. In that case, you may
& SST buttons available in normal operation.
SLIDE 8 IMPROPER 840 START-UP:
- For safety, the ventilator issues a Procedure Error
Alarm and initiates Safety Ventilation Mode if a patient (or closed circuit condition) is detected before all of the ventilator settings have been entered and confirmed (accepted).
- Safety ventilation is an emergency mode of
ventilation per the displayed settings.
SLIDE 9
SAFETY VENTILATION
SLIDE 10 After POST: 840 generates 10 LPM Flow to check for patient connection.
If the measurement circuitry detects the 10 LPM flow, Procedure Error is initiated.
SLIDE 11
GUI STATUS INDICATOR PANEL
SLIDE 12 GUI KEYBOARD
- Rotary Encoder Knob
- ACCEPT key
- CLEAR key
- MANUAL INSP key
- 100% O2 / CAL 2 min key
- RESET key
- 2 min key
- VOL key
- SCREEN LOCK key
SLIDE 13
GUI SCREEN SECTIONS
Patient Data Alarm and Status Miscellaneous Data SandBox Primary Settings Symbols Definitions Prompt Area
SLIDE 14 LOWER STARTUP SCREEN
button
SLIDE 15 LOWER STARTUP SCREEN
activated when it turns orange.
SLIDE 16 UPPER GUI SCREEN
blue expiratory bacteria filter latch
SLIDE 17 THE NEXT SCREEN DEFAULTS TO THE APNEA SETUP SCREEN AFTER SELECTING SAME PATIENT OR COMPLETING A NEW PATIENT SETUP
SLIDE 18 ALWAYS PRESS THE ALARM SETUP BUTTON TO ADJUST THE ALARM SETTINGS OR TO TURN THEM OFF IF YOU ARE EVALUATING (ASSESSING) THE VENT OR RUNNING PVT. HOWEVER, FOR NOW, DO NOT ADJUST THEM.
SLIDE 19
PATIENT DATA – WHAT DOES IT MEAN?
SLIDE 20
CIRCUIT & HUMIDIFICATION TYPE AND TIME & DATE
SLIDE 21 THE MORE INFORMATION SCREEN IF LEAK COMPENSATION IS ENABLED
O2 Sensor Reading – if the reading is
- ut, can calibrate, disable or replace
SLIDE 22
ALARM LOG ICON
SLIDE 23
SAMPLE MORE ALARMS SCREEN
SLIDE 24
ALARMING DOGGIES
SLIDE 25 PRESS THE OTHER SCREENS BUTTON & TO VIEW THE OTHER
- SCREENS. AFTER SELECTING A SCREEN TO VIEW, YOU MUST
PRESS THE OTHER SCREENS BUTTON AGAIN TO BRING BACK THE SCREEN SELECT MENU BELOW:
SLIDE 26 PRESS TEST SUMMARY
Next, press the Other Screens button to bring back the screen select menu.
SLIDE 27 PRESS VENTILATOR CONFIGURATION
- Ventilator S/W
- POST S/W
- GUI & Ventilator
serial numbers (S/N)
- Compressor S/N
- SAAS S/W
- Options
Next, press the Other Screens button to bring back the screen select menu.
SAAS = Safety Audible Alarm System
SLIDE 28
PRESS DIAGNOSTIC CODE LOG
Next, press the Other Screens button to bring back the screen select menu.
SLIDE 29
PRESS OPERATIONAL TIME LOG
Next, press the Other Screens button to bring back the screen select menu.
SLIDE 30
PRESS SST RESULTS LOG
Next, press the Other Screens button to bring back the screen select menu.
SLIDE 31 PRIMARY SETTINGS AREA: CONTAINS VENTILATOR SETTINGS DEFINING HOW A BREATH IS DELIVERED TO THE PATIENT.
10
A/C VC V-TRIG 50
365 44 21
RAMP
- 1. Which button represents how often the vent will deliver a
controlled breath? 2. Which button represents how much oxygen is delivered? 3. Which button represents how much volume is delivered? 4. Which button represents how much positive pressure is maintained during exhalation? 5. Which button represents the rate of volume delivery?
SLIDE 32 SYMBOLS DEFINITIONS AREA – PRESS THE PEAK FLOW BUTTON TO VIEW ITS NAME:
When a button is pressed, you know it is activated because it changes to an
10 44 21
AC
RAMP
SLIDE 33 CHANGING THE IBW FROM VENT SETUP TOUCH THE IBW BUTTON:
50
110
50
110
CURRENT
SETUP Current Vent Settings
Sandbox
SLIDE 34 CHANGING THE IBW FROM VENT SETUP: TURN THE KNOB TO LOWER THE IBW BELOW RECOMMENDED S/W LIMITS:
12
A/C VC V-TRIG 50
400 50 21
RAMP
25
55
Press OK & continue to turn the knob.
SLIDE 35 TOUCH CONTINUE & PRESS THE ACCEPT KEY
12
A/C VC V-TRIG 50
400 50 21
RAMP
9
20
SLIDE 36 UPDATED IBW SETTING
12
A/C VC V-TRIG 50
400 50 21
RAMP
9
20
9
Now change the IBW Back to 50 kg!
SLIDE 37
Peak Pressure = PEEP + Pi
20
Now change the PC breath type back to VC and PEEP from 10 to 3cmH2O.
Pressure Control Ventilation
SLIDE 38 ALARM SETUP ICON
Ppeak (High circuit pressure limit) – sets the maximum circuit pressure allowed during inspiration
SLIDE 39 ALARM SETUP ICON
fTot (Breath rate) – sets the maximum breath rate limit (may be an indicator of breath stacking, autocycling or patient distress) VeTot (Minute Volume) – sets the min & max exhaled minute volume for mandatory & spontaneous breath types
SLIDE 40 ALARM SETUP ICON
Vte mand (Mandatory exhaled tidal volume limit) – sets the min and max mandatory exhaled tidal volume limit
SLIDE 41
ALARM SETUP SCREEN
Medium urgency alarm High urgency alarm
SLIDE 42
LAST 200 BREATHS TO HELP CLINICIANS SET APPROPRIATE ALARM LIMITS
SLIDE 43 TURNING OFF THE 840 ALARMS
- Touch the alarm setup icon in the lower screen to
activate that screen if it is not already selected.
- Turn off all alarms by pressing the gray alarm
buttons and turning the knob to raise the upper limit alarms until they read OFF or 100 cmH2O for Ppeak (it’s max setting).
- Turn off all the lower limit alarms until they read OFF
- r 0.050 ml for Vetot (it’s min setting).
SLIDE 44
OTHER SCREENS ICON
Click on each of the buttons to view the associated screen
SLIDE 45
WORK?
SLIDE 46
- Performed during normal operation when
ventilating – should be performed DAILY when in use
- When the 100% O2 Cal 2 MIN key is pressed, vent
performs a single-point oxygen sensor calibration during the 100% suctioning procedure
- Allows you to calibrate the sensor without having
to disconnect the patient
Oxygen Sensor Calibration
SLIDE 47
CALIBRATE THE OXYGEN SENSOR
Press the 100% O2/CAL 2min key on the keyboard to calibrate the Oxygen sensor. Press the More Information icon in the Upper Screen to view the O2 Sensor reading:
SLIDE 48 UNDERSTANDING THE VT VS VTE RELATIONSHIP
- Locate Vt in lower screen and compare to Vte in
upper screen Vte Must be +/-10mls +/- 10% of set VtVte = Spirometry = Patient’s Exhaled Tidal Volume
- Set Tidal Volume (Vt) 365 mls
+ 10 mls 375 mls + 36.5 mls (+ 10%) High Limit 411.5 mls
- Set Tidal Volume (Vt) 365 mls
- 10 mls
355 mls
Low Limit 318.5 mls
SLIDE 49 5 CONDITIONS THAT MAY CAUSE THE SPIROMETRY READING TO BE INACCURATE.
- 1. A leak
- 2. An obstruction
- 3. Wrong humidifier type
- 4. Wrong circuit type
- 5. A bad Q3 exhalation flow
sensor.
SLIDE 50 Time & Date Stamps Scroll Bar
Alarm Log
Can store up to 80 of the most recent events Tracks PATIENT RELATED ALARMS, Device Alerts, and
System Faults such as Low/Loss AC, Low/Loss of O2 and/or Air, Circuit Disconnects, and Occlusions
Completing a new patient setup clears log memory
SLIDE 51 ALARM LOG
alarm events in order
the most recent event at the top of the list:
- Time stamped alarms
- Alarm silences
- Alarm resets
The question mark in a triangle appears if the log contains an event that has/had not been viewed yet.
SLIDE 52 ALARMS
High-urgency alarm indicator Medium-urgency alarm indicator Low-urgency alarm indicator
Alarms on the 840 Ventilator System are classified as High, Medium, or Low urgency ! ! !
SLIDE 53
High Priority Alarm: 5 tones
SMART ALARMS
SLIDE 54
- High urgency- requires immediate attention.
- Red high urgency !!! indicator flashes rapidly
- High urgency audible alarm sounds (5 tones repeated
twice)
- Upper screen flashes alarm message
ALARMS
SLIDE 55 CIRCUIT DISCONNECT ALARM
- Press the Alarm Log icon in the upper GUI screen
and the Alarm setup icon in the lower GUI screen.
- Create a tubing disconnect by removing the test
lung from the patient wye.
- What urgency alarm is generated?
- What is displayed in the upper GUI screen?
- Does pressing the Alarm Silence button silence the alarm?
- What new entry is in the Alarm Log?
- Reconnect the test lung. What happened? Does
the Alarm Log reflect the series of events?
SLIDE 56
Medium Priority Alarm: 3 tones
SMART ALARMS
SLIDE 57 Alarms
Medium urgency requires prompt attention
Yellow medium urgency !! indicator flashes
slowly
Medium urgency audible alarm (a repeating 3
tone sound) is enunciated
The upper screen flashes an alarm message
SLIDE 58
Low Priority Alarm: 2 tones
Smart Alarms
SLIDE 59
- Low urgency alarms tell you there has been a
change in patient-ventilator system
- Yellow low urgency !! indicator lights
- Low urgency audible alarm (two tone non-repeating sound) is enunciated
- Upper screen displays an alarm message
ALARMS
SLIDE 60
- Alarm handling:
- Medium urgency alarms may escalate to high or de-escalate to low urgency
- Low urgency alarms may escalate to medium or high urgency
- All patient alarms will auto-reset if the criteria is reached
ALARMS
SLIDE 61
2 of last 4 mand breaths < set limit. Check for leaks, changes in patient’s R & C.
V TE MAND
Base Message: Analysis: Remedy:
ALARMS
SLIDE 62 GOLDEN RULE #1
If possible, always review and, if applicable, make note of the Alarm Log,
Ventilator Settings, Alarm Settings, and Apnea Settings, before
doing anything to the ventilator:
Turn to the Sample Alarm Log
- n pages 4 & 5 of the Reference
Manual Addendum
End!
SLIDE 63
QUESTIONS? Q&A