
SLIDE 1
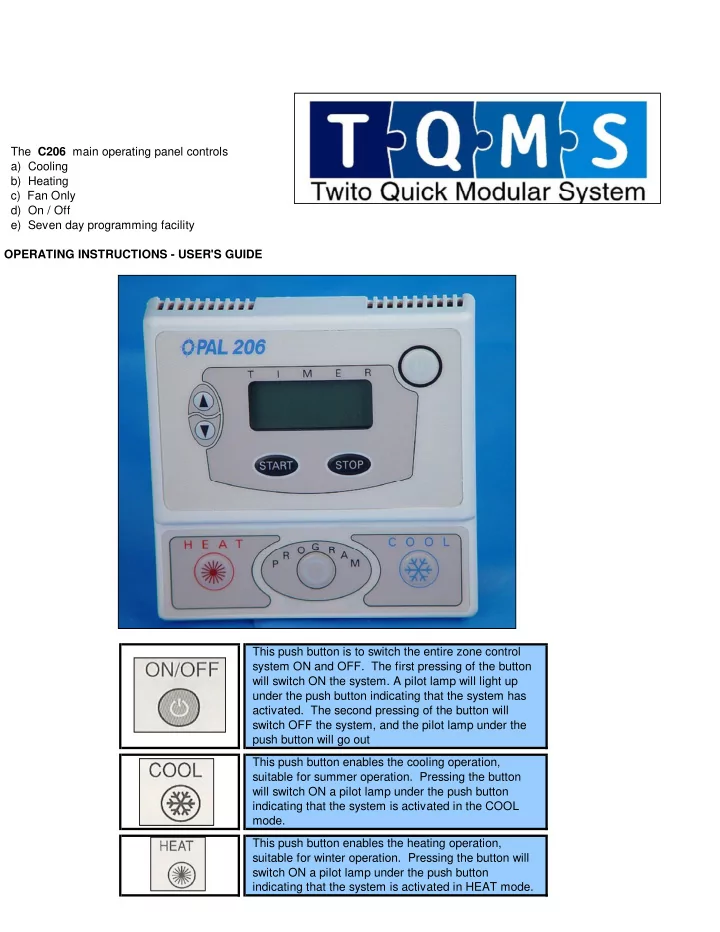
The C206 main operating panel controls a) Cooling b) Heating c) Fan Only d) On / Off e) Seven day programming facility OPERATING INSTRUCTIONS - USER'S GUIDE This push button is to switch the entire zone control system ON and OFF. The first pressing of the button will switch ON the system. A pilot lamp will light up under the push button indicating that the system has
- activated. The second pressing of the button will