Sit somewhere new! Find the 82 resistors in your kit - - PowerPoint PPT Presentation

sit somewhere new
SMART_READER_LITE
LIVE PREVIEW

Sit somewhere new! Find the 82 resistors in your kit - - PowerPoint PPT Presentation

Sit somewhere new! Find the 82 resistors in your kit (gray-red-black). Pull out both switches and an LED Unwrap your medium or large breadboard ENGR 40M, Lecture 6: Switches, logic, and truth tables Steven Bell 7 July 2016 By the end of


slide-1
SLIDE 1

Sit somewhere new!

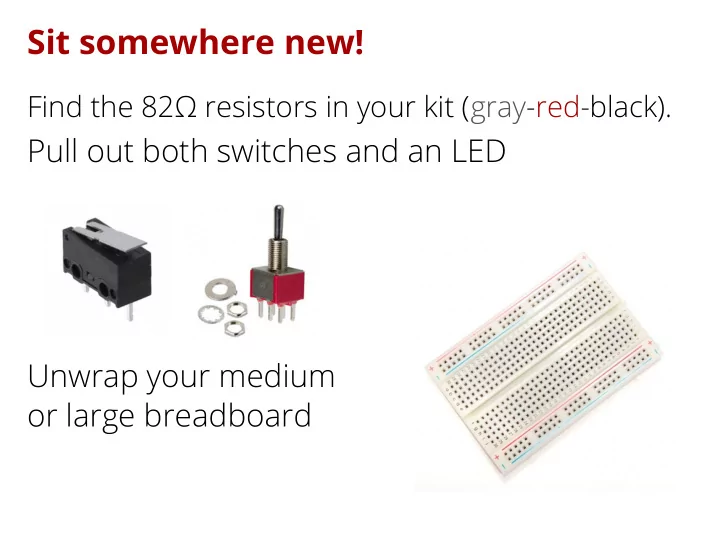
Find the 82Ω resistors in your kit (gray-red-black).

Pull out both switches and an LED Unwrap your medium

  • r large breadboard
slide-2
SLIDE 2

ENGR 40M, Lecture 6:

Switches, logic, and truth tables

Steven Bell

7 July 2016

slide-3
SLIDE 3

By the end of today, you should be able to:

Use a breadboard to make circuit connections Given a circuit with switches, write the truth table, and vice versa. Draw a state diagram for a simple system

slide-4
SLIDE 4

Switches make or break an electrical connection

SPST SPDT DPST DPDT

One pole Two poles One throw Two throws

slide-5
SLIDE 5

You can test connectivity using the resistance setting on your multimeter.

1 2 3 4 5 6

You have a DPDT switch in your kit. Figure out which pins correspond to which numbers on the schematic.

slide-6
SLIDE 6

Breaking break:

Switches

slide-7
SLIDE 7

Breadboards are designed for connecting electrical stuff together. They're internally connected along the

  • range lines below.
slide-8
SLIDE 8

Breaking break 2:

Breadboards!

slide-9
SLIDE 9

Let's connect up an LED:

The flat side (and the short lead) mark the negative side (cathode) of the LED. Flat side

Shorter lead

82Ω 4.5V

slide-10
SLIDE 10

Now team up with the person next to you, and build a two-switch circuit that turns the LED on when both switches are pressed. Modify your circuit to that the LED turns on when either switch is pressed. Challenge: Make the LED turn on when one or the

  • ther - but not both - of the switches is pressed.
slide-11
SLIDE 11

Build a circuit using your limit switch so that the LED turns on when the switch is pressed. Modify the circuit so that the LED is normally on and turns off when the switch is pressed. Once you get it working, help your classmates out!

slide-12
SLIDE 12

Truth tables

slide-13
SLIDE 13

Vdd

A B C Draw a truth table describing when the LED lights up, as a function of A, B, and C. Use "0" for open, and "1" for closed.

slide-14
SLIDE 14

Designing the useless box

slide-15
SLIDE 15

Breaking break 3:

Carbon monoxide detector