
SLIDE 1
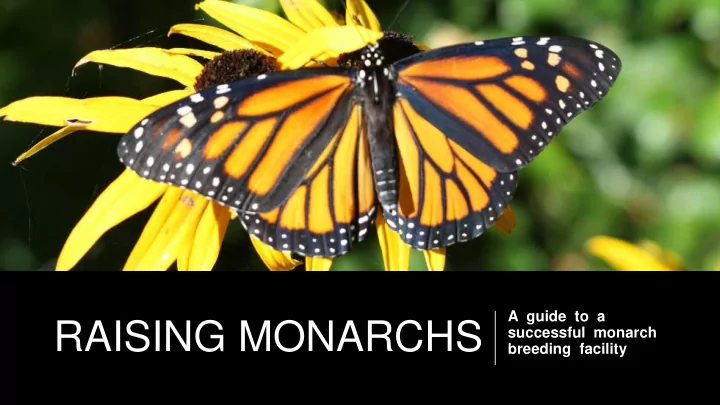
RAISING MONARCHS
A guide to a successful monarch breeding facility
RAISING MONARCHS successful monarch breeding facility Tips for a - - PowerPoint PPT Presentation
A guide to a RAISING MONARCHS successful monarch breeding facility Tips for a successful monarch breeding operation The facility size and set-up should be adequate to allow for ease of movement, access to equipment and tools, and
A guide to a successful monarch breeding facility
allow for ease of movement, access to equipment and tools, and provide sufficient space for sanitizing.
and tools should be sanitized and a “firewall” between all stage of development is recommended.
procedures should be developed and implemented.
crucial.
Sadly, as we learned last year, monarchs are susceptible to several diseases. Learning how to identify the diseases that commonly afflict monarchs will increase breeding success.
OE is a parasite that uses the caterpillar as its host. It survives as dormant spores on adult monarchs and is spread when the caterpillars eat food contaminated with the OE spores. Adults contaminated with a severe infection of OE will be deformed, and unable to fly. Less infected monarchs will be darker and smaller than expected, and their life expectancy will be very short. TESTING FOR OE IS VERY EASY:
It is reported that up to 80% of monarchs in North America are infected with the OE spores (http://monarchparasites.uga.edu/whatisOE) TO PREVENT THE SPREAD OF OE MONARCHS TESTING POSITIVE SHOULD BE EUTHANIZED
Credit: Dawson College Biology students
The NVP virus attacks the cell structure of the caterpillar, slowly killing it. Signs
infection are sluggishness, discoloration, `loss of appetite, hanging in a “V”. This is a highly contagious virus and testing for the NP virus cannot be performed on live caterpillars. Caterpillars exhibiting signs of infection should be euthanized immediately to prevent the virus from spreading.
Staggering seedling planting will ensure adequate food is available on a continual basis.
should be sanitized in a 10% chlorine solution for five minutes, rinsed, then stored in the refrigerator.
source comes from flowers, a solution of fructose and water can be used as a good alternative.
Photos curtesy Flutterby Gardens
The scale and size of the lab will depend on space available, but should include:
cleaning with chlorine and anti-bacterial wipes.
larvae containers.
When males are 2 days old and females are 5 days old, they are mature enough to pair. They can be encouraged to pair-up by placing their abdomens together. Once the couple separates, the female is ready to lay eggs and should be moved to a separate enclosure. Make sure to provide fresh milkweed for her to lay eggs and nectar-soaked sponges for food.
The next day, the egg-laden milkweed is removed from the enclosure, and more milkweed added if there are
Collecting eggs is not difficult. The eggs can be gently rolled off the leave between your fingers. The leaves can also be soaked in water and dried overnight to make the removal process easier.
Since the tiny emerging larvae will eat the shell of the egg, sanitizing the eggs before they hatch is an extremely important step to kill any bacteria and remove OE spores. Eggs are gently washed in a 5% chorine solution for
twice in fresh water for one minute to remove the chlorine residue. They are then gently painted onto a paper blotter to mature before being transferred to the larvae containers.
Credit: Danyel Verdon
Clear plastic containers with vented lids (”Kritter Keepers”) are used to house the larvae. The containers are lined with clear plastic bags for easy clean up. The containers are stored on the shelves by date and are checked daily. During the larvae stage, two completely different container set-ups are used to address the needs of the ever-changing larvae.
Water tubes are used to keep milkweed fresh. The eggs/newly hatched caterpillars are introduced to milkweed by:
with a sable paint brush, or
(the young caterpillars will find their way onto the leaves). To prevent the tiny critters from escaping through the air vents, cover the container with a piece of paper toweling before replacing the container lid.
The caterpillars are now growing at an astronomical rate and are eating machines. To prepare for the new set up, the water tubes are removed and fresh stalks are inserted into a piece of plastic grating supported by a plastic riser (inverted bowl) at the bottom of the container. Now is the time to count and record the number of
leaves by hand or by entwining stalks of milkweed together for them to find their way to the fresh milkweed.
When the caterpillars pupate, the chrysalises are removed from the lid to an open container. It is not necessary to hang chrysalises; however, it is an
When the chrysalises begin to darken, they should be removed to a mesh pop up enclosure to allow the newly eclosed monarchs to crawl up to dry their wings. Testing for OE should be done before the monarchs are released or used for breeding.
Photos curtesy Flutterby Gardens
and released within 2 days
eclosing.
the Monarch Watch Organization (http://shop.monarchwatch.org/cate gory/Tagging-Monarchs)