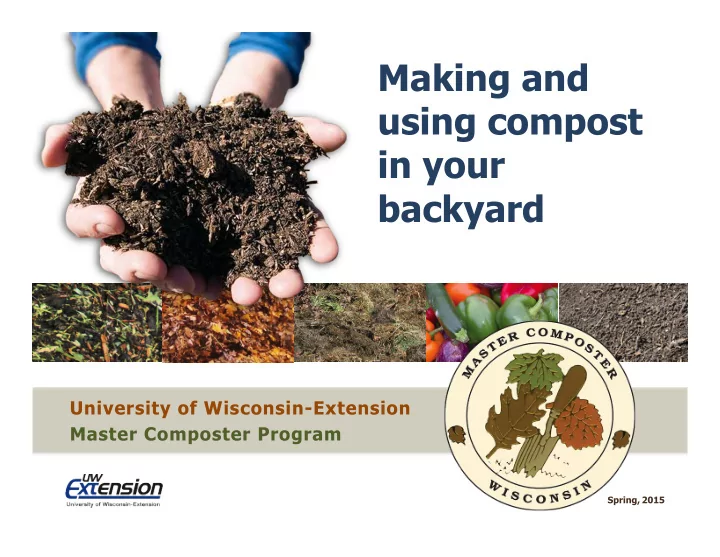
Making and using compost in your backyard University of - - PowerPoint PPT Presentation

making and using compost in your backyard
SMART_READER_LITE
LIVE PREVIEW

Making and using compost in your backyard University of - - PowerPoint PPT Presentation

Making and using compost in your backyard University of Wisconsin-Extension Master Composter Program Spring, 2015 What is composting? Controlling the natural process of decay to transform organic wastes into a valuable soil amendment


slide-1
SLIDE 1

Making and using compost in your backyard

University of Wisconsin-Extension Master Composter Program

Spring, 2015

slide-2
SLIDE 2

What is composting?

Controlling the natural process of decay to transform organic wastes into a valuable soil amendment called compost.

2

slide-3
SLIDE 3

Why compost?

Waste management

  • Yard waste banned from landfills
  • Encourages responsibility for your waste
  • Reduces need for municipal collection

Finished Compost

  • Valuable soil amendment
  • Healthy soil leads to healthy plants
  • Save $

3

slide-4
SLIDE 4

Benefits of adding compost to soil

  • Supplies organic

matter

  • “Lightens” heavy soils
  • Improves moisture

retention in sandy soils

  • Contains humus –

“soil glue”

  • Improves soil structure

4

slide-5
SLIDE 5

Benefits of adding compost to soil

  • Encourages vigorous root growth
  • Allows plants to more efficiently utilize nutrients
  • Enables soils to retain nutrients
  • Buffers soil pH
  • Supplies beneficial

microorganisms

  • Feeds soil life

5

slide-6
SLIDE 6

How is compost made?

Natural process: Biological decomposition of organic matter in the presence of oxygen Human influenced: We can speed up or slow down the process

6

slide-7
SLIDE 7

Microbes do the work

  • Bacteria (including actinomycetes) and fungi
  • Chemical decomposers – enzymes
  • Found in:
  • Soil
  • Leaves
  • Food scraps
  • Manure
  • Finished

compost

Are compost starters needed?

7

slide-8
SLIDE 8

One teaspoon of good garden soil to which compost has been added may contain:

  • 100 million

bacteria

  • 800 feet
  • f fungal

threads

8

slide-9
SLIDE 9

Macroorganisms

9

slide-10
SLIDE 10

Needs for the composting process

COMPOST

O X Y G E N F O O D W A T E R

10

slide-11
SLIDE 11

Acceptable materials –

“food for decomposers”

  • Leaves, grass clippings and yard debris
  • Kitchen scraps: vegetable and fruit peels,

coffee grounds and egg shells

  • Used potting soil
  • Paper and cardboard
  • Manure from herbivores
  • Most weeds and garden debris
  • Sawdust, hay and straw
  • Hair, fur and other natural fibers

+ + =

11

slide-12
SLIDE 12

Compost pile “food” to avoid

  • Persistent weeds: crabgrass and quackgrass,

invasive species and weeds gone to seed

  • Meat, dairy and oils
  • Cat or dog waste
  • Diseased plants
  • Lime and ashes
  • Treated lumber or sawdust

12

slide-13
SLIDE 13

Plant materials treated with pesticides

  • Some pesticides can be persistent
  • Some survive the

composting process

  • Can damage other

plants

13

slide-14
SLIDE 14

Materials with special needs

These require additional consideration

  • r limited volume added
  • Pine needles
  • Walnut leaves
  • Sod

14

slide-15
SLIDE 15

Organisms need a balanced diet

– Carbon (C) and Nitrogen (N) –

Composting will be most rapid if the decomposers are fed a diet of carbon-rich and nitrogen-rich materials

  • Carbon-rich materials are known as “browns”
  • Nitrogen-rich materials are known as “greens”

Rule-of-thumb is 2-3 browns for every green by volume

+

15

slide-16
SLIDE 16

Effects of Carbon:Nitrogen ratios

  • n composting

16

slide-17
SLIDE 17

BROWNS GREENS Leaves Straw Paper Sawdust Animal bedding mixed with manure Grass clippings Vegetable scraps Coffee grounds Manure

  • Cow
  • Horse
  • Poultry
  • Rabbit

17

slide-18
SLIDE 18

BROWNS GREENS

  • Decay very slowly
  • Coarse browns

keep pile aerated

  • Tend to accumulate

in fall

  • May need to

stockpile until can be mixed with greens

  • Decay rapidly
  • Aerate poorly – may

have foul odors if composted alone

  • Tend to accumulate

in spring and summer

  • Supply nitrogen
  • Best composting

when mixed with browns

18

slide-19
SLIDE 19

Materials high in carbon break down slowly

  • High C:N – 30:1 and higher amounts of C

Diet, continued

Materials that are too rich in nitrogen can lead to anaerobic conditions in the compost pile

  • Low C:N – less than 25:1

19

slide-20
SLIDE 20

A final thought on C:N ratio

Mix two

  • r three

volumes BROWN to one of GREEN

20

slide-21
SLIDE 21

A pile starved for air will become anoxic

  • r even anerobic
  • Oxygen acids and amines

(stinky compounds)

  • Aerobic activity stops

Oxygen

Compost pile is

  • ut-of-balance
  • Food or water out-of-balance

(low C:N ratio or pile is too wet)

  • Too many greens

Three types of venting

21

slide-22
SLIDE 22

Smaller particles have a greater surface area Some larger particles are needed to maintain air flow Particles create pore space within the pile A compacted pile lacks the needed pore space

Particle size

22

slide-23
SLIDE 23

Vital to support compost pile organisms

Water

“Damp as well as wrung-out sponge” 40% to 60% moisture

23

slide-24
SLIDE 24

90˚– 140˚ is optimal Temperatures above 130˚ can kill pathogens and weed seeds Excessive temps (greater than 160˚) can kill beneficial organisms

Temperature

24

slide-25
SLIDE 25

Good compost can be made in a pile that never gets hot, but

  • Decay will be slower
  • Not enough air, too little water or too many browns in

the mix could all keep a pile from heating

Does my compost have to get hot?

High pile temperature provides the benefit of

  • The most rapid composting
  • Killing pathogenic (disease causing) organisms
  • Killing weed seeds

25

slide-26
SLIDE 26

Pile should be about 1 cubic yard to maintain temperature

  • under 1 cubic yard is generally too small to reach

temperatures above 130˚F

Pile size

Larger piles (greater than 3 cubic yards)

  • May prove difficult to turn
  • Lack oxygen in pile center

26

slide-27
SLIDE 27

Hot piles

  • Process takes about three months
  • Plan ahead
  • Store brown

Choosing a compost strategy

Cool piles

  • Process takes
  • ne-half to two years
  • Add materials as

they accumulate

  • Less effort

INPUTS = OUTPUTS

27

slide-28
SLIDE 28

Pile built all at one time Pile must be tended

  • ften

Compost in about 12 weeks Benefits:

  • Faster than cool method
  • Reduces weed seeds

Hot compost pile

Lambsquarter seeds

1mm

28

slide-29
SLIDE 29

Hot compost pile

Mix 2-3 volumes of BROWNS to 1 of GREENS Water as you add materials Turn pile:

  • Weekly for first 4-6 weeks
  • Bi-weekly for next 4-6 weeks
  • Let cure (let stand without turning)

for 4 weeks after pile begins to cool

29

slide-30
SLIDE 30

Pile built as materials accumulate Less intensive management 6 months to 2 years Good method for kitchen scraps Keep browns handy to cover

  • Leaves

Cool and easy composting

  • Straw

30

slide-31
SLIDE 31

Mix materials from outside to middle Open pore space Use garden fork

  • r shovel

Add water if needed Commercial turning (mixing) tools for compost are available

Pile turning tips

31

slide-32
SLIDE 32

Composting does not require a bin, but be sure to select a method that will work for you

  • Compost heap, pile, trench and sheet may have

aesthetic concerns

  • Bins can be home-built
  • r manufactured

To bin or not to bin

32

slide-33
SLIDE 33

Examples of home-built bins

Concrete Block Three-Bay Wood/Wire Wood Pallets Wire Mesh All-Wood

33

slide-34
SLIDE 34

Examples of commercial bins

Orb Home Composter Tumbler

34

slide-35
SLIDE 35

Near where the compost will be used Two feet or more from buildings Good drainage Away from wells Be a good neighbor Check local

  • rdinances

Bin or pile location

35

slide-36
SLIDE 36

Nothing is happening!

  • Pile is too dry
  • Not enough “greens”

My pile stinks!

  • Too wet
  • Excess “greens”
  • Pile compacted

Pests

Troubleshooting

36

slide-37
SLIDE 37

Gardens, flower beds, lawns and houseplants

  • Clay soils – improves

drainage and tilth

  • Sandy soils – increases

moisture holding

  • All soils – improves

soil structure

  • All soils – adds nutrients:

nitrogen, phosphorus, potassium and micronutrients

Using compost

37

slide-38
SLIDE 38

When the composting process should be finished

Finished is also known as “mature”

  • r “stable” compost

Compost is dark, loose and crumbly Organic materials are unrecognizable Ambient temperature

38

slide-39
SLIDE 39

Germination test

  • Will seed germinate in compost?
  • Good test if using

for potting soil

Bag test

  • Seal compost in a

plastic bag for 5-7 days

  • Should produce

no foul odor

Simple test for mature compost

39

slide-40
SLIDE 40

Compost use continued

Unfinished compost can pull nutrients from the soil where it is placed Compost can be screened

  • Removes larger

particles

  • Necessary if used

for top dressing

40

slide-41
SLIDE 41

Compost application rates

2 inches mixed into top 6 to 8 inches of soil Side-dress or mulch: 1-3 inches Top-dress lawns: up to ½ inch screen compost

Spreading compost on the Wisconsin State Capitol lawn

41

slide-42
SLIDE 42

Composting key points

ü Balanced diet ü Keep pile damp ü Turn pile when you need to

42

slide-43
SLIDE 43

University of Wisconsin-Extension – Master Composter Program

joseph.vanrossum@ces.uwex.edu

This presentation was developed by Joe Van Rossum, University of Wisconsin–Extension, for use in Wisconsin’s Master Composter program.

Photos and illustrations courtesy of: Joe Van Rossum, Penn State Cooperative Extension, UW-Madison CALS, USDA-NRCS, Ken Chamberlain/OSU/bugwood.org, Kevin Erb, Jeffrey J. Strobel, Jeff Miller, Kevin Schoessow, and David Parsons/NREL.