
SLIDE 1
LEXION 8800 - 6800 CEBIS and CEMOS Training Guide 2020 CEBIS Guide - - PowerPoint PPT Presentation
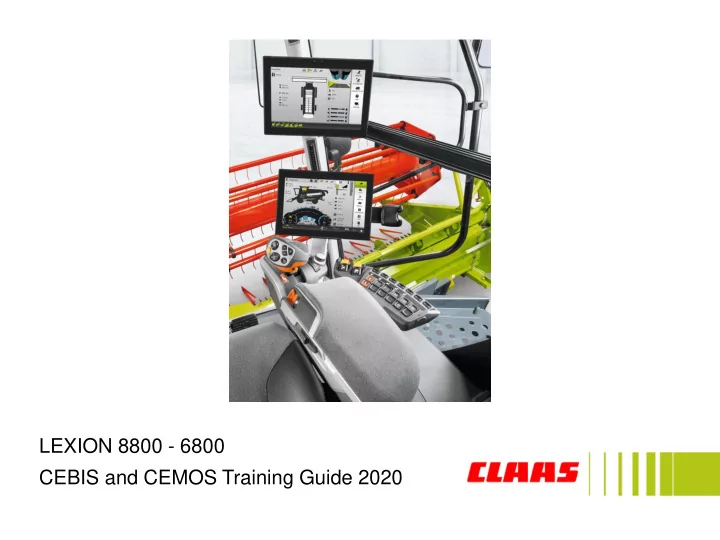
LEXION 8800 - 6800 CEBIS and CEMOS Training Guide 2020 CEBIS Guide Company: CLAAS of America Inc. Address: 8401 South 132nd Street Omaha, NE 68138 Phone: 402-861-1000 Fax: 402-861-1003 Website: www.claas.com Images and content are
2 CLAAS of America Inc. | 2020 CEBIS and CEMOS Training Guide
3 CLAAS of America Inc. | 2020 CEBIS and CEMOS Training Guide
4 CLAAS of America Inc. | 2020 CEBIS and CEMOS Training Guide
5
6 1 5 2 3 4
Feature: 1. Ignition 2. 12 V socket, 2 pin 3. 12 V socket, +15 A 4. 12 V socket, +30 A 5. Diagnosis socket 6. USB interface
CLAAS of America Inc. | 2020 CEBIS and CEMOS Training Guide
6
1 2
Green indicates light is on
3
Procedure:
lights on
position
CLAAS of America Inc. | 2020 CEBIS and CEMOS Training Guide
7
1 2 3 4 5 6 7 6 8 9 10 11 12 13
CLAAS of America Inc. | 2020 CEBIS and CEMOS Training Guide
Feature: 1. CMOTION ground speed control lever 2. CEBIS control panel 3. Settings adjustment 4. Diesel engine speed switch 5. Radio and phone control panel
8 CLAAS of America Inc. | 2020 CEBIS and CEMOS Training Guide
9
1 2 3
directly
4 5 6 7 8 9 10
Feature:
CLAAS of America Inc. | 2020 CEBIS and CEMOS Training Guide
10
1 2 3 4 6 5 7 12 11 10 9 8 13
C8x CMOTION handle
TOUCH functions Feature:
CLAAS of America Inc. | 2020 CEBIS and CEMOS Training Guide
11
Procedure:
DO NOT APPLY SERVICE BRAKE
CLAAS of America Inc. | 2020 CEBIS and CEMOS Training Guide
12
Switching Road Travel switch to Road Travel Procedure: 1. Push the Road Travel switch (1) down Switching Road Travel switch to Fieldwork Procedure: 1. Unlock the Road Travel switch (1) and push up on black tab and rock switch forward
CLAAS of America Inc. | 2020 CEBIS and CEMOS Training Guide
13
Processor Procedure:
Feederhouse Procedure:
CLAAS of America Inc. | 2020 CEBIS and CEMOS Training Guide
Procedure:
the Front attachment button (2) forward
14 CLAAS of America Inc. | 2020 CEBIS and CEMOS Training Guide
15
2 1 2 3 4
HOTKEY buttons (2) are pressed.
the CMOTION handle
5 6
Feature:
CLAAS of America Inc. | 2020 CEBIS and CEMOS Training Guide
16
1 2 3 4 5 6 7 8 Feature:
CLAAS of America Inc. | 2020 CEBIS and CEMOS Training Guide
17
1 2 3 4 5 6 7 8 9 13 15 16 10 14 11 Feature:
12
CLAAS of America Inc. | 2020 CEBIS and CEMOS Training Guide
18
Main Menu Layout
information
adjustments
Moisture, GRAIN QUALITY CAMERA
lubrication system, Programming operations, Vehicle and engine diagnosis, Alarm lists 9. Settings: Basic machine settings
CLAAS of America Inc. | 2020 CEBIS and CEMOS Training Guide
19
Changing a settings value Procedure:
settings circle
settings circle
settings circle and triangle will move to that position
down
CLAAS of America Inc. | 2020 CEBIS and CEMOS Training Guide
Procedure:
the progress bar (2)
button on the console
20 CLAAS of America Inc. | 2020 CEBIS and CEMOS Training Guide
21 CLAAS of America Inc. | 2020 CEBIS and CEMOS Training Guide
When to perform: as needed Navigate to: Settings (1) / Basic settings (2) / Language (3)
language
display units of measure
CLAAS of America Inc. | 2020 CEBIS and CEMOS Training Guide 22
1 2 3
When to perform: as needed Navigate to: Settings (1) / Display settings (2) Procedure:
adjustment
CLAAS of America Inc. | 2020 CEBIS and CEMOS Training Guide 23
When to perform: as needed Navigate to: Settings (1) / Camera input 1 (2) Procedure:
appear in the Camera input 1 display window
appear in the Camera input 2 display window
CEBIS CAN ONLY HAVE TWO CAMERA INPUTS
24
1 2 3
CLAAS of America Inc. | 2020 CEBIS and CEMOS Training Guide
When to perform: as needed Navigate to: Settings / User-defined display / 1st line Procedure:
25
1 2
CLAAS of America Inc. | 2020 CEBIS and CEMOS Training Guide
When to perform: as needed Navigate to: Setting (1) / User Type (2) / Select Type (3) Beginner: Prohibits the operator from making adjustments to the machine Normal: Allows the operator to make basic machine adjustments Expert (RECOMMENDED): Allows the operator full access to all machine functions
26
1 2 3 4
CLAAS of America Inc. | 2020 CEBIS and CEMOS Training Guide
27
When to perform: as needed Navigate to: Settings (1) / Favorite Management (2) / Assignment (3) Procedure:
using CEBIS touchscreen or CEBIS dial
CLAAS of America Inc. | 2020 CEBIS and CEMOS Training Guide
28 CLAAS of America Inc. | 2020 CEBIS and CEMOS Training Guide
When to perform: at the start of harvest Navigate to: Drive (1) / Diesel engine (2) / Max engine speed (3) Procedure:
teaching-in operation
29
1 2 3
CLAAS of America Inc. | 2020 CEBIS and CEMOS Training Guide
When to perform: at the start of harvest or after servicing Navigate to: Machine (1) / Speeds (2) Procedure:
Perform engine speed calibration (Step 1) first followed by belt speed calibration (Step 2)
30
1 2 3
CLAAS of America Inc. | 2020 CEBIS and CEMOS Training Guide
When to perform: at the start of harvest, after a sieve change or reconnecting a sieve motor Navigate to: Machine (1) / Cleaning (2) / Sieve type Procedure:
31
1 2 3
CLAAS of America Inc. | 2020 CEBIS and CEMOS Training Guide
When to perform: at the start of harvest, when changing crops Navigate to: Machine (1) / Cleaning (2) / Returns volume limit (B) Procedure:
limit
CLAAS of America Inc. | 2020 CEBIS and CEMOS Training Guide 32
When to perform: when changing to a new crop type Navigate to: Crop (1) / Crop data (2) / Select crop data (3) Procedure: 1. Start engine, engage processor and throttle to high 2. Select a crop type from the crop menu 3. Press to start loading crop settings 4. Green circles appear once crop has been loaded, If there is an error when loading crop settings, a red circle will appear
33
1 2 3
CLAAS of America Inc. | 2020 CEBIS and CEMOS Training Guide
When to perform: as needed Navigate to: Crop (1) / Crop data (2) Procedure:
settings
34 CLAAS of America Inc. | 2020 CEBIS and CEMOS Training Guide
When to perform: as needed Navigate to: Crop (1) / Crop data (2) / Favorites (3) Procedure:
select it
Selecting crop favorites from Harvest Screen:
35
1 1 2 2 3
CLAAS of America Inc. | 2020 CEBIS and CEMOS Training Guide
36
1 2 B
When to perform: after every header change (except for CONVIO which saves first calibration) Navigate to: Header (1) / learning processes of header (2) Procedure:
throttle to full
procedures
CLAAS of America Inc. | 2020 CEBIS and CEMOS Training Guide
When to perform: beginning of harvest (each crop type) and periodically throughout harvest to confirm accuracy Navigate to: Crop (1) / QUANTIMETER (2) Procedure: Zero calibration:
Teaching-in (wait for message to confirm calibration has completed) Calibrating yield sensor:
tank minimum)
Weight of crop size will appear underneath combine icon
weight in the cart icon (4). Press weight and grain pile icon to type in weight
appear in the calibration factor button
type settings
37
1 2 3
CLAAS of America Inc. | 2020 CEBIS and CEMOS Training Guide
When to perform: as needed Navigate to: AUTOMATIC (1) / AUTOMATIC (2) Procedure:
sensitivity
38
1 2 3 5
CLAAS of America Inc. | 2020 CEBIS and CEMOS Training Guide
4
When to perform: as needed Navigate to: Machine (1) / Straw and chaff processing (2) Procedure:
screen commands
39
1 2 3 4 5 6
CLAAS of America Inc. | 2020 CEBIS and CEMOS Training Guide
When to perform: as needed Navigate to: Machine (1) / Threshing mechanism (2) / Threshing cylinder reduction gearbox (3) Procedure:
40
CLAAS of America Inc. | 2020 CEBIS and CEMOS Training Guide
High speed Low speed
When to perform: as needed Navigate to: Machine (1) / Threshing mechanism (2) Procedure:
disengage
concave threshing flap
41 CLAAS of America Inc. | 2020 CEBIS and CEMOS Training Guide
When to perform: at specified intervals Navigate to: Service (1) / Programming operations (2) Procedure:
finished
42
1 2 3 4
CLAAS of America Inc. | 2020 CEBIS and CEMOS Training Guide
43 CLAAS of America Inc. | 2020 CEBIS and CEMOS Training Guide
44
When to perform: after every header change (except for CONVIO) Navigate to: Header (1) / Header specification (2) Procedure:
3 4
CLAAS of America Inc. | 2020 CEBIS and CEMOS Training Guide
When to perform: after every header change (except for CONVIO) Navigate to: Header (1) / Header specification (2) Procedure:
45 CLAAS of America Inc. | 2020 CEBIS and CEMOS Training Guide
When to perform: as needed Navigate to: Header (1) / Automatic header functions (2) Procedure:
(AUTO CONTOUR)
46 CLAAS of America Inc. | 2020 CEBIS and CEMOS Training Guide
When to perform: as needed Navigate to: Header (1) / Settings on the header (2) Procedure:
speed (3)
CENTER BELT SPEED RUNS FASTER THAN SIDE BELT SPEED TO ENSURE SMOOTH FEEDING
47 CLAAS of America Inc. | 2020 CEBIS and CEMOS Training Guide
When to perform: as needed Navigate to: Header (1) / Settings on the header (2) Procedure:
SIDE BELT SPEED RUNS SLOWER THAN CENTER BELT SPEED TO ENSURE SMOOTH FEEDING
48 CLAAS of America Inc. | 2020 CEBIS and CEMOS Training Guide
When to perform: as needed Navigate to: Header (1) / Settings on the header (2) Procedure:
PSI range is from 653 – 1305 Lower PSI means higher cutter bar ground pressure Higher PSI means lower cutter bar ground pressure
49 CLAAS of America Inc. | 2020 CEBIS and CEMOS Training Guide
When to perform: as needed Navigate to: Header (1) / Header specifications (2) / Draper belt slip limits (3) Procedure:
50 CLAAS of America Inc. | 2020 CEBIS and CEMOS Training Guide
When to perform: as needed Navigate to: Header (1) / Header specifications (2) / Cross auger (3) Procedure:
TURNING CANOLA CROSS AUGERS ON/OFF WILL ALSO TURN SIDE KNIVES ON/OFF IF EQUIPPED
51 CLAAS of America Inc. | 2020 CEBIS and CEMOS Training Guide
When to perform: when changing crops or as needed Navigate to: Header (1) / Header specifications (2) / AUTO CONTOUR operation mode (3) Select:
setting
(standing) and flex (lodged) modes using pre-set cutting heights button on the CMOTION handle
AUTO CONTOUR ground pressure
52 CLAAS of America Inc. | 2020 CEBIS and CEMOS Training Guide
When to perform: when changing header or as needed Navigate to: Header (1) / Header specifications (2) / AUTO CONTOUR sensitivity (3) Procedure:
HIGHER SENSITIVITY MEANS SYSTEM WILL REACT FASTER TO CHANGING TERRAIN
53 CLAAS of America Inc. | 2020 CEBIS and CEMOS Training Guide
58
This setup guide is a supplement to the CEBIS guide. For information on how to navigate CEBIS and how to set up other features please refer to the CEBIS and controls guide. This setup guide is not a substitute for the Operator’s Manual. Further information concerning CRUISE PILOT and CEMOS is available in the Combine Operator’s Manual and CEBIS MOBILE Operator’s Manual.
CLAAS of America Inc. | 2020 CEBIS and CEMOS Training Guide
59
CRUISE PILOT Machine controls speed based on throughput, grain loss, or engine load AUTO THRESHING Machine automatically adjusts threshing cylinder speed and concave clearance AUTO SEPARATION Machine automatically adjusts rotor speed and rotor cover flaps AUTO CLEANING Machine automatically adjusts upper and lower sieve opening and fan speed GRAIN QUALITY CAMERA Camera for viewing non-grain material and cracked grain in the grain tank 4D CLEANING System using rotor cover flaps to compensate for side slopes AUTO SLOPE System using 3D sieve functions to compensate for fore and aft slopes AUTO CROP FLOW Automatic throughput control using cruise pilot sensors for overload protection of the machine
CLAAS of America Inc. | 2020 CEBIS and CEMOS Training Guide
60 CLAAS of America Inc. | 2020 CEBIS and CEMOS Training Guide
When to perform: at the start of harvest, ensure “on” is selected to utilize CRUISE PILOT features Navigate to: CRUISE PILOT (1) / ON - OFF (2) / ON - OFF (3) Procedure:
61 CLAAS of America Inc. | 2020 CEBIS and CEMOS Training Guide
When to perform: after master switch is switched on, change if different driving strategy is desired Navigate to: CRUISE PILOT (1) / Settings (2) / Setting the strategy (3) Procedure: Choose one of the following option:
speed to maintain a constant throughput based on the crop thickness measured in the feederhouse
(recommended): Automatically adjusts ground speed to maintain a constant throughput (bu/hr), while maintaining acceptable grain loss within the limits of the loss monitor
62 CLAAS of America Inc. | 2020 CEBIS and CEMOS Training Guide
When to perform: after an extended period of inactivity and periodically throughout the day, as conditions change Navigate to: CRUISE PILOT (1) / Settings (2) / Start teach- in operation (3) Procedure:
at this time)
63 CLAAS of America Inc. | 2020 CEBIS and CEMOS Training Guide
When to perform: after selecting cruise control strategy Navigate to: CRUISE PILOT (1) / Settings (2) / Set target speed (3) Procedure: Set desired speed to be maintained when operating in cruise control strategy
64 CLAAS of America Inc. | 2020 CEBIS and CEMOS Training Guide
When to perform: after selecting either constant throughput or maximum throughput with grain loss sensing Navigate to: CRUISE PILOT (1) / Settings (2) / Target throughput (3) Procedure: Set desired throughput level to be maintained when
Manual setting:
HOTKEY or enter the value on the settings dial
Automatic setting:
MOTION handle to set new value (hold for three seconds until it beeps)
the value until desired throughput is reached
65 CLAAS of America Inc. | 2020 CEBIS and CEMOS Training Guide
When to perform: after selecting desired strategy Navigate to: CRUISE PILOT (1) / Settings (2) / Maximum speed (3) Procedure: Set the maximum ground speed limit for use when little to no crop is in the feederhouse (example: headlands and areas of light crop or no crop)
speed)
66 CLAAS of America Inc. | 2020 CEBIS and CEMOS Training Guide
When to perform: after selecting desired strategy Navigate to: CRUISE PILOT (1) / Settings (2) / Sensitivity (3) Procedure: Change how quickly the machine responds to changing field conditions when operating with CRUISE PILOT
The more aggressive the setting, the faster the response
67 CLAAS of America Inc. | 2020 CEBIS and CEMOS Training Guide
When to perform: after selecting desired strategy Navigate to: CRUISE PILOT (1) / Settings (2) / Unloading mode (3) Procedure:
constant while unloading on-the-go
resume selected strategy
resume
turned off, the selected strategy will resume after 30 seconds
68 CLAAS of America Inc. | 2020 CEBIS and CEMOS Training Guide
When to perform: after selecting desired strategy Navigate to: CRUISE PILOT (1) / Settings (2) / Engine load (3) Procedure:
PILOT is engaged
69 CLAAS of America Inc. | 2020 CEBIS and CEMOS Training Guide
70 CLAAS of America Inc. | 2020 CEBIS and CEMOS Training Guide
When to perform: beginning of harvest (each crop type) and periodically throughout harvest to confirm accuracy Navigate to: Crop (1) / QUANTIMETER (2) Procedure: Zero calibration:
Teaching-in (wait for message to confirm calibration has completed) Calibrating yield sensor:
tank minimum)
Weight of crop size will appear underneath combine icon
weight in the cart icon (4). Press weight and grain pile icon to type in weight
appear in the calibration factor button
type settings
71
1 2 3
CLAAS of America Inc. | 2020 CEBIS and CEMOS Training Guide
72 CLAAS of America Inc. | 2020 CEBIS and CEMOS Training Guide
When to perform: initial CEMOS AUTOMATIC set up Navigate to: AUTOMATIC (1) / AUTOMATIC (2) Procedure: Press each button to turn on:
73 CLAAS of America Inc. | 2020 CEBIS and CEMOS Training Guide
When to perform: initial CEMOS AUTOMATIC set up Navigate to: AUTOMATIC (1) / Settings (2) Procedure:
74 CLAAS of America Inc. | 2020 CEBIS and CEMOS Training Guide
75
When to perform: initial CEMOS AUTOMATIC setup, change if different combine performance is desired Navigate to:
CLAAS of America Inc. | 2020 CEBIS and CEMOS Training Guide
Gentle threshing Increase throughput Improve threshing Increase throughput Improve grain cleanliness Increase throughput Improve chop quality Reduce fuel consumption Improve straw quality Increase throughput
76 CLAAS of America Inc. | 2020 CEBIS and CEMOS Training Guide
settings
displays machine functions and camera options
Help, Settings
77 CLAAS of America Inc. | 2020 CEBIS and CEMOS Training Guide
menu
function details
under the function details
selected function menu item
78 CLAAS of America Inc. | 2020 CEBIS and CEMOS Training Guide
camera on the main display
here
79 CLAAS of America Inc. | 2020 CEBIS and CEMOS Training Guide
DIALOG threshing optimization suggestions
separation optimization suggestions
CEMOS DIALOG chopping optimization suggestions
and make optimization adjustments
CLAAS of America Inc. | 2020 CEBIS and CEMOS Training Guide 80
adjustments
wind compensation
spreader settings
81 CLAAS of America Inc. | 2020 CEBIS and CEMOS Training Guide
When to perform: beginning of initial CEMOS AUTOMATIC set up, will retain selection after machine reset Navigate to: DIALOG (1) / Settings (2) Procedure:
CEMOS AUTOMATIC
Needs to be on for CEMOS AUTOMATIC to function
82 CLAAS of America Inc. | 2020 CEBIS and CEMOS Training Guide
When to perform: after master switch is switched on, change strategy if different driving mode is desired Navigate to: DIALOG (1) / Condition (2)
(most aggressive)
83 CLAAS of America Inc. | 2020 CEBIS and CEMOS Training Guide
When to perform: after machine reset, ensure machine equipment matches machine configuration Navigate to: DIALOG (1) / Condition (2) Procedure:
the APS grates
84 CLAAS of America Inc. | 2020 CEBIS and CEMOS Training Guide
When to perform: initial CEMOS AUTOMATIC set up Navigate to: AUTOMATIC (1) / AUTOMATIC (2) Procedure: Press each button to turn on:
85 CLAAS of America Inc. | 2020 CEBIS and CEMOS Training Guide
86
When to perform: initial CEMOS AUTOMATIC setup, change if different combine performance is desired Navigate to:
CLAAS of America Inc. | 2020 CEBIS and CEMOS Training Guide
Gentle threshing Increase throughput Improve threshing Increase throughput Improve grain cleanliness Increase throughput Improve chop quality Reduce fuel consumption Improve straw quality Increase throughput
87 CLAAS of America Inc. | 2020 CEBIS and CEMOS Training Guide
When to perform: as needed Navigate to: DIALOG (1) / Start optimization (2) Procedure:
solution
88 CLAAS of America Inc. | 2020 CEBIS and CEMOS Training Guide
When to perform: at the start of harvest, whenever AUTO THRESHING is in use Navigate to: AUTOMATIC (1) / Settings (2) Procedure:
CLAAS of America Inc. | 2020 CEBIS and CEMOS Training Guide 89
When to perform: At the start of harvest; when changing crops Procedure:
MOBILE secondary display
reached in the grain tank (cracked grain appears with a purple outline on GRAIN QUALITY CAMERA)
between 50% and 60%. Touch dial to change sensitivity. Adjust sensitivity incrementally until the desired level is reached
tank and the displayed fill amount is low, increase sensitivity until display fill amount is higher.
tank and the displayed fill amount is high, decrease sensitivity until display fill amount is lower.
90 CLAAS of America Inc. | 2020 CEBIS and CEMOS Training Guide
When to perform: At the start of harvest; when changing crops Procedure:
MOBILE secondary display
reached in the grain tank (non grain material appears with a purple outline on GRAIN QUALITY CAMERA)
between 50% and 60%. Touch dial to change sensitivity. Adjust sensitivity incrementally until the desired level is reached
grain tank and the displayed fill amount is low, increase sensitivity until display fill amount is higher.
grain tank and the displayed fill amount is high, decrease sensitivity until display fill amount is lower.
CLAAS of America Inc. | 2020 CEBIS and CEMOS Training Guide 91