SLIDE 1
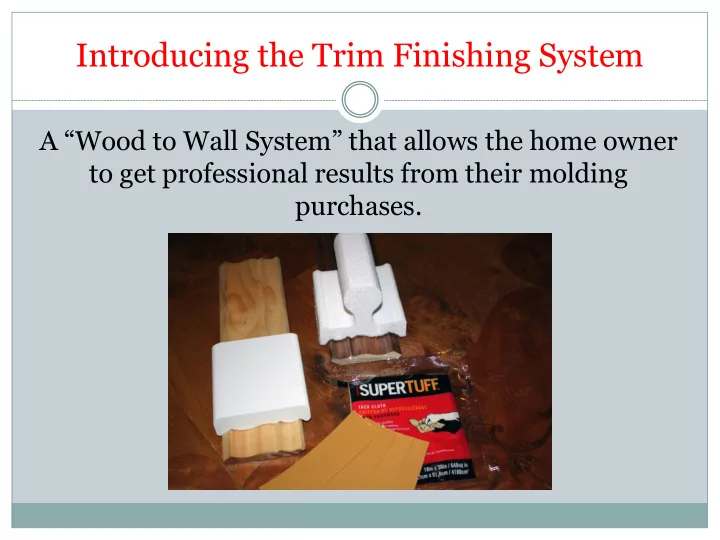
Introducing the Trim Finishing System
A “Wood to Wall System” that allows the home owner to get professional results from their molding purchases.
SLIDE 2
Molding
New molding can improve the look of any house. Several large big box stores sell more than 1,500,000 feet of molding per month along with paint and other sundries. For this molding to look right you must take several steps in preparing this molding to take it’s finish.
1) Sanding to remove knife marks and imperfections and to prepare the
surface for paint or stain.
2) Sanding scarf joints and nail patches. 3) Cleaning to remove any dust left from sanding 4) Applying the stain/paint smoothly and evenly.
How do we accomplish this?
SLIDE 3
The Trim Finishing System
The System Includes: 1) Trim Sander 2) Trim Painter 3) Tack Cloth 4) Coarse and Fine Sandpaper Strips 11
SLIDE 4 Trim Sander: Addressing the problem
Without sanding your trim will show knife marks from
- manufacturing. Sanding with the Trim Sander creates a quality
finish. Stained straight from the lumber yard Stained after using the TRIM SANDER
Both samples are from the same piece of molding with same finish!
SLIDE 5
Trim Sander: Competitors products
Sponges are slow at sanding and will change the molding shape. Not able to get into tight places. May leave “finger prints” in pattern.
SLIDE 6
Sanding Sponges
Very difficult to sand intricate designs Can be hard on the hands
SLIDE 7
Mop or power sanding
Expensive, dangerous, dirty especially for DIY’ers doing a single room or house. Mop sanders will distort the trim’s profile.
SLIDE 8
Trim Sander: The Solution
Form fitting to the molding and comfortable in your hand. The Trim Sander quickly sands all parts of your molding without changing it’s shape. Creating beautiful trim ready to accept stain or paint!
SLIDE 9
Trim Sander: Instructions
The Trim Sander is cut to the molding standard
shape however, during manufacturing, variances in the molding can occur. To accommodate these variances you may need to “lap” the Trim Sander into shape.
Lapping the Trim Sander is accomplished in 2 quick
steps.
By doing this first you will have a perfect fit!
SLIDE 10
Trim Sander: Lapping
1) Place the coarse sand paper on your molding as shown. TIP: The use of a putty knife can help you get the paper into the tight areas!
SLIDE 11 Trim Sander: Lapping
2) Simply sand the Trim Sander into shape by pushing it back and forth across the sand paper. TIP: A light pencil mark across the Trim Sander tracks and simply sand till it
have a perfect fit.
SLIDE 12 Trim Sander: Sanding the Molding
Place 2 pieces of sand paper (coarse
Trim Sander’s tracks. The use of a putty knife can be helpful in this process.
SLIDE 13
Trim Sander: Sanding
This Trim Sander is ready to go to work. A simple back and forth action will now sand your molding perfectly. Switch to fine grit for an even more professional look.
SLIDE 14
Trim Sander
The patent pending Trim Sander is machined to the specific shape of each of the top selling molding designs. It comes with easily replaceable coarse and fine grit sandpaper. Just 12 shapes will cover nearly 50 percent of the molding sold.
SLIDE 15
Cleaning the Surface
After sanding the trim, wipe it down with a cloth. Next remove the sanding strips from the Trim Sander and replace with the tack cloth. Simply rub across the molding. This will remove all dust debris in the tightest of areas and leave the molding ready to accept it’s finishing coats. This is a very simple step but is important for the best possible results. Since the molding is being cleaned with the same tool it was sanded with you will have a perfect match for all the contours. Just one pass back and forth will give great results.
SLIDE 16
Painting or Staining
Pad painters are one of the quickest and smoothest ways to apply a finish. But how do you use one on uneven molding? The Trim Finishing System includes a Trim Painter shaped, flocked and ready to finish your project. Matched to the exact shape of your Trim Sander the Trim Painter will match your trim and help smooth out lines, remove bubbles and give a great appearance to your finished project. Easily cleaned and reusable while giving quick, professional results! For not much more than the price of a single stick of molding you get all these great benefits.
SLIDE 17 Finish the project with the Trim Finishing System
Fast, easy results from a product made in the U.S.A.
Patent in USA and
countries