Experience the Difference 2017 DECRA Villa Tile Panel Detail 2017 - - PowerPoint PPT Presentation

experience the difference
SMART_READER_LITE
LIVE PREVIEW

Experience the Difference 2017 DECRA Villa Tile Panel Detail 2017 - - PowerPoint PPT Presentation

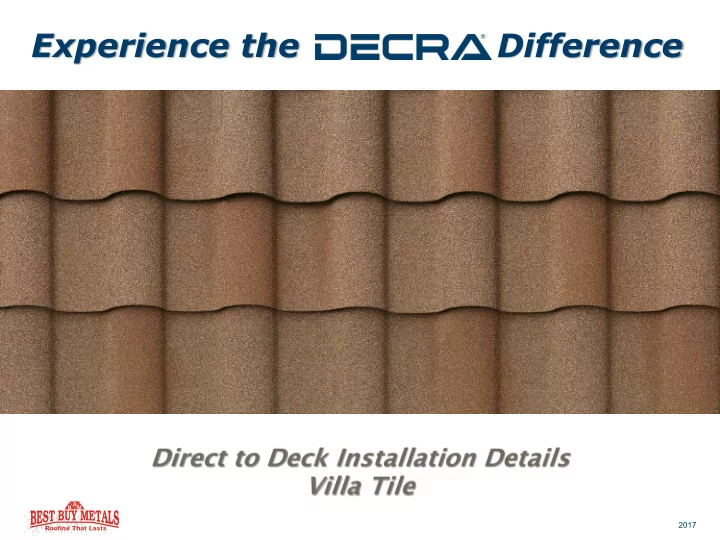
Experience the Difference 2017 DECRA Villa Tile Panel Detail 2017 DECRA Villa Tile Roof Detail Villa Channel (both sides of hip) DECRA Villa Tile Panel Tile Hip & Ridge (at hips and ridges) DECRA Villa Tile Panel Vent Tile End


slide-1
SLIDE 1

Experience the Difference

2017

slide-2
SLIDE 2

DECRA Villa Tile Panel – Detail

2017

slide-3
SLIDE 3

DECRA Villa Tile Roof – Detail

DECRA Villa Tile Panel DECRA Villa Tile Panel Vent Tile End Cap Villa Bird Stop-Ridge (both sides of ridge) Villa Channel (at rake and roof-to-wall) Side Flashing Flat Sheet DECRA Ridge Vent Villa Valley Villa Underpan Tile Hip & Ridge (at hips and ridges) Villa Channel (both sides of hip) Villa Bird Stop-Eave

2017

slide-4
SLIDE 4

Measuring & Cutting Panels

  • Measurements are made on roof

and panels are marked and usually cut on the ground.

  • Panels may be cut with a tin snips
  • r circular saw with metal cutting

blade.

  • A hand bender is used to bend the

cut edge of the panel for hips, ridges, and valleys.

  • Safety equipment should be worn

during the installation process.

2017

slide-5
SLIDE 5

Deck Preparation – Roof Over Asphalt

  • Villa Tile may be installed over existing

asphalt shingle. Cut shingles back 8” from eaves and rakes/gable edges.

  • Can be installed over 2 layers of shingle,

heck local code.

  • Remove existing hip and ridge materials.
  • Underlayment shall comply with ASTM D

226, Type I or Type II, ASTM D 4869, Type I

  • r II or ASTM D 1970 – or greater if

required by local code.

2017

slide-6
SLIDE 6

Install Stacked 2 X 2’s

  • Over prepared deck, position two

stacked 2 x 2s flush along rake/gables, up the center of the hips and along ridges.

2017

slide-7
SLIDE 7

1 x 4 at First Course

  • Install the front edge of a 1x4 15-½”

from the edge of the fascia.

  • Fasten this to the deck using screws

that will fit flush to the 1x4 and long enough to penetrate the deck securely.

2017

slide-8
SLIDE 8

Villa Valley

  • Valley pieces should overlap

minimum 6” – fasteners should be positioned outside the last rib on either side – paint the valley before installing panels.

  • Use Villa Valley or standard

concrete valley metal – minimum 26 gauge pre- finished aluminum-zinc alloy coated steel, minimum 16” wide with a minimum 3-1/4” center upstand.

  • Ices and Water Shield

recommended for freeze/thaw conditions.

2017

slide-9
SLIDE 9

Villa Channel

  • Install Villa Channel at rake/gable, roof-to-wall, and along both

sides of the 2 x 2s at the hip.

2017

slide-10
SLIDE 10

Panel Installation

  • First course of panels will be

fastened at the back of the

  • panel. The nose of the panel

will be fastened during Bird Stop – Eave Installation.

  • Lay out panels and fasten as

you go along - start at the fascia and work towards the ridge.

  • Driving Screws straight down

perpendicular to the deck will ensure a tight finish and a straight alignment.

2017

slide-11
SLIDE 11

Panel Installation

  • Start at fascia and work up to the ridge. Start the first course

with a full panel and the second course with a cut panel measuring 24.5”.

  • Measure panels and make cuts so the cut edge starts or ends in

valley or channel metal.

  • Panels can be laid right to left or left to right – overlap area must

be covered by overlapping panel.

  • Periodically check alignment by snapping a chalk line at 14-1/2”

intervals.

2017

slide-12
SLIDE 12

Fastening Panels

  • Attach second and subsequent courses of panels by locking the

front of each panel into the back of the panel below.

  • Drive screws straight down into the deck to draw panels tight.
  • Fasteners: Minimum #9 Hex (1/4” diameter) x 1.5” Long.

2017

slide-13
SLIDE 13

Villa Bird Stop - Eave

  • Install and fasten Villa Bird Stop –

Eave after installing a minimum of two courses above the eave. (Required along the fascia)

  • Villa Bird Stop – Eave must be

notched where it terminates into the Villa Channel – fasteners placed every 10”. Right and left edges notched in the same manner.

2017

slide-14
SLIDE 14

Eave Fastening

  • Fasteners will go through the

nose of the panel and the Villa Bird Stop – Eave into the deck.

  • Ensure the Villa Bird Stop – Eave

fits tight to the first course of panels without gaps.

2017

slide-15
SLIDE 15

Panel Installation - Roof-to-Wall

  • Install panels up to the wall cutting

the back of the last course so it fits tight – install Bird Stop – Ridge.

  • If wall flashing is present, tuck Villa

Channel behind existing flashing – cut panel into the Channel.

2017

slide-16
SLIDE 16

Panel Installation – Valley & Hip

  • Be sure to paint Villa Channel

prior to installing panels.

  • On Both sides of the hips or

valley, cut panels to fit into the Villa Channel.

  • Fit the panels into place and

screw down.

2017

slide-17
SLIDE 17

Panel Installation - Ridge

  • Install panels up to the 2 x 2s at the

ridge – cut the back of last course so it fits tight against the stacked 2 x 2s – use a hand bender to turn up the pan portion.

  • Install the Villa Bird Stop-Ridge by

lining up with the back of the cut panel and attaching it to the stacked 2 x 2s – overlapping the last course.

2017

slide-18
SLIDE 18

Hip & Ridge

  • Install Hip and Ridge pieces along the rake/gables, hips and ridges.

Overlap and fasten through top down into stacked 2x2s.

  • Use a Tile End Cap to cover open end of Hip & Ridge pieces at

fascia/Villa Bird Stop – Eave.

2017

slide-19
SLIDE 19

Ridge Venting

  • If a vented ridge is desired, stack 2 x 2 battens and install along

the length of the ridge, number of 2 x 2s will be determined by roof pitch. Use DECRA Ridge Vent and fasten to both sides of battens along the length of the ridge.

  • Install Villa Bird Stop – Ridge along the ridge and attach to 2 x 2s

fastening through the Ridge Vent material. Attach DECRA Ridge Vent along the top of Villa Bird Stop – Ridge.

  • Cover the ridge with Tile Hip & Ridge.

2017

slide-20
SLIDE 20

Panel Vent - Installation

  • Install DECRA Villa Tile panels until you reach the approximate

panel vent location. Carefully measure, mark and cut a rectangle hole 29” x 5” in the roof deck to match the opening of the underside of the DECRA Villa Tile Panel Vent. Install the panel vents as you would normal DECRA Villa Tile panels.

2017

slide-21
SLIDE 21

Penetrations

  • Roof penetrations should be flashed with standard roof jacks over

a Villa Underpan which drains over the panel immediately below.

  • Cut the Villa Underpan to fit tightly around penetration. Fit the

pipe flashing apron to the underpan applying roofing grade sealant to both sides.

  • Finish by measuring and cutting panel to fit tight over flashing.

align panel and seal around base. Use touch up kit as needed.

2017

slide-22
SLIDE 22

Chimney, Skylights & Dormers

  • Starting below the chimney, Cut

Panels to fit the area. Bend up and fasten panels – See Ridge

  • Installation. Use Bird Stop Ridge at

the back of the cut panels below the chimney.

  • Use Villa Channel both sides and

counter flash with side flashing or existing flashing.

  • Area above the chimney must be

flashed and counter flashed. Use a chimney saddle bent to fit around the chimney.

2017

slide-23
SLIDE 23

Additional Installation Details

  • Where possible, Roofing Grade (Polyurethane)

sealant / adhesive should be covered by roofing materials or by a matching stone granules.

  • Sealant should not be used to refinished

damaged panel surfaces.

  • After Installation is completed, be sure to

clean off ALL debris, ESPECIALLY any metal shavings.

  • DECRA Touch Up Kits are available in all

matching colors and should be used where it is necessary to touch up or repair panel finishes.

2017

slide-24
SLIDE 24

DECRA RA Villa Tile Capri ri Clay DECRA RA Villa Tile Amalfi fi Sand DECRA RA Villa Tile Pompeii ii Ash DECRA RA Villa la Tile Venetian ian Gold

2017

slide-25
SLIDE 25

Helpful Tools

  • Download literature & specs at bestbuymetals.com
  • Request a free aerial quote from your rep using
  • nly your address
  • Includes drawing and material quotation

2017

slide-26
SLIDE 26

Tips & Tricks

  • Alternate installation direction every other course.
  • Install panels from the middle out for long runs.
  • Use a stitch screw at back flange overlap to “draw up” panel.
  • Work into valleys and hips.
  • Lower batten build up and notch Hip & Ridge at high points so the

barrel fits tighter at low points.

  • Weave jack in with paper when using Underpan.
  • When cutting panel, cut through the back first – metal to stone

coating.

2017