
SLIDE 1
Open Office Impress Page 1
Using Open Office Impress
Starting off
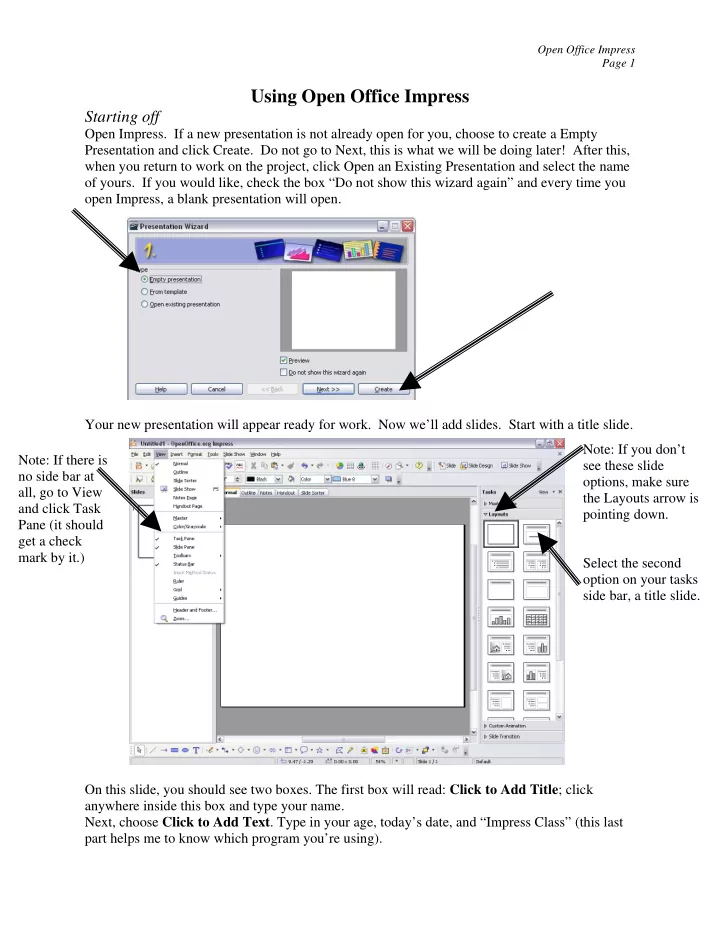
Open Impress. If a new presentation is not already open for you, choose to create a Empty Presentation and click Create. Do not go to Next, this is what we will be doing later! After this, when you return to work on the project, click Open an Existing Presentation and select the name
- f yours. If you would like, check the box “Do not show this wizard again” and every time you
- pen Impress, a blank presentation will open.
Your new presentation will appear ready for work. Now we’ll add slides. Start with a title slide. Note: If there is no side bar at all, go to View and click Task Pane (it should get a check mark by it.) Note: If you don’t see these slide
- ptions, make sure
the Layouts arrow is pointing down. Select the second
- ption on your tasks