
SLIDE 1
1
O Scale West 2007 California Central Coast Modular On30 1
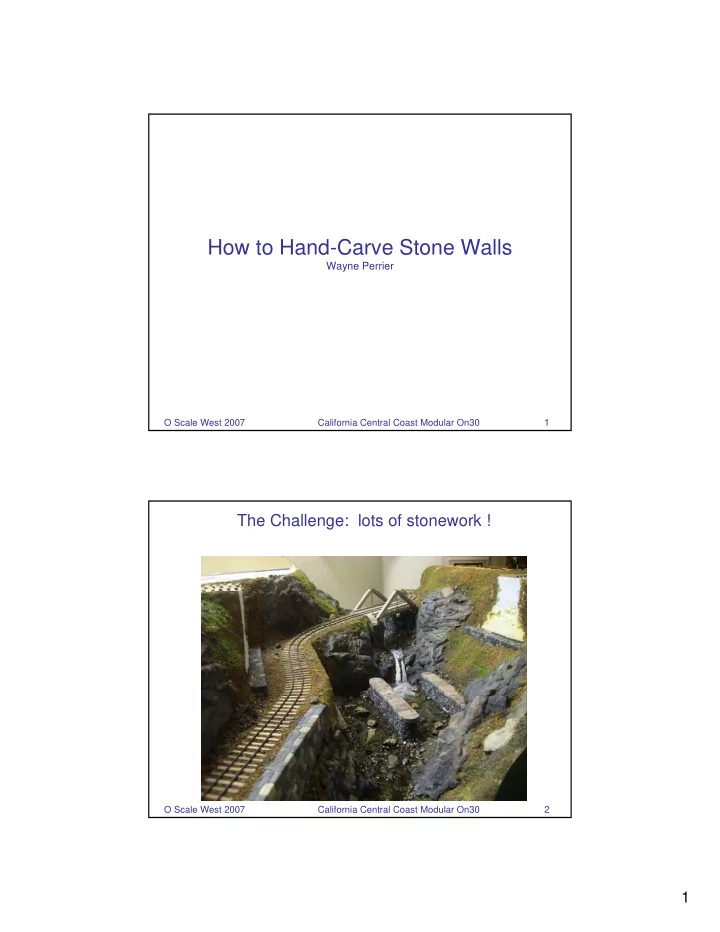
How to Hand-Carve Stone Walls
Wayne Perrier
O Scale West 2007 California Central Coast Modular On30 2
How to Hand-Carve Stone Walls Wayne Perrier O Scale West 2007 - - PDF document
How to Hand-Carve Stone Walls Wayne Perrier O Scale West 2007 California Central Coast Modular On30 1 The Challenge: lots of stonework ! O Scale West 2007 California Central Coast Modular On30 2 1 Summary of Steps Step1: Create a
O Scale West 2007 California Central Coast Modular On30 1
O Scale West 2007 California Central Coast Modular On30 2
O Scale West 2007 California Central Coast Modular On30 3
O Scale West 2007 California Central Coast Modular On30 4
O Scale West 2007 California Central Coast Modular On30 5
– May be cast as a solid piece of plaster (heavy) – Optionally, fill mold 1/3 full of plaster and push a block of “blue foam” in, to conserve Hydrocal and make result much lighter – Another possibility is to “paint” soupy Hydrocal over a foam core. This can be time- consuming but may be the easiest way to create complicated shapes (like an arched viaduct or tunnel portal, for example). – When mixing Hydrocal, first fill container with water and add Hydrocal to the water. Continue adding until the Hydrocal is all wet and then mix to a soupy consistency.
– Allows plaster to strengthen – Will still feel very wet (and heavy)
– This is a toothed file used for drywall work. The blades are replaceable. – Carefully remove any high spots to obtain a smooth surface. Be sure to clean the tool afterwards to prevent rust.
O Scale West 2007 California Central Coast Modular On30 6
O Scale West 2007 California Central Coast Modular On30 7
– The pencil should have a round head, and actually removes some of the plaster. – Use enough pressure to leave an impression in the plaster. – Avoid the temptation to “connect the dots” and instead trace the outline of each and every stone. – Start with corner stones. Be careful when crossing the corner to avoid chipping. – Try to keep stone sizes random (unless you are making a cut-stone wall). – Try to pass the pencil through any air bubbles that are present. The penciled areas will be removed in later steps (and hence so will the bubbles). O Scale West 2007 California Central Coast Modular On30 8
O Scale West 2007 California Central Coast Modular On30 9
O Scale West 2007 California Central Coast Modular On30 10
– Pull the knife towards you, supporting the back of the knife with your fingertip. – Try to trace the outline of each stone – Use care in corners to avoid chipping – Feel free to rotate the work when the direction of the line changes. – If the knife slips sometimes, do not worry. Many mistakes will be obscured in Step4. – The V-groove that is formed should be about 1/16 of an inch deep. If some are deeper, do not worry. – The finished result of Step3 will look very similar to other stone carving techniques. We are going to take things a little further.
O Scale West 2007 California Central Coast Modular On30 11
O Scale West 2007 California Central Coast Modular On30 12
O Scale West 2007 California Central Coast Modular On30 13
– Angled side of chisel faces down, just like if you were working on wood – Use hand pressure to carefully follow all lines – Try to eliminate any air bubbles. It is ok to carve down deeper to remove these. – Purposely take some of the stones down 1/16” or 1/8” below the surface level of other stones, for visual interest. – Feel free to scribe some deep lines across the faces of some of the larger stones. – Clean the chisel after use to prevent rust (the plaster is very wet).
O Scale West 2007 California Central Coast Modular On30 14
O Scale West 2007 California Central Coast Modular On30 15
O Scale West 2007 California Central Coast Modular On30 16
– This creates additional definition between each stone – I generally do this the day after the other carving, more because of time issues than anything else. – I also find this step a little easier if the plaster is dryer, hence waiting another day.
O Scale West 2007 California Central Coast Modular On30 17
O Scale West 2007 California Central Coast Modular On30 18
O Scale West 2007 California Central Coast Modular On30 19
– After all that work carving, spend a few extra days to make a mold to easily duplicate it in future. – The cost of this is minimal, but the payoff can be very high. – Also a good idea if you are making multiples of something, like bridge abutments.
– Clean stonework with compressed air before anything else. – Goal of first coat is to pickup all the details. – Brush latex on with ¼” paintbrush, taking care to work the latex into all features of the wall – Try to eliminate any air bubbles in the latex by using the brush – Let first coat dry 4 hours
– Use same paintbrush; goal is to get complete coverage with approximately 1/32” to 1/16” latex. Let each coat dry 4 hours.
– Coat again in latex using paintbrush – Apply single layer of cheesecloth over entire work if possible – Apply additional latex on top of cheesecloth, working into the cloth with paintbrush. – Let dry at least 12 hours – Carefully peel mold off of work, taking care to loosen all edges first before peeling off entire mold – Clean up any latex debris on work.
O Scale West 2007 California Central Coast Modular On30 20
O Scale West 2007 California Central Coast Modular On30 21
– Use a wire brush to roughen up all stones – Note that this method is used on any stone walls cast from your new latex molds – I use a brush that is sold in hardware stores for cleaning metal before welding or soldering; it has brass bristles that are of medium stiffness. – Scrub the stones in multiple directions. Plaster dust will be produced, so avoid
– Note, you can also use coarse #0 steel wool to roughen up the stone surfaces. – When finished, clean off work with compressed air. – Congratulations, you are finished the carving stage
O Scale West 2007 California Central Coast Modular On30 22
O Scale West 2007 California Central Coast Modular On30 23
– Paint the entire stonework with Woodland Scenics Slate Gray, slightly diluted. Goal is to have no white plaster showing. – Paint each stone individually with differing colors. I use a ¼ “ flat brush and a ¼ “ angled brush. Take care here to not paint neighboring stones identical colors. – When dry, I dry-brush with white, gray, and yellow paints. Use the same ¼” flat brush, dip in one of the above colors, and scrub almost all the paint out onto a paper
O Scale West 2007 California Central Coast Modular On30 24
O Scale West 2007 California Central Coast Modular On30 25
O Scale West 2007 California Central Coast Modular On30 26
O Scale West 2007 California Central Coast Modular On30 27
O Scale West 2007 California Central Coast Modular On30 28
O Scale West 2007 California Central Coast Modular On30 29
O Scale West 2007 California Central Coast Modular On30 30
O Scale West 2007 California Central Coast Modular On30 31
O Scale West 2007 California Central Coast Modular On30 32
O Scale West 2007 California Central Coast Modular On30 33
O Scale West 2007 California Central Coast Modular On30 34
O Scale West 2007 California Central Coast Modular On30 35
O Scale West 2007 California Central Coast Modular On30 36