G tti Getting Started With Alice St t d With Ali By Ruthie Tucker - - PowerPoint PPT Presentation

g tti getting started with alice st t d with ali
SMART_READER_LITE
LIVE PREVIEW

G tti Getting Started With Alice St t d With Ali By Ruthie Tucker - - PowerPoint PPT Presentation

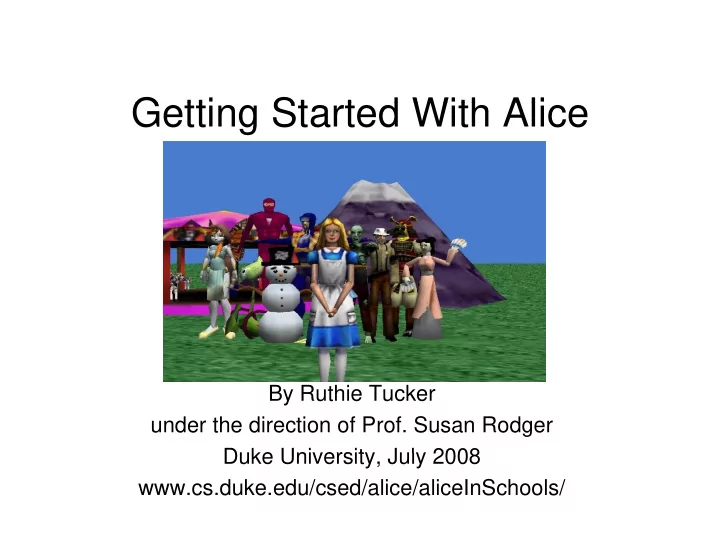
G tti Getting Started With Alice St t d With Ali By Ruthie Tucker under the direction of Prof. Susan Rodger Duke University July 2008 Duke University, July 2008 www.cs.duke.edu/csed/alice/aliceInSchools/ Lets Get Started Let s Get


slide-1
SLIDE 1

G tti St t d With Ali Getting Started With Alice

By Ruthie Tucker under the direction of Prof. Susan Rodger Duke University July 2008 Duke University, July 2008 www.cs.duke.edu/csed/alice/aliceInSchools/

slide-2
SLIDE 2
slide-3
SLIDE 3

Let’s Get Started Let s Get Started

  • The first step in making

an Alice world is to pick a p background.

  • When you open Alice,

this bo to o r left ill this box to your left will automatically pop up. You may have to click on the “Templates” tab

  • Today, we are going to

select the water world select the water world.

  • Click on “water” and then

click on the “open” button.

slide-4
SLIDE 4

Once you have chosen the water world thi i h h ld l k this is how your screen should look.

slide-5
SLIDE 5

Adding objects to your world Adding objects to your world

  • Now lets add some

Now lets add some

  • bjects to our world.
  • To the right of the

g water world picture, there is a green button labeled “Add Objects.” Cli k i

  • Click on it.
slide-6
SLIDE 6

Adding objects to your world Adding objects to your world

  • Once you have clicked on

“add objects” a gallery of

  • This is your local gallery

f bj t add objects a gallery of

  • bjects will appear, on

your screen, below your

  • f objects.
  • There are lots of folders,
  • f objects.

water world.

  • f objects.
slide-7
SLIDE 7

Adding objects to your world Adding objects to your world

  • Select the animals folder

and scroll over until you and scroll over until you find the Goldfish.

  • Click on the Goldfish.
  • And then click on “Add

i t t ld ” instance to world.”

  • The Goldfish should

appear in your world, on appear in your world, on the water

slide-8
SLIDE 8

Adding objects to your world Adding objects to your world.

  • Your goldfish will be very

g y

  • small. Don’t worry about

this yet. Fi t d t dd

  • First we need to add

another object to your world.

  • Click on “Local

Gallery” to go back to the starting point of g p the Local Gallery.

slide-9
SLIDE 9

Adding Objects to your world Adding Objects to your world

N ll d

  • Now, scroll over and

select the “Fantasy” folder.

  • Then, select the fairies

folder

slide-10
SLIDE 10

Adding objects to your world Adding objects to your world

  • Add this fairy into your world, by

clicking on her and then clicking

  • n “Add Instance to World”.
  • Your screen should now look

like this like this.

slide-11
SLIDE 11

The Object Tree The Object Tree

  • When you add objects to

y j the world they will appear in a list on the left of your screen screen.

  • This list is called your

“Object Tree.”

slide-12
SLIDE 12
slide-13
SLIDE 13

Positioning your objects Positioning your objects

  • Now look at the right

Now look at the right side of your screen.

  • All of the buttons with

the faces are designed to help you position your objects.

  • Click on the white

li ki arrow, try clicking on your fairy and moving her around her around.

slide-14
SLIDE 14

Positioning your Objects Positioning your Objects

  • Try moving your fairy so

y g y y that she is to the right of your fish. Y h ld l k

  • Your screen should look

like this

  • The button with the up

and down arrows will move your object up and move your object up and down.

  • Click on it and move your

y fairy so she is hovering

  • ver the water
slide-15
SLIDE 15

Positioning your objects Positioning your objects

  • This button is used to

i bj t d spin your objects around. Try spinning your goldfish

  • Try spinning your goldfish

around so he is directly parallel to the screen.

  • Your screen should look

like this. N t : If u click n th

  • Note: If you click on the

water by mistake and move it, click the UNDO button to fix the water back.

slide-16
SLIDE 16

The Undo Button is your Friend! The Undo Button is your Friend!

  • Anytime you do

Anytime you do something wrong in your Alice world you can click the undo button and Alice will d th l t undo the last command.

  • Use it as much as you
  • Use it as much as you

need!

slide-17
SLIDE 17

Positioning your objects Positioning your objects

  • The next button will turn

your character either backwards or forwards. Use it to make your fairy Use it to make your fairy tilt slightly forward.

  • This is how your screen

should look.

slide-18
SLIDE 18

Positioning your objects Positioning your objects

  • This next button is a

toggle button. It will move your object all over the place. place.

  • Use it to move your fairy

so that she is facing the fi h fish

  • Your screen should look

like this. like this.

  • Note: If you don’t like her

position, click on “undo” d t t h and try to move her again.

slide-19
SLIDE 19

Positioning your objects Positioning your objects

  • This next button will make

your objects bigger.

  • Click on it and use it to

make your goldfish bigger make your goldfish bigger than the fairy.

  • Your screen should like

this.

slide-20
SLIDE 20

Positioning your objects Positioning your objects

  • Now lets move our fish

down so that he Is slightly sticking out of the water. Y h t h

  • You may have to push

the fish back further and resize him to get this picture.

slide-21
SLIDE 21

Positioning your objects Positioning your objects

  • There is one more button

that we will NOT use.

  • This button will copy your

bj t h it

  • bject, however it causes

problems later SO DON’T USE IT!

  • It’s better to add another
  • bject from the gallery if

you want two of the same you want two of the same thing.

slide-22
SLIDE 22

Positioning your objects Positioning your objects

  • Click on the “done” button

to leave your objects gallery. N h ld

  • Now your screen should

look like this.

slide-23
SLIDE 23
slide-24
SLIDE 24

The Dummy Camera The Dummy Camera

  • The Dummy camera is

y designed to save camera positions as you move your camera around your camera around.

  • Click on the “add objects”

button again and look for a gray button under your

  • bject positioning buttons
  • Click on the button

labeled “more controls”.

slide-25
SLIDE 25

The Dummy Camera The Dummy Camera

  • Once you have

Once you have clicked on the “more controls” button you will see a drop down menu.

  • Click on the “drop

dummy at camera” button button.

  • Just click once!
slide-26
SLIDE 26

The Dummy Camera The Dummy Camera

  • Once you have dropped

y pp the dummy camera. A folder will appear on your

  • bject tree called
  • bject tree called

“Dummy Objects.” If o click on the pl s

  • If you click on the plus

sign beside the Dummy Objects folder your list of dummy camera positions should appear.

  • Right now there should
  • Right now there should
  • nly be one, called

“Dummy”.

slide-27
SLIDE 27

The Dummy Camera The Dummy Camera

  • You can rename your

y dummy camera to something that is easier to remember to remember.

  • Lets rename ours “Start.”
  • This will freeze your

camera position for you to camera position for you to return to whenever you would like.

slide-28
SLIDE 28

The Dummy Camera The Dummy Camera

  • Now we can move our

camera to another position using the purple arrows at the bottom of arrows at the bottom of your screen.

  • Lets move the camera so

that we can get a close up of the fairy up of the fairy.

slide-29
SLIDE 29

The Dummy Camera The Dummy Camera

  • Lets drop another

p Dummy camera at our Fairy Position and label it “Fairy ” Fairy.

  • Now what if we want to

go back to our “Start” go back to our Start camera position?

  • Right Click on camera in

bj t t your object tree

slide-30
SLIDE 30

The Dummy Camera y

  • Right click on

Right click on Camera and choose “methods”, then “camera t i t f set point of view to” then “Dummy Dummy Objects”, then “Start”.

slide-31
SLIDE 31

The Dummy Camera The Dummy Camera

  • This should set your

y camera view back to its starting position.

  • Now go through these

steps again to create a camera position for camera position for “Fish.”

slide-32
SLIDE 32

Dummy Camera Conclusion Dummy Camera Conclusion

  • Finally, Set your

Finally, Set your camera position back to “Start” position.

  • Now click on the

“Done” button at the bottom right of your screen to exit out of your “add objects” your add objects section (you may have to scroll down to have to scroll down to see the Done button).

slide-33
SLIDE 33
slide-34
SLIDE 34

Writing Methods Writing Methods

  • The large tan part in the center of your

The large tan part in the center of your screen is called your “Method Editor.”

slide-35
SLIDE 35

Methods Methods

  • The method editor is for

making your characters do something. Y h t l d

  • Your characters already

know how to do several things.

  • These are all of the things

that your fairy knows how to do to do.

slide-36
SLIDE 36

Methods Methods

  • You can find these by

y clicking on your fairy in your object tree and choosing methods choosing methods.

  • Lets try animating our
  • Lets try animating our

fairy with some of these methods.

slide-37
SLIDE 37

Methods Methods

  • This time

instead of right clicking, drag your camera view camera view change into your method dit editor.

  • Set your

camera view camera view to “Fairy.”

slide-38
SLIDE 38

Methods Methods

  • Click on the method called “Wink,” drag

Click on the method called Wink, drag it over and drop it in your method editor.

slide-39
SLIDE 39

Methods Methods

  • When you press play the fairy should wink

When you press play the fairy should wink with her right eye.

  • Try dragging in each of the methods to
  • Try dragging in each of the methods to

see what she does. N t th t th “fl i ” th d k

  • Note that the “flap wing” method asks you

for a duration and an amount. Type in b f b th d h t h numbers for both and see what happens.

slide-40
SLIDE 40

Methods Methods

  • If you don’t want any

If you don t want any

  • f this code you can

right click on the sections that you don’t want and h “d l t ” choose “delete.”

slide-41
SLIDE 41

Methods Methods

  • What if we want to teach
  • ur fairy to do something

that she doesn’t know how to do? how to do?

  • If you look below the

methods that you just tried there are more simple methods.

  • These are the methods
  • These are the methods

that we will use to teach

  • ur fairy to do new things.
slide-42
SLIDE 42

Talk Talk

  • Lets start with

Lets start with something simple

  • Go to the methods for

your fairy and select the gray button labeled “Create new method.” N i “T lk ”

  • Name it “Talk.”
  • This box should

appear

slide-43
SLIDE 43

Methods Methods

  • Now look in the

Now look in the simple methods of your fairy and find the “Say” method

  • Drag it over and drop

it into your method editor.

slide-44
SLIDE 44

Methods

  • Select “other”
  • This should give you a box for you to type
  • This should give you a box for you to type

something. T “I’ fl i !”

  • Type “I’m flying!”
slide-45
SLIDE 45

Methods Methods

  • Try this again but have her say something

Try this again but have her say something else.

slide-46
SLIDE 46

Methods Methods

  • Now your method
  • Now how can we play

Now your method should look like this. Now how can we play this method?

slide-47
SLIDE 47

Events Events

  • An event is a way to

call the methods you y create when you play your world The e ent editor is in

  • The event editor is in

the top right hand corner of your

  • We want the fairy to say “I’m

flying” and the other things that t d h th screen. you typed whenever we press the space bar.

  • To do this, we will add an event

To do this, we will add an event and call the Talk method we wrote.

slide-48
SLIDE 48

Events Events

  • Click on “create new

event”

  • You will see the list of

events in the events events in the events

  • editor. Select “when a

key is typed”

  • After clicking it you

should get this.

slide-49
SLIDE 49
slide-50
SLIDE 50

Events Events

  • Try playing your world
  • Each time you press the

y p space bar, your fairy should say “I’m flying”, then “This is fun!” then This is fun!

slide-51
SLIDE 51

Methods Methods

  • Now, lets have the fairy

, y fly around the fish.

  • Click on your fairy in your

bj t t d t

  • bject tree and go to

methods.

  • Select the gray button

Select the gray button that’s labeled “create new method.”

slide-52
SLIDE 52

Methods Methods

  • After clicking on it a gray

g g y box will appear that asks you to name your new method method.

  • Let’s name ours

“FairyFly”.

  • Now a new method will

appear on your method editor editor.

slide-53
SLIDE 53

FairyFly

  • First we will set our camera to “Start” position.”
slide-54
SLIDE 54

Methods

  • Now lets have our

fairy flap her wings fairy flap her wings.

  • Click on

lichenZenspider in the object tree and then “methods” tab.

  • Drag in the

Drag in the flapWings method.

  • Have her flap 6

times for 2 seconds.

  • If the number you

want is not there want is not there, select “other” and then type it in. Resulting code is:

slide-55
SLIDE 55

Methods

  • Now before we play this

we need to change our events editor. events editor.

  • The events editor is at the

top right of your screen.

  • We need to

change the “when the world when the world starts” event to

  • ur “FairyFly”

th d S th t

  • method. So that

we can test it

  • ut.
slide-56
SLIDE 56

Methods Methods

  • Now try playing your method Your camera

Now try playing your method. Your camera should move back to the starting position and your fairy should flap her wings and your fairy should flap her wings.

slide-57
SLIDE 57

Methods

  • Now we need to

Methods

  • Now we need to

have our fairy fly around the fish instead of flying in place.

  • Go back to your

Go back to your simple methods for your fairy and l t “T ” select “Turn” and drag it into your code. y

  • Have your fairy

turn left 1 revolution.

slide-58
SLIDE 58

Methods Methods

  • Your code should

Your code should now look like this.

slide-59
SLIDE 59

Methods Methods

  • Now try playing this

Now try playing this.

  • Your Fairy should flap her wings and then

spin in place spin in place.

  • Now we know that we need to fix two

thi things.

– We need her to flap while she turns – And we need her to turn around the fish instead of turning in place.

slide-60
SLIDE 60

Methods

  • First lets have her flap

and turn at the same time.

  • Look at the bottom of

your screen for a purple your screen for a purple button labeled “Do Together.”

  • Drag this up and drop

it under your code. Then place your “flap wings” code and your “turn” code inside it turn code inside it.

  • Try playing it
slide-61
SLIDE 61

Methods Methods

  • After clicking on the

arrow a pop up menu

  • In order to make the fairy

fly around the fish we

arrow a pop up menu will appear.

  • Select “As seen by”

fly around the fish we need to select the “more” button beside the “Turn” • Select As seen by ,

“goldfish”, “the entire goldfish”.

code.

g

slide-62
SLIDE 62

Methods Methods

  • This should make your fairy turn around in

This should make your fairy turn around in a circle from the point of view of the fish.

  • This means it will rotate around the fish
  • This means it will rotate around the fish.
  • Press play to try it.
slide-63
SLIDE 63

Methods Methods

  • Lets write one more method

Lets write one more method

  • Lets make the fairy ride the fish after she

has flown around him has flown around him.

slide-64
SLIDE 64

RideFish

  • First you will want to create a new method labeled
  • First you will want to create a new method labeled

“RideFish.”

  • Click on “lichenZenspider/ “methods”tab/then “create

p new method”/ and name it “RideFish.”

  • Inside your method editor drag the “move to” command

and select goldfish/ the entire goldfish and select goldfish/ the entire goldfish.

  • Your code should look like this.
slide-65
SLIDE 65

Glue Fairy to Fish Glue Fairy to Fish

  • Now we need a way to

y glue the fairy to the goldfish so that when the goldfish moves the fairy goldfish moves, the fairy will move with it.

  • This is called the vehicle

property. Y fi d it d th

  • You can find it under the

properties tab of your fairy. y

slide-66
SLIDE 66

Methods Methods

  • Drag the vehicle

property over to your property over to your method editor and select goldfish/entire g goldfish.

  • This should set your

goldfish as a vehicle to your fairy.

  • When the fish moves

the fairy should move with it with it.

slide-67
SLIDE 67

Events Events

  • Lets make an event for

this method.

  • Go to your events editor

d l t “l t th and select “let the arrow keys move subject.”

  • Right now it is set as a

default to the camera.

  • Lets change this so it is

Lets change this so it is set to the goldfish/the entire goldfish.

slide-68
SLIDE 68

Events

  • Now we can put it all together.
  • If you noticed at the beginning of your method editor

th th d th t id “W ld fi t th d ” there was a method that said “World.myfirstmethod.”

  • This method is for telling our story.
  • You may have more code in there than I do that is fine
  • You may have more code in there than I do, that is fine.
slide-69
SLIDE 69
slide-70
SLIDE 70

Events Events

  • First click on the tab that says

First click on the tab that says “World.MyFirstMethod”

  • It is the tab that we put all of our original
  • It is the tab that we put all of our original

code in.

slide-71
SLIDE 71

Events

  • First we need to set our camera position in

“world myfirstmethod” to “Start” right after world.myfirstmethod to Start right after the code you have.

  • Drag in “camera set point of view to” and

Drag in camera set point of view to and set to “Dummy objects”, then “Start”

slide-72
SLIDE 72

Events and Methods Events and Methods

  • If you look under the

If you look under the methods of your fairy you will now see the methods that you wrote.

  • We can put these

together in world myfirstmethod world.myfirstmethod to tell a story.

slide-73
SLIDE 73

Events and Methods Events and Methods

  • Lets have the fairy fly

y y around the fish and then get on the fish and ride Wh d thi b

  • When can do this by

dragging “FairyFly” and “Ridefish” into World.myfirstmethod.

  • Now we can use the event

“When the world starts” to call it.

slide-74
SLIDE 74

Events and Methods Events and Methods

  • If you look at your

events you will see y that when you play your world the fairy will fly around the will fly around the fish and then get on its back.

  • You can have her

talk by pressing the space bar space bar

  • And move the fish

with the arrow keys.

  • Try it!
slide-75
SLIDE 75

Events and Methods Events and Methods

  • Wait! Our fish swam away!

Wait! Our fish swam away!

  • Hmmm how can we fix it so that we can

follow the fish? follow the fish? Let’s set the camera as a vehicle to the fish!

slide-76
SLIDE 76

Events and Methods • Click on

“Camera”, “Properties”

  • Drag the

vehicle property property inbetween “FairyFly” and FairyFly and “RideFish” and set it to “goldfish”, “the entire goldfish” goldfish”.

slide-77
SLIDE 77

Events and Methods Events and Methods

  • Once you have done this try playing your

ld i world again.

slide-78
SLIDE 78

Notes on “Vehicle Property” Notes on Vehicle Property

  • If you later want to unglue the fairy from

If you later want to unglue the fairy from the fish or the unglue the camera, see these instructions these instructions.

  • To unglue the fairy from the fish, set the

vehicle property for the fairy back to vehicle property for the fairy back to “world”. T l th C f th fi h l

  • To unglue the Camera from the fish, also

set its vehicle property back to “world.”

slide-79
SLIDE 79

Now try to do these! Now try to do these!

  • Drop an island from the environments

Drop an island from the environments folder.

  • Steer the fish around the island
  • Steer the fish around the island.
  • Unglue the fairy (by setting her vehicle

b k t ld) d h h t back to world) and have her move over to the island.

  • Try gluing the camera to the fairy instead
  • f the fish.
slide-80
SLIDE 80