
SLIDE 1
DATABASE SYSTEMS
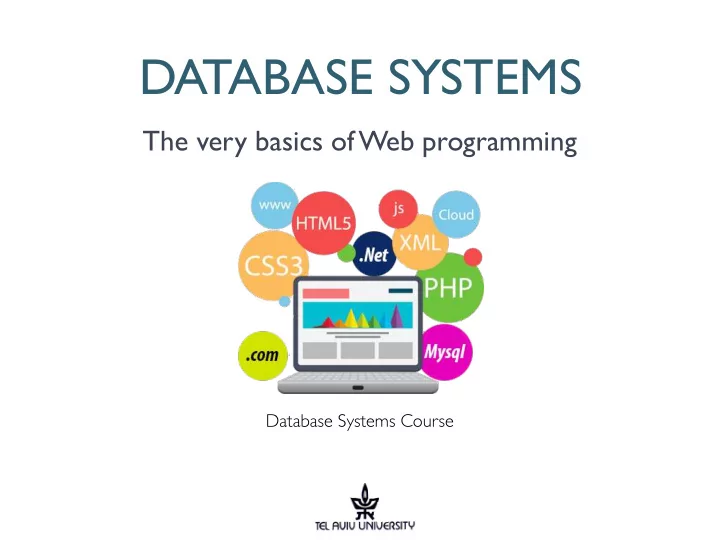
The very basics of Web programming
Database Systems Course
DATABASE SYSTEMS The very basics of Web programming Database - - PowerPoint PPT Presentation
DATABASE SYSTEMS The very basics of Web programming Database Systems Course BEFORE WE START This lecture is an overview of the very complicated world of web programming. If you are a (very) experienced web developer - take a 2.5hr break
Database Systems Course
This lecture is an overview of the very complicated world
If you are a (very) experienced web developer - take a 2.5hr break and come back for the last 20 minutes of the third period. The goal of this talk is to introduce you to this world and give you some tools to explore it by yourself. You can do this, even if you have no experience at all. You may hate it now, and send me thank-you emails after
The client:
The server(s):
requests
I listen on port:80 I listen on port: 3306
H T T P G E T R e q u e s t
HTTP Response
MySQL connection “Select * from Images…”
OK: Img01, Img02….
Part #1: Client side programming: HTML, CSS Javascript Responsive design Front-end frameworks Part #2: Server side programming Python (Flask): Install, hello world, requests, cookies, sessions. Using the university web servers. Part #3: Using the university servers (python/ php)
Open a text editor Type this: Save the file as my_website.html Open in your favorite browser Voila ! ---------------------------->
Content is identical, regardless (i.e. non-interactive) To perform changes in content, the programmer has to change the HTML file. For example:
To view the HTML source code, we can right click and select “view source” Or use the browser’s developer tools. e.g.
HTML web page is a document, orgnizied in a tree structure, according to the Document Object Model (DOM). The most important nodes: <html> the root of every web page <head> containing meta-data and external sources <body> holds the content of the webpage <div> is the basic content container.
Each node is an element Each element beings and ends with a tag e.g. : <title> Noga Alon </title> Each element has a set of attributes
Web forms: Used to collect input from the user and submit it to the server The values are sent to the web server via HTTP GET/POST requests: GET: most web requests you will encounter, parameters are passed in the URL POST: used to send files, large size parameters, and sensitive parameters (passwords)
Web forms:
browser and handle irrational browser e.g., Internet Explorer.
So far we learned how to structure the content of a webpage (Like Noga) This is Tova’s website without style. Looks familiar?
For adding some “style”, we use a CSS (Cascading Style Sheet) file.
How to set the style of an element: Example of a CSS file:
You can use multiple style sheets. FYI: Your browser has its own CSS file that is used by default. Cascading order (first one has the highest priority): 1.Inline style (inside an HTML element) 2.External and internal style sheets (in the head section) 3.Browser default
1.External CSS file: Include a link to the stylesheet file under the <head> tag
2.Internal Stylesheet: Include a tag <style> under the <head> tag:
3.Inline styling: by adding the attribute style:
1.Inheritance of style. (“I changed the font size but I can’t see the changes”) The best tip in this lecture: use !important 2.Positioning of elements (“This stupid DIV keeps floating over the title”) 3.The box model (“Wait, is it margin-right? or padding-right? I’ll try both and see what happens”)
These are the most important attributes in CSS.
css_positioning.asp There are 2 types of elements: Block and Inline
available.
as necessary The Display attribute: can alter the element’s type or hide it completely.
All HTML elements are considered as “boxes” . The box model allows us to add a border around elements, and to define space between elements: Content: The content of the box, where text and images appear Padding: Clears an area around the content. Padding is transparent Border: A border that goes around the padding and content Margin: Clears an area outside the border. The margin is transparent For Example:
Positioning of elements: Example:
Selection by element ID: (Use when addressing unique elements) Selection by element class: (can be used for multiple elements)
Selection by tag: Grouping selection: Descendant selection:
Attributes selection (Attribute selectors selects elements based upon the attributes present in the HTML Tags and their value):
Use to refer elements in different stages of execution. Example: Changing the color of links:
Used to generate HTML content automatically. Using the special attribute Content:
Responsive web design makes your web page look good
Use only HTML & CSS to resize, hide, shrink, enlarge, or move the content to make it look good on any screen
Viewoports:
screens -
Media queries: Mobile (default) Wider screens media query
Each HTML web page is standalone. Using JavaScript we can make a dynamic, single page and self-contained web application. What is Javascript? It is a client-side programming language.
name) . Actually the syntax is based on C.
Why Javascript?
To embed javascript, include the tag <script>
Javascript basic features: Traverse the tree using the document reserved word. Function getElementByID(“<id>”): finds the HTML element Variable innerHTML : holds the element HTML content HelloWorld example
This are the main events that happen in the web browser (there are more): With these events JS can do:
Important:
AJAX: asynchronous JavaScript and XML. Lets you:
An example showing everything :
The JavaScript Code: Ready states:
Why designing a page from scratch when you can rely on existing libraries that extend HTML, CSS and JavaScript?
★Bootstrap: An HTML+CSS+JavaScript framework for developing
Responsive websites
★AngularJS/ ReactJS: extends HTML by adding new tags and features
Bootstrap is the most popular HTML, CSS, and JavaScript framework for developing responsive, “mobile-first" web applications It's completely free Many beautiful templates are available online
“installing” Bootstrap: Just include these lines in your HTML header:
Grid system: The core of Bootstrap is the grid system, allowing you to define up to 12 responsive columns.
xs (for phones - screens less than 768px wide) sm (for tablets - screens equal to or greater than 768px wide) md (for small laptops - screens equal to or greater than 992px wide) lg (for laptops and desktops - screens equal to or greater than 1200px wide)
Hello world:
The MVC approach separates the UI (views) from the data and logics (models) and let them communicate via designated I/O methods (controllers) Examples: Angular-js, React-js, Redux, etc.
How to install Angular? Simply include the following script in your <head> scope: A bit complicated example for creating a table with data from the server:
The results:
Part #1: Client side programming: HTML, CSS Javascript Responsive design Front-end frameworks Part #2: Server side programming Python (Flask): Install, hello world, requests, cookies, sessions. Using the university web servers. Part #3: Using the university servers (python/ php)
Flask is a web-server library. Let’s hello world it: 1.Install flask - you already know by now :-) 2.Create server.py:
1.We use static HTML templates. For everything. 2.Create a template folder : 4.Create template.html:
Template file Server.py
The HTTP request is passed to the web server and Flask gives it to you as a request object. Important attributes:.
their values
Login page template:
Server side code:
A browser cookie is a small piece of data stored in the web browser
Your shopping cart in amazon.com.
In Flask:
Server side code:
Unlike cookies, “sessions” are stored on the server…..
the server. In Flask:
PYTHON 1.Full instructions: http://www.cs.tau.ac.il/system/django 2.Supports Flask and Django 3.Server name: delta-tomcat-vm (accessible from uni only) 4.Instructions in a brief: 1.SSH to delta-tomcat-vm and run: sudo create-my-django-dir 2.Copy your application files to your django dir: /specific/scratch/<username>/django/ 3.Choose an available port and use it in your configuration file. 4.Run your app *detached*: nohup python3 -m "from my_flask_web_server import run_server; run_server.run_server()" &
PHP 1.Connect to NOVA 2.Create a new directory called html 3.Create your project dir under ~/html 4.Create a “hello.php” file under ~/html/project 5.Access the url from your web browser: cs.tau.ac.il/~<your_username>/project/hello.php
We overviewed the world of web programming in a brief “hello-world”-ing Bad news: This is barely enough to get started Good news: You know enough to continue learning this by yourself Use the online resources: w3schools Google system@cs.tau.ac.il Our class forum Come to projects day Bye.
PHP stands for “PHP: Hypertext Preprocessor” Why PHP: ★PHP is one of the leading web development languages. ★PHP is compatible with almost all servers used today (Apache, IIS, etc.) ★PHP is free. Download it from the official PHP resource: www.php.net ★PHP is easy to learn and runs efficiently on the server side What can PHP do: ★PHP can generate dynamic HTML content ★PHP can collect and process user input from GET and POST requests ★PHP can send and receive cookies ★PHP can add, delete, modify data in your database
On your local machine (Windows): 1.Install XAMPP (or WAMP) from https://www.apachefriends.org/download.html 2.It will install Apache (web server) + MySQL database + PHP + phpMyAdmin 3.Open the XAMPP control panel and click Start on everything. 4.Open the folder C:/xampp/htdocs and create hello.php 5.Access from your web browser: 1.http://localhost/hello.php
hello.php
1.This is a simple HTML form in a static page ( form.html )
2.What does welcome.php looks like?
3.What does the user see?
SuperGlobals: PHP has several predefined arrays that are “super globals”: means they are available in all scopes throughout a script without using any special prefix. And they are: $GLOBALS stores all global variables $_SERVER stores information about the current server e.g. path of the script, server name. $_GET stores the parameters that are passed via HTTP GET $_POST stores the parameters that are passed via HTTP POST $_FILES stores files that are uploaded to the server via HTTP POST $_COOKIE stores the parameters of the HTTP cookie $_SESSION stores information for a user in a session. $_REQUEST stores all data passed via GET and POST
What if some of the user didn't send a required parameter?
Like that:
PHP allows the programmer to include (or require) other scripts. footer.php can be When to use: ★Separate DB handling from the logics. ★Separate HTML generation from the logic. ★Dedicated files for methods and functions
HTTP Cookie (Browser cookie) is a small piece of data stored in the web browser ★Useful since the internet (and HTTP) (and PHP) are STATELESS . ★Example use: Your shopping cart in amazon.com. ★Cookies are saved per web page. ★The browser will send the cookie content to the web-page if it contains one.
Using setcookie(): Example: The browser will sent the request :
PHP Sessions: are a way to store information (in variables) to be used across multiple pages. Unlike a cookie, the information is not stored in the browser but in the server! How to: 1.Session_start() , the first thing on the page even if the session is not new!
3.session_unset() will delete all session variables 4.session_destroy() will destroy the session
How is a PHP session created?
hexadecimal numbers such as 3c7foj34c3jj973hjkop2fc937e3443.
identification string.
the name of the unique identifier prefixed by sess_ ie sess_3c7foj34c3jj973hjkop2fc937e3443. How does PHP retrieves session information?
by comparing both values. How do sessions end?
minutes duration.
PHP can use one of two methods for Database handling:
Prepared statements using:
Remember: PHP is not always configured to display errors and warnings PHP stores all error and warning to a log. Depends on the configuration, it also prints annoying messages to the screen such as : Theses are the available error levels: use error_reporting() to control it:
Are store in a file called error.log that can be found in the apache directory
error_reporting
Apache configurations are stored in a file called httpd.conf
You can make changes in the httpd.conf file then restart the server
PHP configurations are stored in a file called PHP.ini