
SLIDE 1
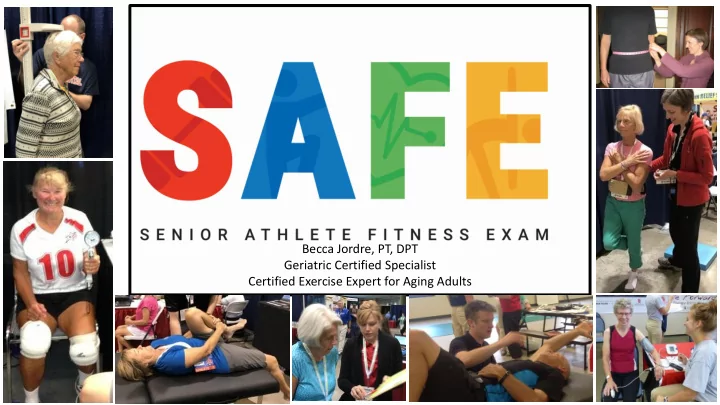
Becca Jordre, PT, DPT Geriatric Certified Specialist Certified Exercise Expert for Aging Adults
Becca Jordre, PT, DPT Geriatric Certified Specialist Certified - - PowerPoint PPT Presentation
Becca Jordre, PT, DPT Geriatric Certified Specialist Certified Exercise Expert for Aging Adults Materials: Health History Form Health & Sport History Health History Follow all of the questions on the form when asking an athletes
Becca Jordre, PT, DPT Geriatric Certified Specialist Certified Exercise Expert for Aging Adults
Materials: ✓ Health History Form
Health History
history.
is not valid for checking ‘yes’.
use a ‘typical week’.
grandkids.
Athlete Instructions
SAFE screen results for research purposes.”
Blood Pressure Heart Rate Pulse Oximetry
Materials: ✓ Electronic blood pressure unit ✓ Pulse oximeter
Blood Pressure
Heart Rate
% O2 Saturation
Athlete Instructions
(pulse oximeter) goes on your right ring finger.
travel, dietary changes and recent (or pending) competition.
(and should not) be used to diagnose hypertension.
measurement.
usual blood pressure and if they are taking any prescribed medication. It may be appropriate to suggest they visit their doctor with the recorded pressure. Blood Pressure
increase with this correction you should remind them of the influence their posture might have on getting good oxygen into their body.
appropriate for exercise. O2 Saturation
You may see some lower resting heart rates due to the athletic population being tested. Heart Rates
Grip Strength Five Times Sit to Stand Test
Materials: ✓ Stopwatch ✓ Standard chair without arms
(approximately 43 cm high)
Grip Strength
two hands for comparison.
Athlete Instructions
elbow bent. You’re going to squeeze this as hard as you can. I’m going to have you try it once and then we will record your next trial.”
their age and gender they should consider more resistance training in their week.
PT for this.
OVERALL strength and should not be interpreted as a reason to work on hand strengthening but, rather, overall strength and resistance training. Grip Strength
GRIP STRENGTH (kg) Age Norms, dominant hand (mean in kg) Men Women Athlete Comm. Athlete Comm. 50-54 53 44 36 28 55-59 52 39 34 25 60-64 49 41 32 24 65-69 46 37 31 22 70-74 44 35 29 22 75-79 41 33 28 20 80-85 39 28 25 20 86+ 33 NA 22 NA
Five Times Sit to Stand Test
stand.
Athlete Instructions
“go” and I’ll stop when you return to sitting after the fifth stand. Please stand up completely each time. You may sit on the edge of your chair but you do have to come to a full stand and sit back down each time.”
they should consider adding more strength training to their weekly routine. They should also know that their score puts them at a higher risk of falling as compared to other senior athletes. They should consider a fall prevention program as well.
PT for this.
good advice for these athletes. Five Times Sit to Stand Test
CHAIR STAND
.Age Athlete Goal 60+ Less than 9 seconds Community Goal Less than 12 seconds
Waist Circumference Waist to Hip Ratio
Materials: ✓ Retractable Tape Measure ✓ Calculator
Waist Circumference
use the umbilicus for reference.
cm, flip the tape to see this in inches.
Hip Circumference
Waist to Hip Ratio
Athlete Instructions
narrow part of your waist.” or “Please point to your belly button and I’ll measure you waist from that reference point.”
feet together.”
35” in women is associated with an increased risk
Waist Circumference
size into consideration when determining how narrow the waist should be. It has been shown to be a valid indicator of cardiovascular and metabolic disease risk. Ratios equal to or higher than 0.85 in women are indicative of risk while ratios equal to or greater than .90 are indicative or risk in men. Waist to Hip Ratio
. Shoulder Flexion Ankle Dorsiflexion (AROM with knee straight) Thomas Test
Materials: ✓ Treatment plinth ✓ Large and small goniometers
Posture
pad under their head and record the need for this under “posture” as “yes”. If AirEx is not needed enter “no”. If the athlete appears to need a pillow but refuses a pillow you can still record “yes”.
Shoulder Flexion
the proximal arm parallel to the midaxillary line of the thorax and the distal arm along the lateral midline of the humerus.
Athlete Instructions
their neck to lie flat suggest, “would you like a pillow?”
Calf Flexibility
lateral midline of the fibula, using the head of the fibular for reference. Align distal arm parallel to the lateral aspect of the fifth metatarsal.
lacking with a negative number.
Thomas Test
chest.
midline of the femur and the proximal arm along the lateral midline of the trunk/pelvis.
Athlete Instructions
chest.”
health handout. Maintaining a more upright posture can assist in keeping your shoulders more flexible. When stretching your shoulder be sure you posture is upright as well. Shoulder Flexion
calf stretch on our flexibility handout. Calf Flexibility
Thomas Test
upper back and neck. This is worsened by maintaining a slouched
Posture
. Single Leg Stance Single Leg Stance (eyes closed) Single Leg Stance (on foam)
Materials: ✓ Gait Belt ✓ Stopwatch x 3 ✓ AirEx Pad
Single Leg Stance
….the athlete shifts their foot, squeezes their legs together or places their foot down to balance.
Single Leg Stance Eyes Closed
eyes open first.
Single Leg Stance on Foam
Athlete Instructions
you may. I’ll stop the time if you touch your foot down, shift your foot position, squeeze your legs together or use your arms to balance. I’ll stop you at 30 seconds if you go that long. Your score will be the best of 3 trials.”
leg longer than 30 seconds are at an increased risk of falling. This does not seem to be a rigorous enough task for senior athletes who, we suspect, challenge their balance more in a given day. Single Leg Stance Eyes Open
Imagine that this is how well you’ll balance in the dark or if you’re not looking forward when you lose your balance. Single Leg Stance Eyes Closed
uneven ground. Single Leg Stance on Foam
the 5 and 15 second thresholds for balance with eyes closed and on foam are significantly more likely to experience a fall. Missing thresholds on Eyes Closed AND Foam
. Usual Gait Speed Fast Gait Speed Gait Speed Reserve
Materials: ✓ Stopwatch x 3 ✓ 20 m walkway
Usual Gait Speed
Fast Gait Speed
Athlete Instructions
mailbox or in a mall. Don’t worry, you’ll get to show me your fast pace after this. “
adults with links to mortality and chronic diseases. Senior athletes seem to walk a bit faster than the general population. Usual Walking Speed
Fast Walking Speed
Gait Speed Reserve
. Contact Becca Jordre, Becca.Jordre@usd.edu prior to conducting SAFE screening for detailed norms and instructions.
Senior Athlete Fitness Exam (SAFE) Goal CARDIOVASCULAR Blood Pressure mmHg <140/<90 mm Hg Oxygen Saturation % ≥95 Heart Rate beats/min 60-100 bpm Waist Circumference “ ♀ ≤ 35” ♂ ≤ 40” Waist to Hip Ratio ♀ ≤ .85 ♂ ≤ .9 STRENGTH (dominant hand) Grip Strength Kg See chart Chair Stand (seconds) sec <9 seconds FLEXIBILITY Shoulder (degrees) R L >168 degrees Ankle (degrees) R L 10-20 degrees <5 indicates fall risk Hip (degrees) R L 0 degrees Posture (needs pillow to achieve neutral supine) Yes No No BALANCE All trials measures in seconds up to 30 seconds. Single leg eyes open
Score is the BEST of 3 trials
30 seconds
indicates increased fall risk in community dwelling older adults
Single leg eyes closed
Score is the BEST of 3 trials
>5 sec
indicates increased fall risk in senior athletes
Single leg on foam eyes open
Score is the BEST of 3 trials
>15 sec
indicates increased fall risk in senior athletes
Usual Gait Speed Meters/second 1.2m/s Fast Gait Speed Meters/second >1.7 m/s Gait Speed Reserve Meters/second >.33 m/s
This resource is intended for senior athletes who exercise regularly and may not be appropriate for all older
Balance Training for Athletes Over 50
Good balance requires the ability to pull together information from your eyes, inner ear, muscles, and joints to keep you upright and in the game. This intricate interaction is what enables you to “catch” yourself when you are suddenly thrown off balance. Paying attention to your balance can up your level of competition by making you steadier on your feet. Senior athletes tend to demand increased levels of balance control on a daily basis as they engage in more challenging activities on and off the field. Improving or maintaining your balance is one
How does balance change with aging?
As we age, our balance changes. Nerve impulses traveling to and from our brain slow down and our sensory organs (eyes and ears) give us less accurate position information. Stiffness in
some of these challenges and decrease our risk of falling.
What can I do?
Improving balance requires strength, flexibility and balance activities. You can establish an individualized balance program with a physical therapist. You can also seek out an evidence- based fall prevention program in your area. Go to https://www.ncoa.org/ and click on Falls Prevention at the bottom of the page to see what is available near you. Regular and consistent balance training can significantly reduce your fall risk. The following exercises are just a few examples of what you can do on your own to start making a
counter where you can easily steady yourself. Choose exercises that fit your abilities. Know your limits and if you feel unstable, stop. You want to feel confident when practicing balance. It is fine to start these exercises while holding on. Try holding onto the wall, a railing, or a counter until you can hold your balance without support. Start with 2-hand support, then 1- hand support, then none. As you work your way through the following exercises, you will see that they comprise 4 stages
designed to increase the level of difficulty. Don’t progress to the next level until you’re steady for at least 10 seconds.
This resource is intended for senior athletes who exercise regularly and may not be appropriate for all older
Bone Health and Fracture Prevention for Athletes Over 50
Adults who exercise regularly are more likely to have healthy bones. The right exercises and good habits can reduce age-related bone loss and risk of fracture. Both muscle strengthening and weight-bearing exercise have proven to be effective at maintaining a healthy skeleton.
How does bone health change with aging?
Bone loss is a common concern with aging. Hormone changes during menopause promote less bone growth in women but men can also be at risk. Vitamin D is a key nutrient in keeping bones healthy, though levels can often decrease with age. People deficient in Vitamin D are at a greater risk of fractures and falls. The trend toward decreased activity levels with advancing age has also been shown to contribute to poor bone health.
What can I do?
Resistance exercises should be done 1-2 times per week for a total of 60 minutes each week.
and jumping have all been shown to improve bone density. Variety is best!
prevent spine fractures. Upright posture helps protect the spine from compression.
coordination all help prevent falls and ultimately fractures.
women 65 & older, (2) men 70 & older, (3) those over 50 who have broken a bone without significant trauma or, (4) those who have lost height of more than 1 ½ inches. Talk to your healthcare provider about the risks of low Vitamin D and visit https://www.nof.org/ to learn more.
POSTURE STRETCH: To open your chest and
promote more upright posture, lie on your back with your knees bent. Rest your arms out to the side in a ‘T’ position. If this is easy, try resting your arms up in a ‘Y’ position. Use pillows to support your arms as
This resource is intended for senior athletes who exercise regularly and may not be appropriate for all older
Cardiovascular Training for Athletes Over 50
Cardiovascular fitness refers to the ability of the heart and lungs to deliver oxygenated blood to the muscles of the body so that they can perform exercise. Maintaining high levels of cardiovascular fitness increases life expectancy and reduces a person’s risk for many chronic diseases and conditions including heart disease, high blood pressure, Type II diabetes,
the game’ longer.
How does cardiovascular fitness change with aging?
With age our heart’s ability to pump blood gradually decreases because it cannot beat as forcefully or rapidly. Our lung function is challenged as our rib cage stiffens, posture changes, and our respiratory muscles weaken. Blood flow to the heart and muscles decreases as we age due to narrowing and stiffening of the arteries and can further decrease cardiovascular fitness. Performing regular cardiovascular exercise maintains or slows the rate of decline in the function of these critical body systems in order to support competitive sport.
What can I do to improve my cardiovascular fitness?
Improving your cardiovascular fitness comes down to four basic factors summarized by the acronym “F.I.T.T.”.
Frequency
day.
Intensity
heart rate with the formula below or use the ‘talk test’. If you can easily carry on a conversation while exercising you’re probably not working hard enough.
Time
week or 20 minutes of vigorous activity 3 days per week. Adding time beyond an hour is fine but likely won’t make a big difference in your overall fitness. If cardio is new to you start with short sessions and build up slowly.
Type
groups and allows for continuous movement.
This resource is intended for senior athletes who exercise regularly and may not be appropriate for all older
Flexibility Training for Athletes Over 50
Flexibility comes from tissue in our joints, tendons, ligaments and muscles. This tissue can allow impressive amounts of tension, compression and torsion without tearing or injury. Good tissue flexibility can help to prevent injuries. Beyond that, it can allow senior athletes to be better able to ‘wind up’ for a pitch, stoop down for a ball, stride past the competition or
How does flexibility change with aging?
As we age, the tissues that allow flexibility become less hydrated and less pliable. Joints, tendons, ligaments and muscles become more stiff. Senior athletes have been shown to maintain better flexibility than the average older adult, though losses still occur with age.
What can I do to be more flexible?
Flexibility is a great example of ‘use it or lose it’. The more you use a motion or move in a certain way, the easier that movement will become. Your body’s ability to adapt to new movements, reach higher, and stretch further is still there. It just takes a bit more attention and time than it used to. A warm-up with dynamic stretching is a useful means of improving flexibility and decreasing the risk of injury before competition and may enhance your
mobility and may make your next workout or competition even better.
WARM UP – Dynamic Stretching LUNGE WALKING
movement bigger.
movements you’ll make during your specific sport.
This resource is intended for senior athletes who exercise regularly and may not be appropriate for all older
Strength Training for Athletes Over 50
Strength is the ability to move or hold against resistance (your body weight, hand weights or resistance bands). Power is a component of strength and is the ability to use strength at higher
farther, and move faster.
How does strength change with aging?
Though strength commonly declines with age, the ability to gain strength with the right training is never lost. Applying sound strength training principles to your training routine will help you toward better performance and help protect your body from injury.
What can I do?
One of the most important aspects of strength training is to make it progressive. That means when the weight you are lifting gets easy enough to lift more than 12 times, you should increase it. If you lift the same weight, month after month you will not get stronger. However, if you cannot lift your chosen weight at least 8 times, or if it causes pain, decrease it or switch
experience temporary muscle soreness after a workout but ongoing pain is a sign of overdoing
This will give you time for other exercises and lessen the stress on your joints.
CHAIR SQUATS
Stand and sit without using your hands. Once you can do more than 12 repetitions try this from a lower surface or practice faster reps.
→ Keep your knees and toes pointed straight ahead or slightly outward. Don’t let them go inward or into a “knock knee” position. → Don’t stoop, keep your posture tall! → If you have pain with this exercise, try it from a higher surface.
Place an elastic loop around your thighs, above your
engaged and your feet pointed forward side step
then switch directions. You should feel this in the side of your upper thigh.
Keeping you in the game!
For more resistance, add an elastic band under your feet, or weights in your hands. Squat until you almost reach your chair, then return to standing with tension on the
CHAIR SQUATS WITH RESISTANCE MONSTER WALKS
To receive an exercise program specifically for you, find a local physical therapist. www.moveforwardpt.com
How much should I lift? Lower intensity → Start with lighter weight that makes you tired at reps. Higher intensity → Work up to heavier weight that causes fatigue at reps. SHOULDER ROTATION
Sit or stand tall. Hold a band between your hands. Keeping your elbows at your side, pull your hands away from each other and return to the start position.
Say No to Pain! Strength training exercises should not be
causes pain, try something different! Ready for a dose of power? Try these exercises with a little speed.
Perform 3-4 repetitions quickly, then another 3-4 times at regular speed, alternating and continuing more sets, as you are able. Be careful – don’t let speed destroy your form!
Static Stretching
Static stretching will improve your flexibility, but it’s best after exercise or following a good warm up when your tissues have plenty of blood flow and are less likely to be injured. The American College of Sports Medicine (ACSM) recommends at least 10 minutes of stretching, twice weekly for older adults. Consider some of the following exercises as a way to improve your flexibility. Remember stretching should not hurt. You should feel tension, not pain.
STANDING CALF STRETCH
Stand at a wall and place one foot behind you. With your knee straight and your toes pointed at the wall feel the stretch in the back of your calf. Hold 30-60 seconds at least twice on each side. To receive an exercise program specifically for you, find a local physical therapist. www.moveforwardpt.com
Keeping you in the game!
STANDING QUAD STRETCH
Stand behind a chair for balance. Place one foot behind you on a sturdy chair or other surface. Stand tall and feel the stretch in the front of your thigh. For a greater stretch
Hold 30-60 seconds at least twice on each side.
FIND YOUR TARGET HEART RATE
Age predicted max heart rate: 208 – (0.7 x Age) Example for 60 yo: (208 – (0.7 x 60) = 166 beats/min) Target Heart Rate (HR): Resting HR + ((Max HR–Resting HR) x % intensity) Example for 60 yo: 70 + ((166-70) x.60) = 127.6 beats/min) 70 + ((166-70) x. 80) = 146.8 beats/min A 60 year old person with a resting heart rate of 70 would train at a HR between 128-147 bpm to be at 60-80% intensity. To receive an exercise program specifically for you, find a local physical therapist. www.moveforwardpt.com
Keeping you in the game!
Warm Up and Cool Down
Regardless of how you structure your exercise, it is important to include a 10-15 minute warm-up and cool-down in every
your exercising muscles by easing in slowly. Don’t push yourself until you’ve started to break a sweat. When your workout is
zone.
Boost your performance with interval training
High intensity interval training (HIIT) is a fun way to mix up your training sessions. Rather than holding the same pace for your cardio exercise try varying your intensity with intervals. After your warm up, ramp up to a sprint
the same amount of time. Repeat this for approximately 15 minutes and you’ll enjoy similar, or even superior, cardiovascular benefits to a longer workout. As a bonus, you’ll train your body to move faster for sport competition.
On Heart Medication?
Some heart medications are designed to keep your heart at a steady rhythm, so your heart rate won’t change as much with exercise. In this case, try the talk test. When you’re at your target heart rate you should be ‘out of breath’ but still able to speak.
Keeping you in the game!
BACK STRENGTH TRAINING (I,T,Y) WEIGHT LIFTING: Lifting weights will help to build
muscle AND bone. Lifting a weight over your head can help to strengthen the bones in your arms AND your spine. Be sure to keep your posture upright. Slowly work up to weights that make you tired after 10-15 repetitions. Once your can do 15, increase the weight.
Do not perform this exercise if you already have bone loss (osteoporosis or osteopenia).
To receive an exercise program specifically for you, find a local physical therapist. www.moveforwardpt.com For more ideas, visit Stepping Out Strong; https://americanbonehealth.org
Keeping you in the game!
Lie on your stomach with a towel roll under your forehead for
strain on your low back. For each of the above positions (I,T,Y) raise your arms off the ground while squeezing your shoulder blades
do more than 15, add small hand weights. Palms Ups Thumbs Up Palms Down I T Y If you have
are more guidelines for strength training
start an exercise program without first consulting your healthcare provider and a physical therapist.
To receive an exercise program specifically for you, find a local physical therapist. www.moveforwardpt.com
www.cdc.gov/steadi
Need a challenge? Once you are comfortable performing the above exercises, try each one with your eyes closed.
Keeping you in the game!
Always practice balance in a safe environment. Stand at a counter or in a corner so you have an easy way to stabilize yourself. If you don’t feel safe, stop. It may be better for you to practice with a professional.
Static Balance Exercises Dynamic Balance Ideas:
1. Try the static balance activities while performing a movement related to your sport such as head turns, arm swings, or leg kicks. 2. Try heel-toe tightrope walking forward and backwards. 3. Finally, try these exercises while standing on a pillow or another unstable surface such as grass or sand.
Dynamic Balance
An athlete practicing head turns in tandem stance. Dynamic balance, or balance maintained while moving, is another key component to balance training. Do not start working on dynamic balance until you are no longer challenged by the static balance exercises shown on the left.
www.cdc.gov/steadi