overview in this tutorial we will learn how to log into
play

Overview In this tutorial, we will learn how to log into the EE - PDF document

UC Riverside CS/EE 147 Bender Tutorial Overview In this tutorial, we will learn how to log into the EE server, Bender. Then, we will write and run a basic CUDA application on it. In short, we will do the following: 1. Access a terminal 2. Log


  1. UC Riverside CS/EE 147 Bender Tutorial ♦ Overview In this tutorial, we will learn how to log into the EE server, Bender. Then, we will write and run a basic CUDA application on it. In short, we will do the following: 1. Access a terminal 2. Log into Bender 3. Write a simple CUDA code 4. Compile and run the CUDA code ♦ Access a terminal In order to log into Bender, you will need to access a terminal or SSH client first. You will then use it to connect to Bender via a secure shell protocol (SSH). For Windows, there are several free applications you could use to this end, such as PuTTY , MobaXTerm and Windows Subsystem for Linux (WSL) . For Unix-based operating systems, there is already a pre-installed Terminal application. Therefore, you may skip this step if you are using Linux and open the Terminal for the next step. In this tutorial, we will use MobaXTerm due to its ease of use and fast preparation time. 1. Go to this link: https://mobaxterm.mobatek.net/download-home-edition.html 2. You may choose either the portable edition or the installer edition. (The portable edition requires no installation and can be run immediately.)
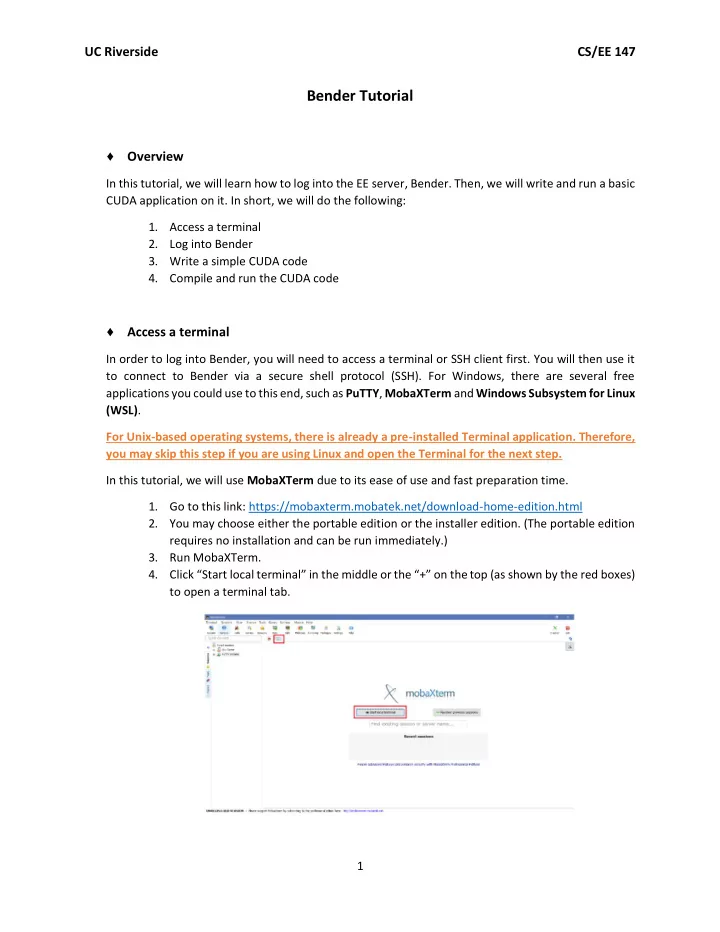
 3. Run MobaXTerm. 4. Click “Start local terminal” in the middle or the “+” on the top (as shown by the red boxes) to open a terminal tab. 1

  2. UC Riverside CS/EE 147 ♦ Login into Bender After opening the terminal, you can now SSH into the Bender machine. 1. Type the following command into the terminal: ssh <ENGR UNAME>@bender.engr.ucr.edu 2. It may ask you if it should remember the server’s key. You may choose Yes or No. (If you say No, you will be asked again in the next login!) 3. You will be prompted to input your password. If you need an ENGR account, visit: https://www.engr.ucr.edu/secured/systems/login.php You should first create an ENGR account. After creating the account, the system will give you a username and password, which you can use to access the server. There is a message for CS students to visit CS website, please ignore this message. If you had problem in any stage, please contact systems@engr.ucr.edu and ask them that you need account for EECS217. ♦ Write a simple CUDA code Now we can use the resources on Bender to write and run a simple CUDA program! You may use Bash commands to roam around, create folders and files, etc. Listed below are some of the most basic and useful commands you will ever utilize in Bash. Name Description Example 1 Example 2 ls List all content in current directory ls -l ls Test/ mkdir Create directory mkdir Test -- cd Change directory cd Test cd ~ touch Create file/Modify its timestamp touch newfile -- mv Move to another directory/Rename file mv newfile Test/ mv newfile samefile cp Copy file/directory cp newfile Test/new2 cp -r Test/ Test2/ rm Remove file/directory rm -f newfile rm -r Test/ 1. Make a new directory: mkdir GPUTest 2. Navigate into the new directory: cd GPUTest 3. Open a new CUDA file in any text editor. We will use Vim here: vim test.cu 4. Press <i> to enable text editing in insert mode, i.e. you will not overwrite existing text by typing over it. The word “INSERT” will be shown at the bottom of the screen 5. We will now write a simple CUDA code: Adding a constant offset (3 here) to a random array of 32 integers. 2

  3. UC Riverside CS/EE 147 #include <cstdio> #include <cstdlib> #define UPPER_LIMIT 100 #define OFFSET 3 #define LENGTH 32 // GPU kernel: Add offset __global__ void addOffset(int* dev_array, int length) { int tid = threadIdx.x + blockIdx.x*blockDim.x; if(tid < length) { dev_array[tid] += OFFSET; } } int main() { // Host and Device Arrays int arr_h[LENGTH], res_h[LENGTH]; int* arr_d; cudaMalloc((void**) &arr_d, sizeof(int) * LENGTH); // Assigning random values to the host array for(int i=0; i<LENGTH; i++) arr_h[i] = rand() % UPPER_LIMIT; cudaMemcpy(arr_d, arr_h, sizeof(int) * LENGTH, cudaMemcpyHostToDevice); addOffset <<<1, 1024>>> (arr_d, LENGTH); cudaMemcpy(res_h, arr_d, sizeof(int) * LENGTH, cudaMemcpyDeviceToHost); // Verify the results using CPU for(int i=0; i<LENGTH; i++) { register int expected = arr_h[i] + OFFSET; printf("%d / %d\n", res_h[i], expected); if(res_h[i] != expected) { printf("FAILURE at i=%d", i); break; } } // Freeing up the GPU memory cudaFree(arr_d); return 0; } 3

  4. UC Riverside CS/EE 147 As you can see, there are the following segments in the main code: ▪ Defining the arrays on the host and the device (GPU) ▪ Filling up the host array with random values ▪ Copying from the data from the host to the device ▪ Launching the kernel on the GPU, which works on the data ▪ Copying the new data back to the host ▪ Verifying the values from the device on the host ▪ Freeing up all the dynamically allocated memory 6. Press <ESC> to exit editing mode. The “INSERT” at the bottom vanishes. 7. Type “:wq” and press to save and exit Vim. Your code is now ready to be compiled and run. ♦ Compile and run the CUDA code It is usually recommended to use a Makefile to compile a program. However, in this case, we will directly use Nvidia’s CUDA compiler (NVCC). 1. Run the compiler for your code: nvcc test.cu a. This will produce an executable by the name “a.out” . b. To change the executable’s name, use the following -o flag: nvcc test.cu -o ANY_NAME 2. Run the executable: ./a.out This will run the application and print the results. 4

Download Presentation
Download Policy: The content available on the website is offered to you 'AS IS' for your personal information and use only. It cannot be commercialized, licensed, or distributed on other websites without prior consent from the author. To download a presentation, simply click this link. If you encounter any difficulties during the download process, it's possible that the publisher has removed the file from their server.

Recommend


More recommend